January 2014 archive

Adding Light with Flash – Tech Thursday

Pet TTL flash portrait indoors - ©TimeLine Media

With the advances in digital photography, it is easier to explain how the camera calculates an exposure. Additionally, it is easy to visualize that a larger aperture opening will let more light into the frame, or a faster shutter speed will let in less light. Once you memorize that lower ISO values are less sensitive to light than higher ones, you have the basics of the “Exposure Triangle” mastered.

Flash Portrait

TTL flash portrait indoors - ©TimeLine Media
TTL flash portrait indoors – ©TimeLine Media

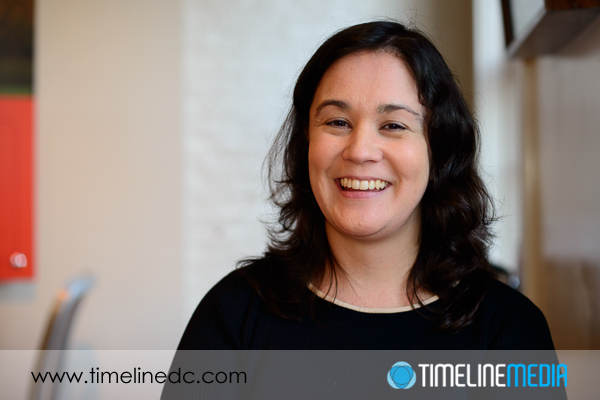
Getting photographers to start using flash is a difficult step. They start to freeze up. Almost as though they just put the camera back in Program mode again. They let the camera make all the decisions like they did when they first started taking photos. Just like the settings for Aperture, Shutter Speed, and ISO, working with flash can be straightforward. However, it does add another layer to the considerations when making images. I hope that through some posts, I can get you to experiment more with your flash. Hopefully you will learn how to control it to improve your photography. It will set you apart from “natural light” photographers that never add flash. There are many that choose to do this for artistic reasons, but do not be afraid to add this to your toolkit. You will be able to make images that are IMPOSSIBLE without the flash. If you have aspirations of photographing weddings, or events, you will need to use flash at some point in order to make images that grab attention.
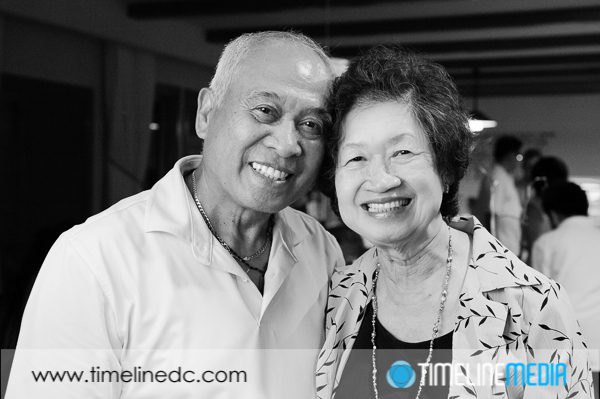
Pet Portrait

Pet TTL flash portrait indoors - ©TimeLine Media
Pet TTL flash portrait indoors – ©TimeLine Media

In my previous post on flash, the settings on the speedlight were in the default TTL (Through-The-Lens) mode. This is the equivalent of the Program or P mode. The camera and flash work together to calculate how much light to add to your scene to get a good exposure. The computing power built into both ensure that you will get good exposures – and you can still control some of the aspects of the image. You can use TTL mode in Aperture priority so that you can set the depth of field in your image to keep that control over your composition. This is the first step – and likely you will get good results with the TTL settings on your camera. I’ll post how you can take control of this just as you do with your other settings in your camera to make even better images.

TTL flash portrait indoors - ©TimeLine Media
TTL flash portrait indoors – ©TimeLine Media

TimeLine Mediawww.timelinedc.com
703-864-8208

Printing Image on Inkjet Printers Part 2

HDR Lincoln Memorial - ©TimeLine Media

Continuing on with my first printing project from my own inkjet printer, I first wanted to ensure that only the black ink was used in the next print. I clicked all the boxes in the dialog box to only use the black ink, but this had an unintended consequence. In choosing to only use the black ink, the printer dialog does not let you specify the type of paper. My thought was that the printer can handle this change and make the appropriate changes to get a good print. That was not the case! Here is the print:

Second inkjet print from black and white HDR image - ©TimeLine Media
Second inkjet print from black and white HDR image – ©TimeLine Media

Printing Setup

For the third attempt, I changed the paper type in the printing dialog box to match the type of paper I was using. In this case, I was using a “premium glossy” paper from Kodak. There was no specific settings or profiles for this particular paper, although I have seen instances where more professional papers and printers will let you set each. This made the biggest differences in the printing quality.

Third inkjet print from black and white HDR image - ©TimeLine Media
Third inkjet print from black and white HDR image – ©TimeLine Media

The banding is now gone, and the image takes on a picture-like quality. The first two attempts not only had banding, but you could see many of the components dots that make up the image much like duotone or newspaper printing. This third attempt, this is almost disappears completely, and gradients between the light and dark parts of the sky transition nicely between each. When you hold the photo at arm’s length, it looks almost like an optical print. I am happy with the results, but I think that I am limited with how far I can take this. If I do make any more prints, I will stick to small ones – probably 5″x7″ or smaller.

HDR Lincoln Memorial - ©TimeLine Media
HDR Lincoln Memorial – ©TimeLine Media

TimeLine Media – www.timelinedc.com
7
03-864-8208

Printing Image on Inkjet Printers Part 1

Lincoln Memorial - monochrome HDR - ©TimeLine Media

Because of the nature of event photography, and the way I sell my photos, I do not do any of the printing of these images using my own inkjet printers. With the amount of images that I need to print, and the number of different places that I need to send these, I outsource this task to professional photo labs. They have the expertise in doing this work, and they have the best in optical printing machines to create the best possible prints for my clients.

So, if you have come across this post because you have purchased prints from TimeLine Media before, please know that no changes will be made to how I create those photos. If I print using inkjets, it will only be for personal work for the near future. In this case it was the first experiment in printing on inkjets using this HDR photo from a recent walk in D.C.

Original File

Lincoln Memorial - monochrome HDR - ©TimeLine Media
Lincoln Memorial – monochrome HDR – ©TimeLine Media

This is an HDR image that was processed in HDR Efex Pro 2. It was subsequently converted to black and white in Silver Efex Pro 2. At this time, I wanted to try a monochrome image first. I thought it would be easier to see and fix any problems compared to adding color into the mix. Here is my first attempt with the default settings from my printer. Undoubtedly it is not pretty! To keep the changes to the images minimal, I kept the 4×6 aspect ratio. It was then printed onto 5×7 glossy paper:

Inkjet Print

First inkjet print from black and white HDR image - ©TimeLine Media
First inkjet print from black and white HDR image – ©TimeLine Media

Truth be told, I just hit print immediately, and did not even see a dialog box for printing settings. There is some serious banding problems in this attempt. In looking at the settings as the print was going through, the printer was using some of the color inks. It was not just using the black ink to create the print. For my second attempt, I made a few more changes in the dialog boxes prior to printing the next try.

TimeLine Media www.timelinedc.com
703-864-8208

1 3 4 5 6 7 10