Archive of ‘Portrait’ category

Youth Football Portraits

©TimeLIne Media - football player portrait

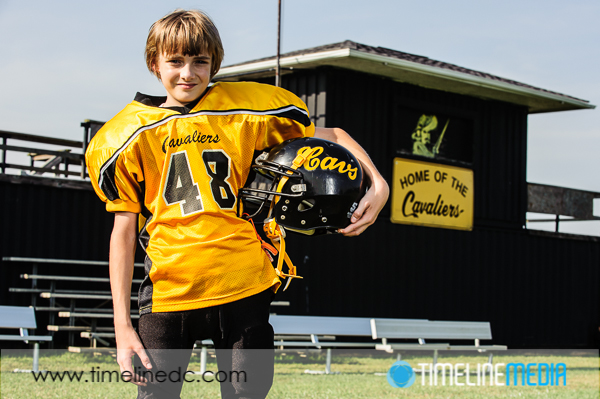
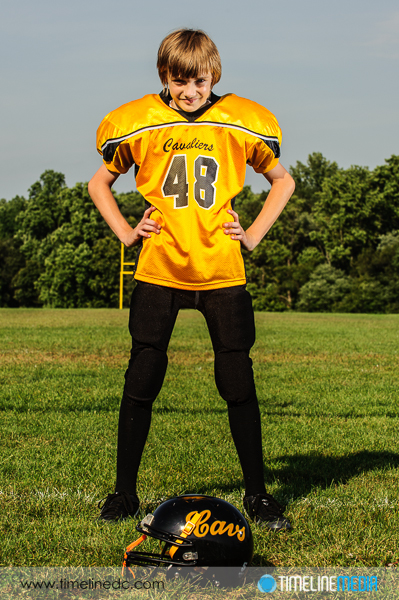
Recently, I had someone that was on my email list request that I make some portraits for her brother that plays youth football. It would be perfect for my project for making more sports portraits. I have plenty of action shots from players during games, or dancers during competition, but I want to expand my portfolio of setup portraits where I control more of the lighting, posing, and composition. It is no surprise that trying to get a clean image while the game is going on is difficult.

Football Field Set

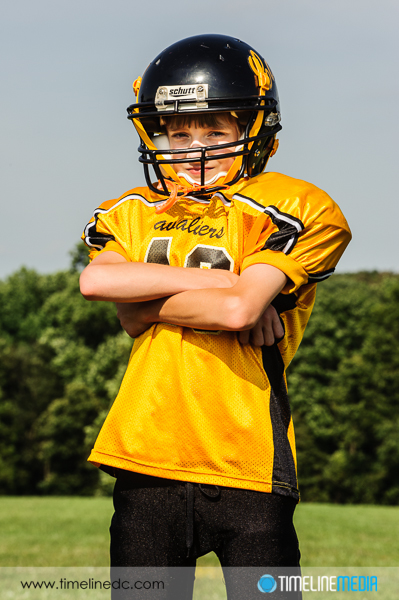
Most sports photographers resort to heavy cropping to eliminate distracting backgrounds or other elements that take away from their main subject. When I photograph ballroom dancers, I use additional flashes in order to make the colors better, and to make the settings on my camera little less extreme, but the lighting has to cover a large area. It is not setup specifically for one spot, or subject, so it is much more flat overall. With “D”, the football player, we had an open, empty football field to use. It was a very bright, sunny afternoon, so I had to use an ND filter to knock down some of the light going into the camera to keep a shallower depth of field. Adding some flash to fill in helped to bring him out from the darker background making him stand out.

©TimeLIne Media - football player portrait
©TimeLIne Media – football player portrait

With all the light out there, it would seem to be easy to make this portrait, but bright sun makes for dark shadows. In order to bring some detail back into his face from under his helmet, I needed a flash to fill that in. A flash in a medium-size softbox placed just off camera left brought in enough light to fill in his face, and highlight more of the top of his uniform.

Background Setting

©TimeLIne Media - football player portrait
©TimeLIne Media – football player portrait

We did a few other poses, but this was another keeper for me. The afternoon sun was to camera left, so I used the flash through a softbox on the right to fill in his left side which was much darker. Had the aperture stopped down more than usual for a portrait since I wanted to keep their home field sign in focus. I am always looking for more portrait subjects, and like having the element of sports for props and settings so contact me if you would like to have some made!

©TimeLIne Media - football player portrait
©TimeLIne Media – football player portrait

TimeLine Media – www.timelinedc.com
703-864-8208

Body Fit DC

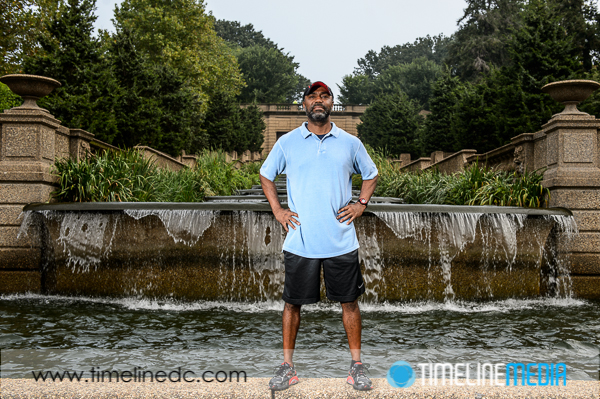
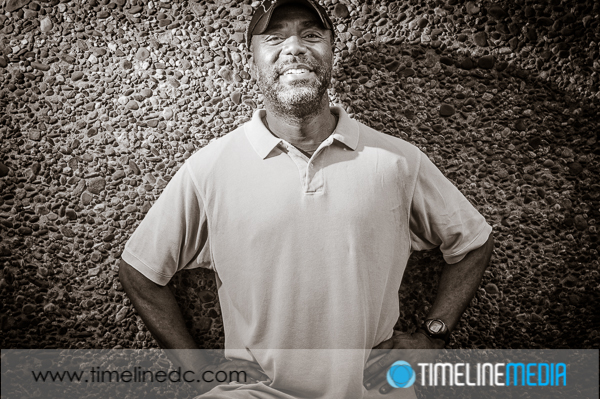
©TimeLine Media - Orlando of Body Fit DC

Body Fit DC is the creation of Orlando, a certified personal fitness trainer. He is committed to encouraging others to make fitness a part of their life. Especially as we get older, it is important to make exercise a regular part of our routine. It helps to avoid health problems associated with lowered mobility and gained weight. If you have one conversation with Orlando, you can feel the drive he has to help people. He has an especially positive message to help the people he trains, and he will be supportive of your fitness goals.

Washington, DC

©TimeLine Media - Orlando of Body Fit DC
©TimeLine Media – Orlando of Body Fit DC

In my own push to expand my athletic portraiture portfolio, I took some photos of Orlando. At this time we met at the beautiful Meridian Hill Park in the heart of Washington, DC. Following our trip to Jones Point where the first boundary for DC was placed, Meridian Hill is on a line directly north of that point. The original marker on this hill was made directly from the White House which was made from Jones Point – clearly where the name “Meridian Hill” originated.

The park has a large flat field at the top and descends with cascading fountains in the center. On either side of the large fountain are steps and stairs of differing lengths which gives runners a changing elevation to challenge them on their runs. At this time, this is a great spot for getting outside to do some exercise – Orlando picked a perfect spot. At the bottom of the fountain, he stood on the last ledge which made for a nice background for him to show off his boot camp venue. Visit his web page and contact him to get more information on his on-going programs.

©TimeLine Media - Orlando of Body Fit DC
©TimeLine Media – Orlando of Body Fit DC

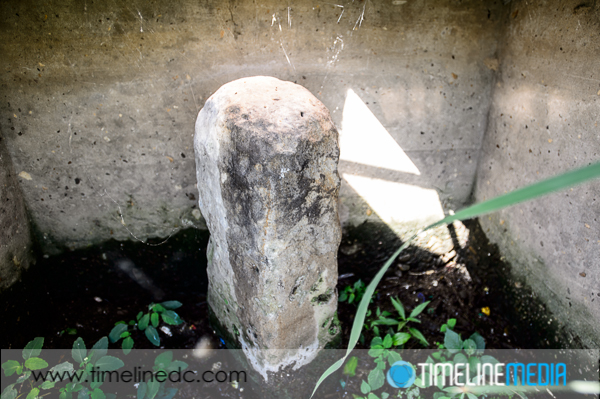
Just a reminder there is a contest going on from this post. The prize is a $50 coupon from the proofing website to the best guess as to how the below photo was made. If you have any other need for environmental portraits, or updated headshots, please contact me! My email address is: rassi @ timelinedc.com

©TimeLine Media - DC South Boundary Stone
©TimeLine Media – DC South Boundary Stone

TimeLine Media – www.timelinedc.com
703-864-8208
Clarity – Tech Thursday

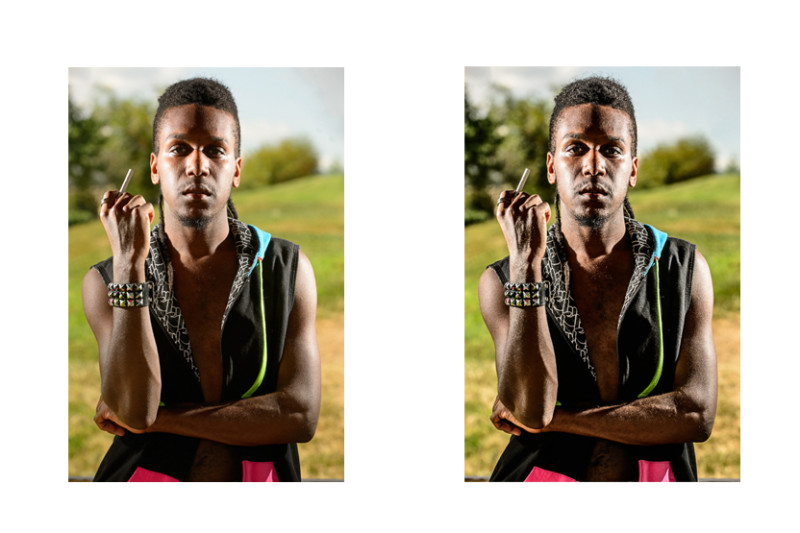
©TimeLine Media - enhancing details in hair with the Clarity slider

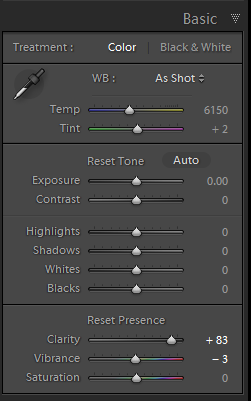
My photographic style is constantly evolving when it comes to my portrait and personal work. Since I have started shooting professionally, my style changed quite a few times. Whether this is normal for a photographer, I do not know! It seems like my style changes as software updates brings functionality to RAW processors. With each new feature,  I try what new changes I can make to photos, and implement them to more shoots. Also, my editing eye gets fatigued in putting the same effects to photos which is probably why I do not have many Lightroom Development presets any longer. My favorite slider that I am using more and more is the Clarity slider under “Presence” in the Develop module.

Adobe Lightroom - Develop Module Basic panel
Adobe Lightroom – Develop Module Basic panel

Adobe Lightroom

Clarity is a tool that has long been a part of Lightroom, but I have not used it much until version 4. It is a mid-tone adjustment which when applied to portraits, can give images a crisp edge that makes it look sharper overall when the value of the slider is increased. There is a contrast adjustment component to this slider that really focuses on edges as opposed to the entire frame making it less harsh than the Contrast slider when pushed to the limit. This works especially well with male portrait subjects or landscapes. On the other end of the scale, pushing the Clarity slider down will decrease edge sharpness and will soften edges. This was can easily be overdone resulting in a vaseline-on-the-lens look from vintage television programs.

©TimeLine Media - Clarity slider example
©TimeLine Media – Clarity slider example

For the image above, the image on the left is with the default settings out of the camera. The image on the left is the same image with the Clarity slider adjusted to +83. It gives a grittier more edgy contrast that brings out more details in the portrait subject.

Pet Portraits

©TimeLine Media - enhancing details in hair with the Clarity slider
©TimeLine Media – enhancing details in hair with the Clarity slider

Just like every other slider that you can use on an image, it can be overdone. Just move the slider until you can see the Clarity effect start to show in hair, or around the eyes, then stop moving. For the most part, you can push it all the way to 100 without it having it destroy the photo, but it may become a muddy mess with dark areas that are crushed to nothing, and having it creep to areas that you do not necessarily want too dark. If printing the images, I use the default output print sharpening settings after adjusting sharpness with the Clarity slider. I have been pleased with the results so far!

©TimeLine Media - Portrait
©TimeLine Media – Portrait

TimeLine Media – www.timelinedc.com
703-864-8208
1 16 17 18 19 20 23