Posts Tagged ‘D4’

Outrunning the Curtain – Tech Thursday

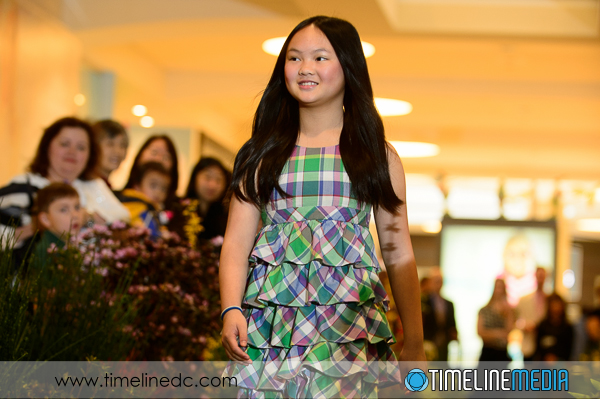
Fashion Show with off camera flash - ©TimeLine Media

Testing

Flash photography is different, not difficult! Natural, or available is easier in the way that Microsoft Word is an easy as a text editor. With available light, what you see if what you get. There is no guessing as to the effect that the light will have on your subject in the photo, because you can see it even without looking through your camera. I am trying to step away, and attempting to use flash in every situation that I can. It is a challenge, but I think the results can be much better, and the files much easier to work with in post. This post is about the first lesson is using a flash off the camera. This can be a speedlight that you attach to your camera with a cord, or wirelessly – it does not matter which for this article.

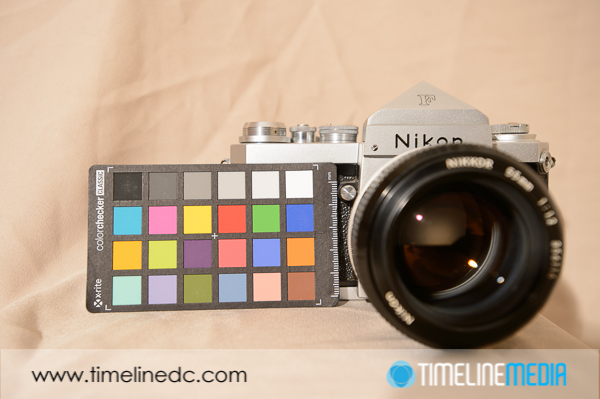
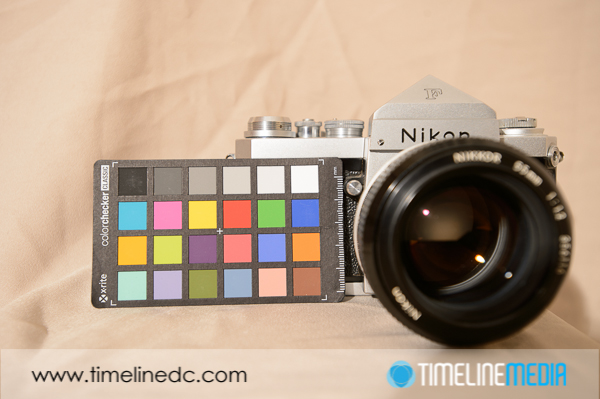
Every camera has a set flash sync speed. This is a fastest shutter speed at which the flash can illuminate the full frame of the camera with light. Any shutter speed slower than that will also light the frame fully, but any speed faster will start to darken the frame. As an example, here are some photos where I attempted to keep the same exposure, only changing the shutter speed. The settings are in their captions:

1/60 sec, f/6.3 - ©TimeLine Media
1/60 sec, f/6.3 – ©TimeLine Media
1/125th sec, f/5 - ©TimeLine Media
1/125th sec, f/5 – ©TimeLine Media
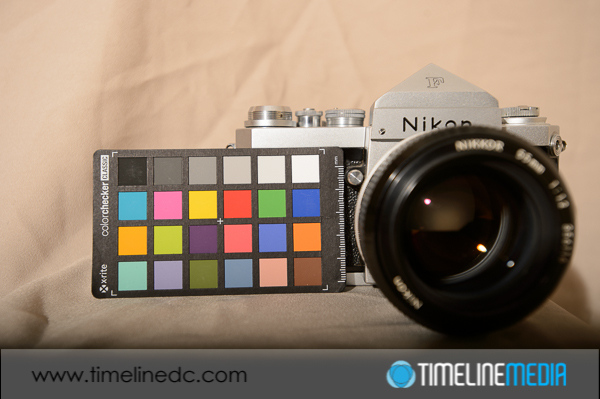
1/200th sec, f/5 - ©TimeLine Media
1/200th sec, f/5 – ©TimeLine Media

Shutter Speed and Flash

All of the above photos have shutter speeds slower than the sync speed of 1/250th of a second. This sync speed will vary with your camera, so consult your manual to find it for your particular model. Now the next photo is at 1/320th of a second, and the frame starts to darken from the bottom.

1/320th sec, f/5 - ©TimeLine Media
1/320th sec, f/5 – ©TimeLine Media

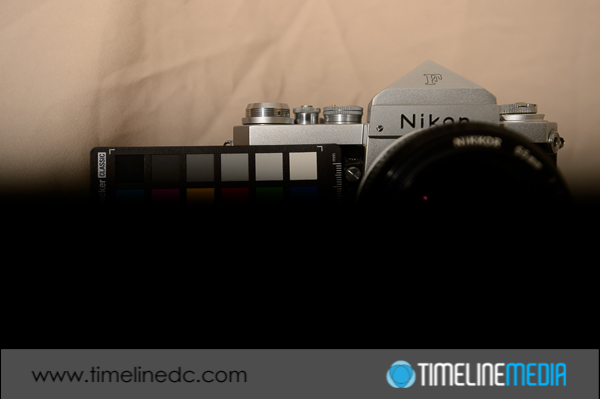
This darkening is from the curtain that covers sensor. Its movement determines the shutter speed settings on your camera. It moves faster across the sensor as you increase the shutter speed. When you make an exposure with a shutter speed that is too fast, you start to catch the curtain in the frame when the shutter speed is too fast.

1/500th sec, f/5 - ©TimeLine Media
1/500th sec, f/5 – ©TimeLine Media
1/800th sec, f/5 - ©TimeLine Media
1/800th sec, f/5 – ©TimeLine Media

So if you are just starting to experiment with off camera flash, make this your first options to set on your camera. Conversely, check this setting if you are on a shoot and seeing something strange on the image. I’ll bet it is the curtain. This will save you a lot of frustration especially in bright settings! Give it a try with your camera to find your flash shutter sync speed.

Fashion Show with off camera flash - ©TimeLine Media
Fashion Show with off camera flash – ©TimeLine Media 

TimeLine Media – www.timelinedc.com
703-864-8208

iPhone vs. DSLR in Early Morning – Tech Thursday

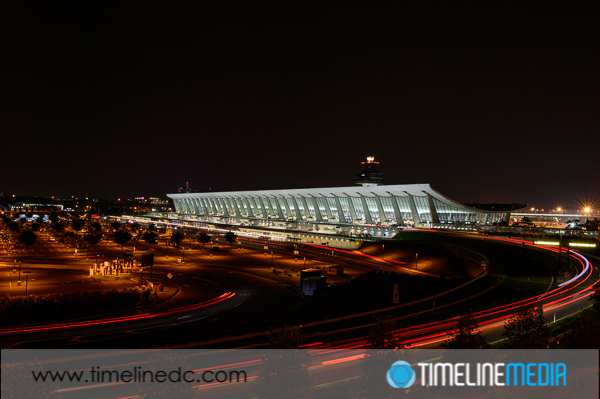
©TimeLine Media - Dulles Airport Main Terminal - Nikon D4

Earlier this week, I needed to bring my uncle to the airport for an early morning departure. With a 6:30 departure time, it was a VERY early morning for us. With the days being so long in the summer, I have not had the inspiration to get up before the sun. This is the best time to get landscape or architecture photos. Unfortunately this time was a little TOO early since the sky was still black as night, but I took advantage of the beautiful Main Terminal at Dulles International Airport to make photos of another landmark of the Washington, DC area. I tried making images with both the iPhone and my DSLR for comparison.

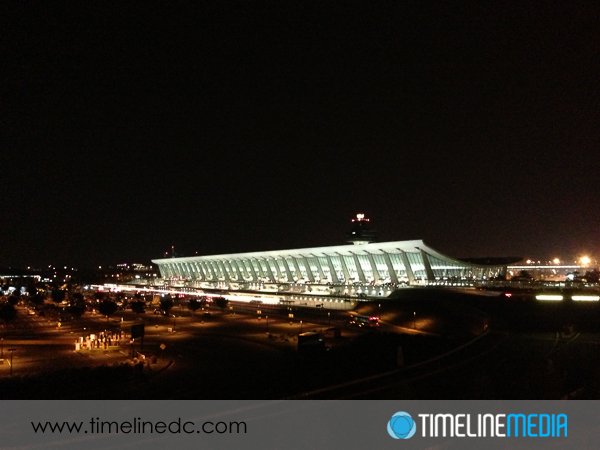
My father, an architect that had a great appreciation for clean, contemporary design, would always start to lecture as we approached this building. Designed by Finnish-American architect Eero Saarinen, the main terminal at Dulles is a panoramic structure of concrete and glass that echoes the air supporting the planes coming into and out of the airport. My dad would talk about the open concept interior, the rain management system that you do not even notice in the center of the airport, and the overall design that still looks modern even though it was designed in the 1950’s. The airport was just starting to wake up. There was minimal activity and traffic going into the terminal at 5AM in the morning. I found a nice spot in the Daily Garage closest to the main terminal. Walking to the top level to provides a nice clear view of the main terminal. Here is are the completely images from both uncropped, out of the camera:

Comparing iPhone Imaging

©TimeLine Media - Dulles Airport Main Terminal - iPhone
©TimeLine Media – Dulles Airport Main Terminal – iPhone
©TimeLine Media - Dulles Airport Main Terminal - Nikon D4
©TimeLine Media – Dulles Airport Main Terminal – Nikon D4


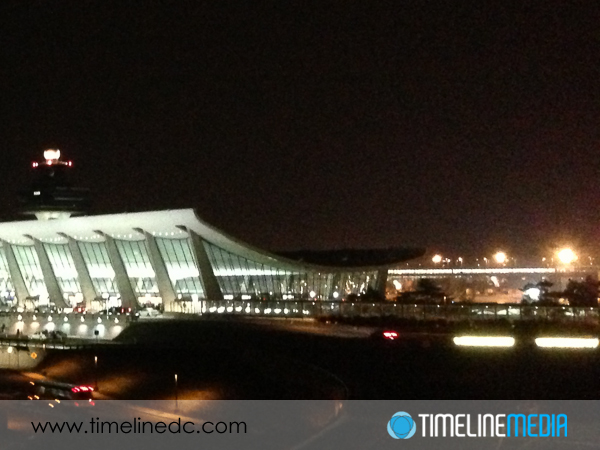
I was a little surprised at the results. The iPhone did remarkably well considering what I was asking it to do. I had put the exposure measurement cursor right in the middle of the terminal. The default image would have made the terminal overexposed without any detail. In this case the camera compensates for the large portion of the frame that was dark, or completely black. This image would be sufficient for using on Instagram or Facebook if you are just establishing where you were travelling.

Comparing DSLR Imaging

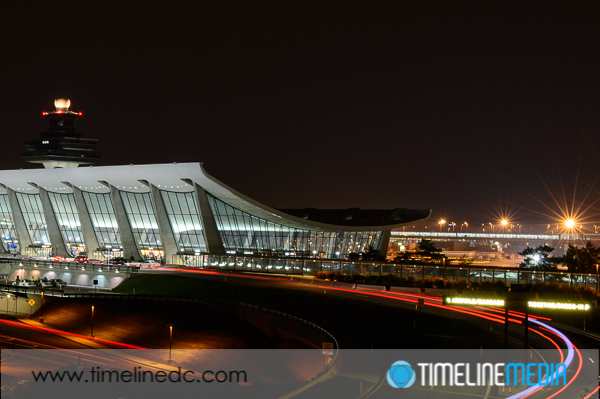
When I setup the DSLR, I put the camera right on the edge of the wall of the garage to stabilize the camera, and manually set the exposure. I wanted it to be similar – with the terminal not over exposed. With the controls that are available on the DSLR, I set the aperture down to f/11 so that the exposure time is increased to 5 seconds. This makes for some really cool light trails from the cars coming into the terminal! This is really the main difference between these two photos when zoomed out to their default views.

As expected, though, the iPhone image really loses when you zoom in to see any detail in the photo. These conditions are really pushing the limits of the tiny sensor in this camera which is best when used in bright conditions. When you zoom into the DSLR photo, you can also see some nice star-like flares in the lights on the tarmac behind the terminal. These are a result of the aperture of f/11 which is a much smaller opening than f/2.4 that the iPhone was using to try to get as much light into the camera. This example clearly shows a few of the features that a camera with full controls can get for you compared to point-and-shoot or smartphone cameras.

©TimeLine Media - Dulles Airport Main Terminal - iPhone
©TimeLine Media – Dulles Airport Main Terminal – iPhone
©TimeLine Media - Dulles Airport Main Terminal - Nikon D4
©TimeLine Media – Dulles Airport Main Terminal – Nikon D4

TimeLine Media – www.timelinedc.com
703-864-8208
Cameras – Tech Thursday

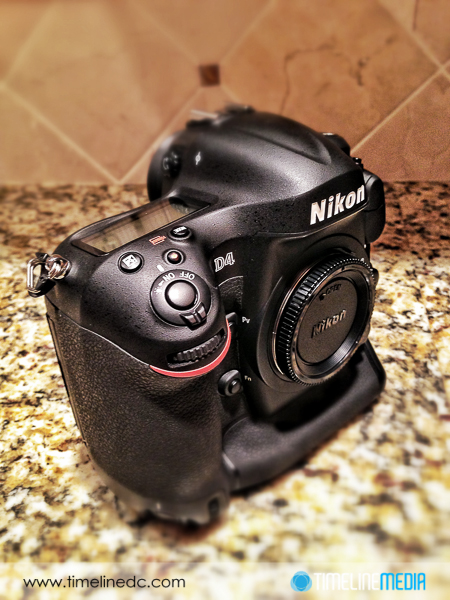
Nikon D4-TimeLine Media-www.timelinedc.com

Equipment Matters

One of the photography mantras that is repeated on blogs and forums has to be “It doesn’t matter the equipment, only the operators behind the cameras that matters in making photographs.” There are so many examples of this from the collection of iPhone photographs, to Instagram superstars that create wonderful imagery with humble, accessible gear. With digital photography you can experiment with angles, lighting, time exposures, almost any variable you can imaging using the controls built into DSLRs or the slides built into smartphone apps. This has helped me to understand the functions of my camera and allowed me to quickly grow as a photographer much faster than I could have with film. This can take you only so far as a hobbyist or advanced amateur.

Nikon D4-TimeLine Media-www.timelinedc.com

Professional Consideration

As a professional, my growth was also tied to the equipment that I was carrying in my bag. My first digital camera was a Nikon Coolpix 5700 that exposed me to RAW file capture, and some exposure control. My first DSLR was a Nikon D100 which I used with old camera lenses my father had from the 1980’s. They still worked on the D100, and I learned about full manual control using these old optics. I secured my first photographic jobs with this body because of my skills in composition, technique, and post processing.

But I soon ran into a technology wall. The Nikon D200 was released, and there had been a jump in quality. Whereas I could be interviewed after showing my portfolio, when my equipment list was discussed, I was turned away. It is not just that your images must look good, but your equipment must look the part as well.

That sounds controversial, but I see its merit especially in a time when everyone has a DSLR and standing out from the crowd is essential for your business. The upgrade to the Nikon D3 really took my images to the top of the heap. There was no comparison between this camera and any previous camera body. The images looked 3-dimensional to me both on the back of the camera, and in the prints. And the construction of the body of the camera with a built-in grip really looked the part. Knowing what to do with the camera in your hand is important, but in today’s marketplace, the kind of equipment you carry with you definitely plays a part in getting you noticed, and in the door.

TimeLine Media – www.timelinedc.com
703-864-8208