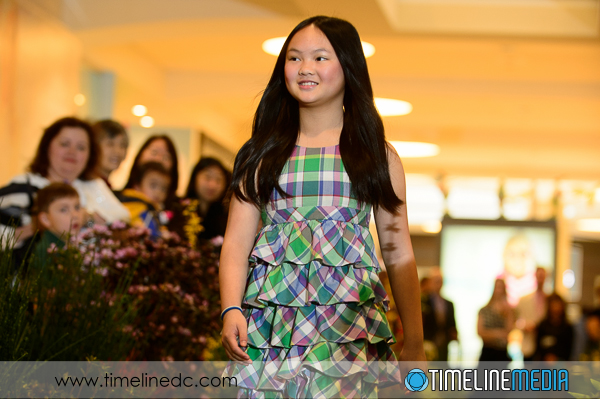
Posts Tagged ‘Nikon’

Light Modifier Reflections – Tech Thursday

Musician Portraits

I have been doing a lot of great portraits lately! Luckily for me, the people that have been in front of the lens have been great subjects. It seems like it would be easier to have a person giving you all the attention for the photograph. Compared to event or dance photos where it is more up to me to catch a great image. Making portraits is a different challenge. It is a true collaboration with your subject that needs input from the photographer to make it happen.
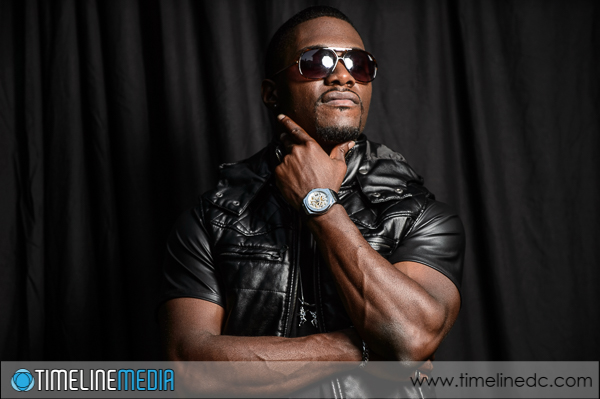
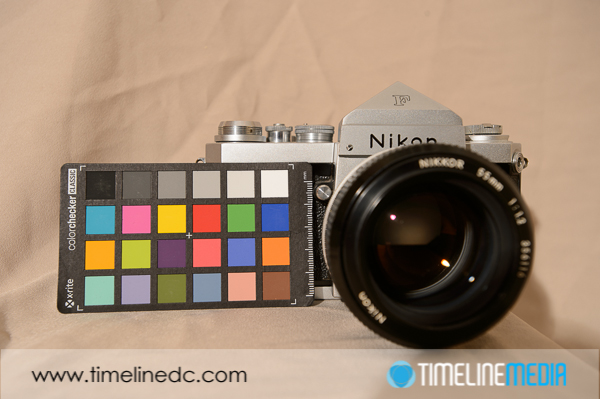
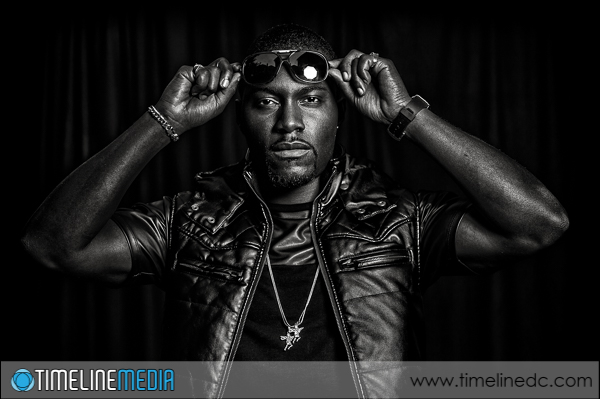
Portrait with Nikon D4, SB-910, Westcott Rapid Box - ©TimeLine Media
Portrait with Nikon D4, SB-910, Westcott Rapid Box light modifier – ©TimeLine Media

Studio Portrait

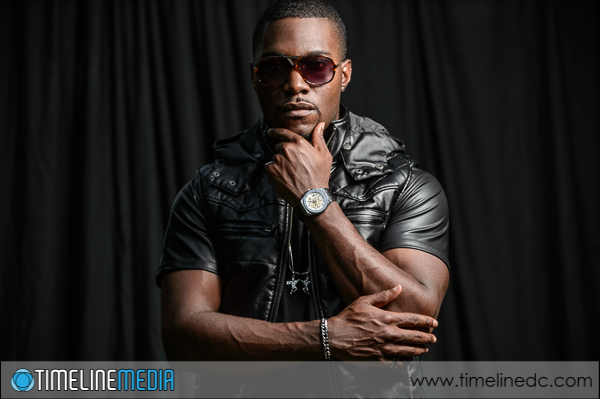
This setup on a black background was at the suggestion of the subject. The easiest way to have the most control over the light is to use a strobe to light a subject with the dark material as a backdrop. For this, I used a Nikon Speedlight firing through a Westcott Rapid Box Octa. The flash was triggered with the FlexTT5 from PocketWizard. The great thing about these triggers is that they use the TTL ability built into the Nikon camera body. Thus the computer in the flash will set the power. This is different from shooting with moonlight strobes that I typically use as those are set manually. But for this, the TTL worked very well as I setup the flashes, so I kept using them so that we could change backgrounds, and setups quickly as needed.

Portrait with Nikon D4, SB-910, Westcott Rapid Box - ©TimeLine Media
Portrait with Nikon D4, SB-910, Westcott Rapid Box light modifier – ©TimeLine Media

When photographing people with clear eyeglasses, it is not typical that you would want to have the light reflected from the glass. With sunglasses, and the kind of photos we were making here, the reflection actually turned out to be a nice element to the face!

Portrait with Nikon D4, SB-910, Westcott Rapid Box - ©TimeLine Media
Portrait with Nikon D4, SB-910, Westcott Rapid Box – ©TimeLine Media

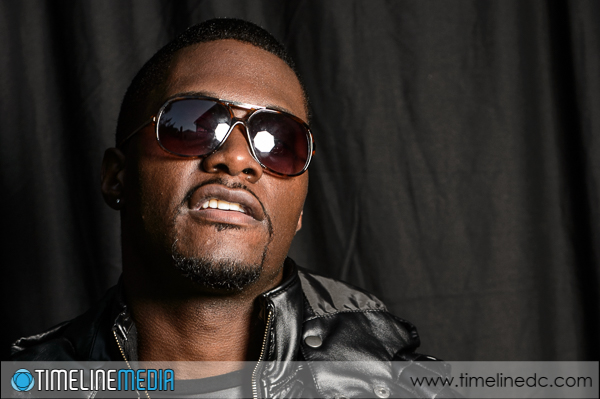
I did make images that also did not have the reflection so that the subject would have options. In case the later use of these images would not work with the octagonal light reflection, we had both in the can. My favorite, was when he just moved the glasses above his eyes so we could see underneath – this was the best of the session in my opinion.

Portrait with Nikon D4, SB-910, Westcott Rapid Box - ©TimeLine Media
Portrait with Nikon D4, SB-910, Westcott Rapid Box – ©TimeLine Media

TimeLine Media – www.timelinedc.com
703-864-8208

Outrunning the Curtain – Tech Thursday

Fashion Show with off camera flash - ©TimeLine Media

Testing

Flash photography is different, not difficult! Natural, or available is easier in the way that Microsoft Word is an easy as a text editor. With available light, what you see if what you get. There is no guessing as to the effect that the light will have on your subject in the photo, because you can see it even without looking through your camera. I am trying to step away, and attempting to use flash in every situation that I can. It is a challenge, but I think the results can be much better, and the files much easier to work with in post. This post is about the first lesson is using a flash off the camera. This can be a speedlight that you attach to your camera with a cord, or wirelessly – it does not matter which for this article.

Every camera has a set flash sync speed. This is a fastest shutter speed at which the flash can illuminate the full frame of the camera with light. Any shutter speed slower than that will also light the frame fully, but any speed faster will start to darken the frame. As an example, here are some photos where I attempted to keep the same exposure, only changing the shutter speed. The settings are in their captions:

1/60 sec, f/6.3 - ©TimeLine Media
1/60 sec, f/6.3 – ©TimeLine Media
1/125th sec, f/5 - ©TimeLine Media
1/125th sec, f/5 – ©TimeLine Media
1/200th sec, f/5 - ©TimeLine Media
1/200th sec, f/5 – ©TimeLine Media

Shutter Speed and Flash

All of the above photos have shutter speeds slower than the sync speed of 1/250th of a second. This sync speed will vary with your camera, so consult your manual to find it for your particular model. Now the next photo is at 1/320th of a second, and the frame starts to darken from the bottom.

1/320th sec, f/5 - ©TimeLine Media
1/320th sec, f/5 – ©TimeLine Media

This darkening is from the curtain that covers sensor. Its movement determines the shutter speed settings on your camera. It moves faster across the sensor as you increase the shutter speed. When you make an exposure with a shutter speed that is too fast, you start to catch the curtain in the frame when the shutter speed is too fast.

1/500th sec, f/5 - ©TimeLine Media
1/500th sec, f/5 – ©TimeLine Media
1/800th sec, f/5 - ©TimeLine Media
1/800th sec, f/5 – ©TimeLine Media

So if you are just starting to experiment with off camera flash, make this your first options to set on your camera. Conversely, check this setting if you are on a shoot and seeing something strange on the image. I’ll bet it is the curtain. This will save you a lot of frustration especially in bright settings! Give it a try with your camera to find your flash shutter sync speed.

Fashion Show with off camera flash - ©TimeLine Media
Fashion Show with off camera flash – ©TimeLine Media 

TimeLine Media – www.timelinedc.com
703-864-8208

Tilt Shift Lenses – Part 1– Tech Thursday

Shift corrected house photo - ©TimeLine Media

Straight Lines

Very good photographers visualize the world differently. There are stories of people that claim to see the world at certain focal lengths. Commonly 35mm or 50mm on a full frame camera. I don’t know if I am that in tune with my gear, but I am getting much better at pre-visualizing an image before I set the camera.

Architects, similarly, view structures in much the same way. My father was an architect, and I watching him draw buildings out of a blank sheet of paper reveals how he views structures from different perspectives. Another characteristic of most blue prints is that there is no distortion of the angles in the drawings. It is important to keep them straight to make it clear to engineers and builders which angles should be straight in case there are others that they are intentionally changing for design. A tilt shift lens will allow you to straighten all the angles in an image, and remove the distortion that comes from the angle of the camera to the building.

Uncorrected house photo - ©TimeLine Media
Uncorrected house photo – ©TimeLine Media

Above is an example of a non-corrected image from a 24mm lens. Because the camera and lens is pointed up towards the building, it makes the top of the house look like it is falling away. The straight sides of the structure seem to be converging at the top of the frame. This is an angle that would not be drawn by an architect. It would be confusing, and not representative of how they would want the structure to be built. Here is a corrected version of the same scene:

Shift Correction

Shift corrected house photo - ©TimeLine Media
Shift corrected house photo – ©TimeLine Media

The camera position was not changed between these two images as it was mounted on a tripod. Only the shift function of the tilt shift lens was changed, and the camera angle pointed straight towards the building. This is the magic of the tilt shift lens. You remove the distortion by straightening the angle of the camera to the house, then shift the lens so you can still capture the entire front façade of the building in one frame. I will show how the lens looks and how it makes these changes in a future post.

Tilt Shift comparison - ©TimeLine Media
Tilt Shift comparison – ©TimeLine Media

TimeLine Media – www.timelinedc.com
703-864-8208

1 2 3 4 10