Posts Tagged ‘tech’

Rename Photos – Tech Thursday

Flowers in Bon Air Park - ©TimeLine Media

Photo Processing

This is a simple idea for a blog post, but one that I think is very important for many reasons. Digital cameras are small, very advanced computers that specialize in making images. The computers run an operating system that conforms to the Design Rule for Camera File Systems or DCF. This is the reason that in any digital camera, your images are stored in a file folder named “DCIM”. After that level, camera manufacturers can change the default naming conventions for images captured by your camera. For Nikon, Fuji and Sony cameras, the default is “DSCXXXX.jpg” while for Canon cameras, the default is “IMGXXXX.jpg”.

Flowers in Bon Air Park - ©TimeLine Media
Flowers in Bon Air Park – ©TimeLine Media

In the menus for your cameras, you can change the default name for your images. When I am setting up a new camera body, this is one of the first things I change for two reasons. The first is so that I can easily identify which images are from which camera, or photographer if I am covering an event with multiple photographers. The second is that in post-processing, I can more easily keep track of photos that I am editing.

Rename Photos

For example, I rename all my images W2A for one camera, W2B for another camera, etc. When at an event with other photographers where we are collecting all the images on one workstation, I can almost ensure that there will not be any accidental rewriting of images since the filenames will likely be different. If I kept the default DSC names, there is a danger that copying files from 2 different Nikon bodies will be overwritten if the user is not careful in copying images. During a busy event, something like this can definitely happen!

Field of Buttercups - ©TimeLine Media
Field of Buttercups – rename example – ©TimeLine Media

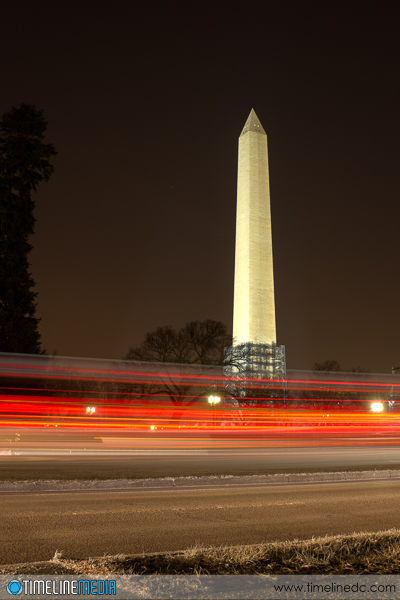
Before posting images online, it is also important to rename your images. This makes it easier for search engines to find your images when people search. It is much more likely that someone online will find my image of the “Washington_Monument.jpg” when searching for images of DC when it is renamed rather than if it was posted as “W2A7879.jpg” as it was named straight out of camera. Come up with some naming conventions for your images. Especially as your image collection grows, it helps to keep organized and will help you to recall the images later if/when they are needed. Perfect for #TBT Throwback Thursdays!

Washington Monument at night - ©TimeLine Media
Washington Monument at night – ©TimeLine Media

TimeLine Media – www.timelinedc.com
703-864-8208

Outrunning the Curtain – Tech Thursday

Fashion Show with off camera flash - ©TimeLine Media

Testing

Flash photography is different, not difficult! Natural, or available is easier in the way that Microsoft Word is an easy as a text editor. With available light, what you see if what you get. There is no guessing as to the effect that the light will have on your subject in the photo, because you can see it even without looking through your camera. I am trying to step away, and attempting to use flash in every situation that I can. It is a challenge, but I think the results can be much better, and the files much easier to work with in post. This post is about the first lesson is using a flash off the camera. This can be a speedlight that you attach to your camera with a cord, or wirelessly – it does not matter which for this article.

Every camera has a set flash sync speed. This is a fastest shutter speed at which the flash can illuminate the full frame of the camera with light. Any shutter speed slower than that will also light the frame fully, but any speed faster will start to darken the frame. As an example, here are some photos where I attempted to keep the same exposure, only changing the shutter speed. The settings are in their captions:

1/60 sec, f/6.3 - ©TimeLine Media
1/60 sec, f/6.3 – ©TimeLine Media
1/125th sec, f/5 - ©TimeLine Media
1/125th sec, f/5 – ©TimeLine Media
1/200th sec, f/5 - ©TimeLine Media
1/200th sec, f/5 – ©TimeLine Media

Shutter Speed and Flash

All of the above photos have shutter speeds slower than the sync speed of 1/250th of a second. This sync speed will vary with your camera, so consult your manual to find it for your particular model. Now the next photo is at 1/320th of a second, and the frame starts to darken from the bottom.

1/320th sec, f/5 - ©TimeLine Media
1/320th sec, f/5 – ©TimeLine Media

This darkening is from the curtain that covers sensor. Its movement determines the shutter speed settings on your camera. It moves faster across the sensor as you increase the shutter speed. When you make an exposure with a shutter speed that is too fast, you start to catch the curtain in the frame when the shutter speed is too fast.

1/500th sec, f/5 - ©TimeLine Media
1/500th sec, f/5 – ©TimeLine Media
1/800th sec, f/5 - ©TimeLine Media
1/800th sec, f/5 – ©TimeLine Media

So if you are just starting to experiment with off camera flash, make this your first options to set on your camera. Conversely, check this setting if you are on a shoot and seeing something strange on the image. I’ll bet it is the curtain. This will save you a lot of frustration especially in bright settings! Give it a try with your camera to find your flash shutter sync speed.

Fashion Show with off camera flash - ©TimeLine Media
Fashion Show with off camera flash – ©TimeLine Media 

TimeLine Media – www.timelinedc.com
703-864-8208

Tilt Shift Lenses – Part 1– Tech Thursday

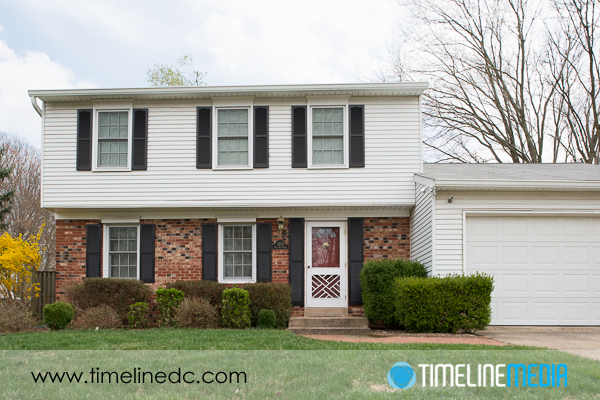
Shift corrected house photo - ©TimeLine Media

Straight Lines

Very good photographers visualize the world differently. There are stories of people that claim to see the world at certain focal lengths. Commonly 35mm or 50mm on a full frame camera. I don’t know if I am that in tune with my gear, but I am getting much better at pre-visualizing an image before I set the camera.

Architects, similarly, view structures in much the same way. My father was an architect, and I watching him draw buildings out of a blank sheet of paper reveals how he views structures from different perspectives. Another characteristic of most blue prints is that there is no distortion of the angles in the drawings. It is important to keep them straight to make it clear to engineers and builders which angles should be straight in case there are others that they are intentionally changing for design. A tilt shift lens will allow you to straighten all the angles in an image, and remove the distortion that comes from the angle of the camera to the building.

Uncorrected house photo - ©TimeLine Media
Uncorrected house photo – ©TimeLine Media

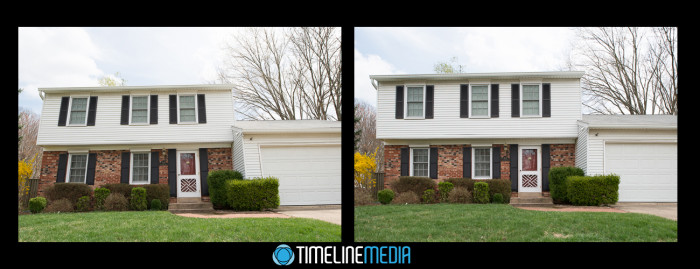
Above is an example of a non-corrected image from a 24mm lens. Because the camera and lens is pointed up towards the building, it makes the top of the house look like it is falling away. The straight sides of the structure seem to be converging at the top of the frame. This is an angle that would not be drawn by an architect. It would be confusing, and not representative of how they would want the structure to be built. Here is a corrected version of the same scene:

Shift Correction

Shift corrected house photo - ©TimeLine Media
Shift corrected house photo – ©TimeLine Media

The camera position was not changed between these two images as it was mounted on a tripod. Only the shift function of the tilt shift lens was changed, and the camera angle pointed straight towards the building. This is the magic of the tilt shift lens. You remove the distortion by straightening the angle of the camera to the house, then shift the lens so you can still capture the entire front façade of the building in one frame. I will show how the lens looks and how it makes these changes in a future post.

Tilt Shift comparison - ©TimeLine Media
Tilt Shift comparison – ©TimeLine Media

TimeLine Media – www.timelinedc.com
703-864-8208
1 2 3 4 5 9