Posts Tagged ‘High Dynamic Range’

Air Force Memorial – Early Morning Photos

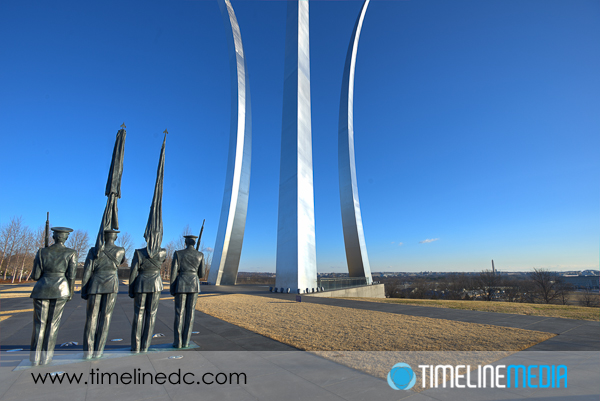
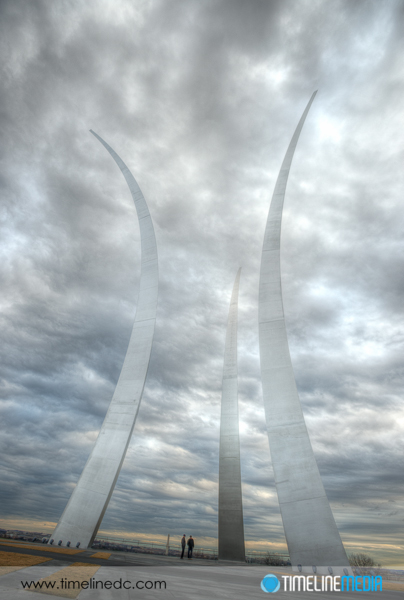
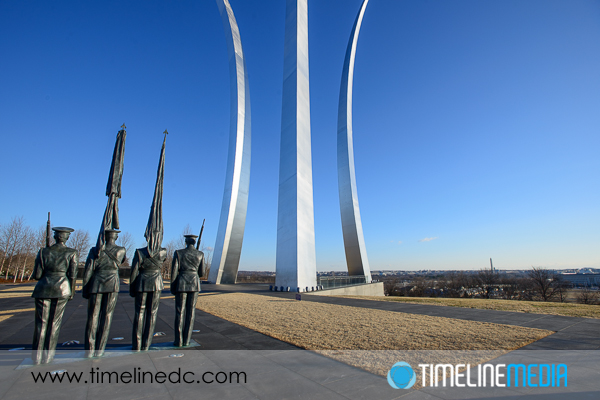
Air Force Memorial - single exposure - ©TimeLine Media

With announcements that the cherry blossoms are very close to peak bloom, I am anxious to go out to the Tidal Basin in downtown DC to make some springtime photos! Until I get out there, I am looking back on other recent photo walks around town. The images on this post was from a particularly COLD morning at the Air Force Memorial in Arlington, Virginia. I remember how numb my hands and face was after this shoot even though I was bundled up! At least one advantage is the cold keeps the crowds away, so I was mostly alone at the Memorial except for a group of school kids that quickly took some photos, then hurried back to their waiting motor coach.

Arlington, Virginia

From this high overlook, you have a panoramic view of the Pentagon, and Washington, DC below. This also brings the high winds which makes trying to keep the camera steady difficult. A tripod was definitely necessary this morning, and it allowed me to slow down and really position the camera right where it needed to be for these photos. With the tripod steadying the gear, I also took multiple varying exposure for making high dynamic range photos. Here is a comparison of a single exposure with the metered settings, and an HDR image of 7 combined images, 1 stop apart.

Air Force Memorial HDR - ©TimeLine Media
Air Force Memorial HDR – ©TimeLine Media
Air Force Memorial - single exposure - ©TimeLine Media
Air Force Memorial – single exposure – ©TimeLine Media

The edited single exposure is preferable to me. The dark part of the sky ends up in a different area in the HDR image, and I find it more pleasing in the single image. With HDR images, they bring out more of the shadow areas which did not come out as well in the HDR as a default. I could edit this more in Photoshop, but the single image was pleasing as it is, so I have decide to just keep that version instead of investing more time in the HDR file.

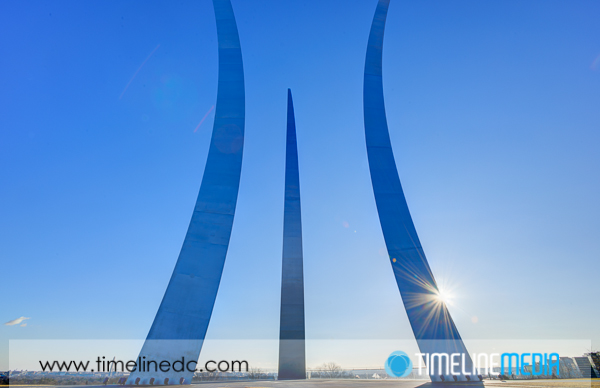
Air Force Memorial with sunburst - ©TimeLine Media
Air Force Memorial with sunburst – ©TimeLine Media

TimeLine Mediawww.timelinedc.com
703-864-8208

Comparing HDR to Non-HDR images

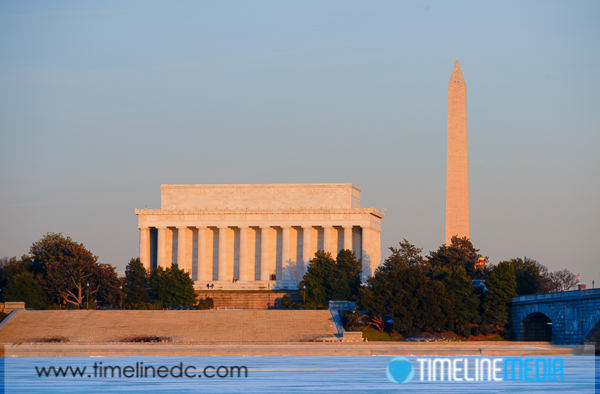
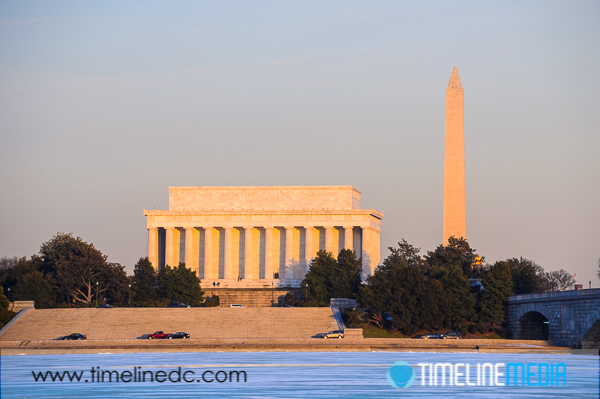
Lincoln Memorial and Washington Monument from Virginia - ©TimeLine Media

With all my landscape images, I have been bracketing exposures with the intent to do some post processing on the photos and create a high dynamic range (HDR) final image. One evening, I walked out on the Virginia side of the Potomac River from Washington, DC to the Memorial Bridge. This is a beautiful spot to make images of the Lincoln and Washington Monuments especially in the early evening. With the sun lowering, the white buildings again take on that pink/orange hue of the fading light.

Lincoln Memorial and Washington Monument from Virginia - ©TimeLine Media
Lincoln Memorial and Washington Monument from Virginia – ©TimeLine Media

HDR testing

In looking through the set of images that I made after the shoot, I did notice that this night had a smoggy haze. With rush hour traffic starting to build, it did not make for as nice a scene as the crisp winter mornings. The haze came in the middle of the frames underneath the blue, and stayed over the pink part of the sky overlaying this ugly gray layer.

This was just bad luck for the time I happened to be out there shooting. Obviously, it makes me want to try this on a different day. Perhaps I can get a better result next time. In any case, I saw the result from the post processing the bracketed photos with Photomatix. I wanted to compare it to the RAW file images. With this in mind, I had a feeling that being able to shoot at a low ISO. Additionally, with all the detail and information that the Nikon D4 gathers, I could make one of the RAW files that was in the middle of the bracket look just as good as the HDR image.

Washington, DC

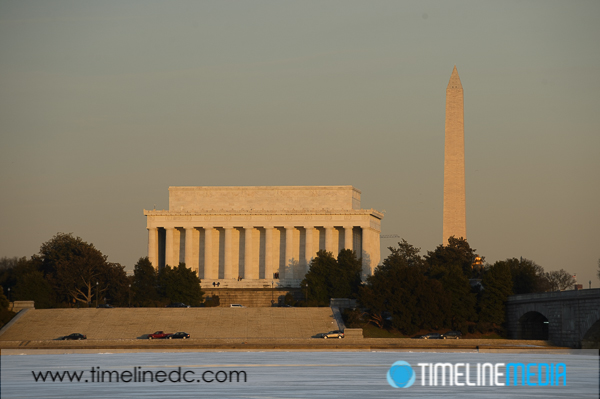
Lincoln Memorial and Washington Monument from Virginia - ©TimeLine Media
Lincoln Memorial and Washington Monument HDR from Virginia – ©TimeLine Media
Lincoln Memorial and Washington Monument from Virginia - ©TimeLine Media
Lincoln Memorial and Washington Monument non-HDR from Virginia – ©TimeLine Media

What I learned in looking at these photos, is that there is not a huge difference between the dark and light sections of the photo. Moreover it is very possible to make one exposure similar to a realistic HDR image from 7 bracketed photos. The Raw file was adjusted in Adobe Lightroom with just some contrast, clarity, and vibrance added to the original file.

I then adjusted the white balance of the scene to mimic the HDR, and these photos looked very similar. Although it is not something that I am comfortable yet pre-visualizing. So it is nice to have the bracketed photos as a backup. I will probably continue to shoot both ways, and processes them in 2 ways, until I can more easily predict when it will save me a lot of time and memory card space to shoot just one photo instead of the whole series.

TimeLine Media – www.timelinedc.com
703-864-8208

Tools for Bracketing Exposures – Tech Thursday

Air Force Memorial morning HDR - ©TimeLine Media

When creating high dynamic range or HDR photos, you need to make multiple exposures of the same scene. However, the images need to be made at difference exposure values. Between each time you fire the shutter, you only change the shutter speed. Afterwards you have a set of photos that have the same composition, but differ in the amount of exposure. In this case half will be under exposed, half will be over exposed. One will have the exposure set by the meter.

Bracketing Exposures

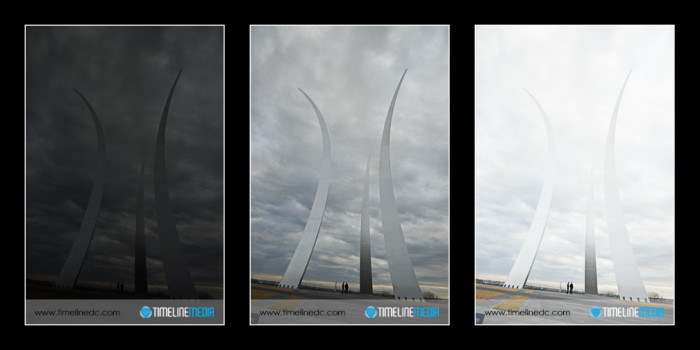
Air Force Memorial multiple exposures - ©TimeLine Media
Air Force Memorial multiple exposures – ©TimeLine Media

These three images were exposed (from left to right) for 1/3200th second, 1/400th second, 1/100th second, at an aperture of f/5.6 for all. For the final image, I had a total of 9 exposures that were combined to make the HDR file. To ensure you have good images to work with, it helps to make these exposures as fast as you can. If your position moves, or elementes in the frame move between each exposure, it will be more post work. In software you need to correct these, It adds to the long post processing of these files. Many modern DSLRs have functions and tools that will help.

Bracketing and motor drive settings on Nikon DSLR - ©TimeLine Media
Bracketing and motor drive settings on Nikon DSLR – ©TimeLine Media

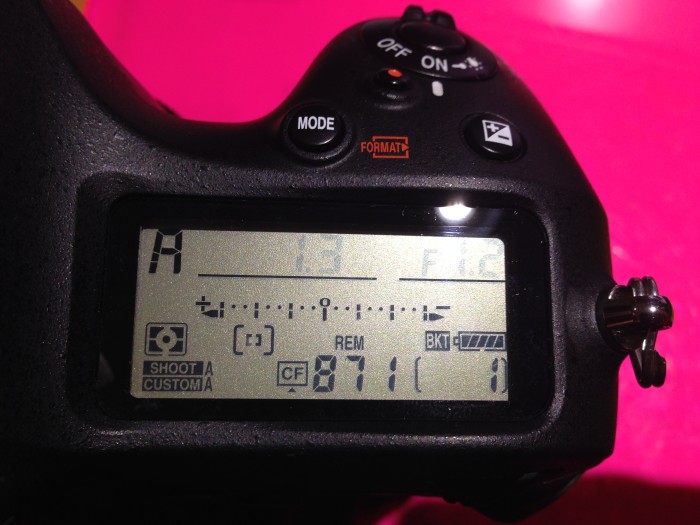
In my Nikon camera, I can use the “Bracketing” function to set the camera to take a series of exposures that vary in shutter speed. Holding this BKT button, and moving the main command dial will bring up this dialog box in the mail LCD screen:

Nikon LCD screen setup for bracketing - ©TimeLine Media
Nikon LCD screen setup for bracketing – ©TimeLine Media

What this screen is showing it that the camera will take 9 frames with 1.0 stops of light between each exposure. You can change this to be 7, 5, or 3 frames, and you can change the differences of stops between each to be 0.3, 0.7, 1.0, 2.0, or 3.0 (!) stops of light difference between each. From my experience, having 9 frames with a stop between each frame will cover more than an adequate amount for most situations. You may have to change depending on your particular subject, but this has worked for me very well in both indoor and outdoor photos.

Air Force Memorial morning HDR - ©TimeLine Media
Air Force Memorial morning HDR – ©TimeLine Media

TimeLine Mediawww.timelinedc.com
703-864-8208

1 2 3 4