Posts Tagged ‘Nikon’

Flash basics – Tech Thursday

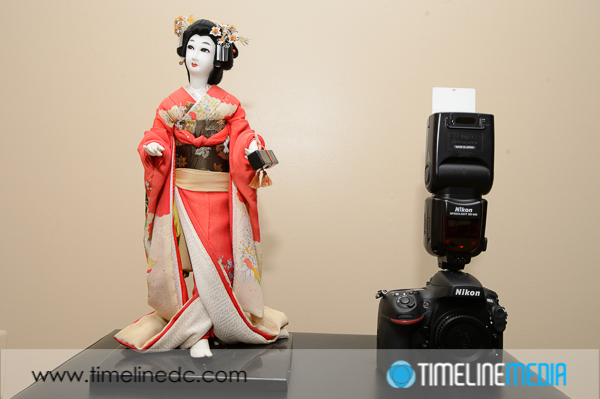
Flash with head in position to bounce off ceiling - ©TimeLine Media

Testing with a Statue

Today, I have been reviewing previous posts about a new camera, or perhaps a flash. I have been making these posts from the side of what advice would I give to someone that just received a new DSLR for Christmas and what would they do with their new toy. After the first few weeks of just taking photos, getting comfortable with how the camera feels in the hand, and being confident that it would not lose any of the photos that you take with it.

One of the first accessories that people use frequently, but often incorrectly, is the flash. Going around the tourist areas, or looking at the crowds at sporting events, there are so many people that use their flash. This is because the photos from their camera using their default settings are too dark for the situation. Indoors under artificial light, or any photo taken at night, the flash will pop on your camera to brighten the scene. You will definitely make your photos brighter with the flash, but a lot of times, the light will be ugly! Here is the reason why, and how you can make it better.

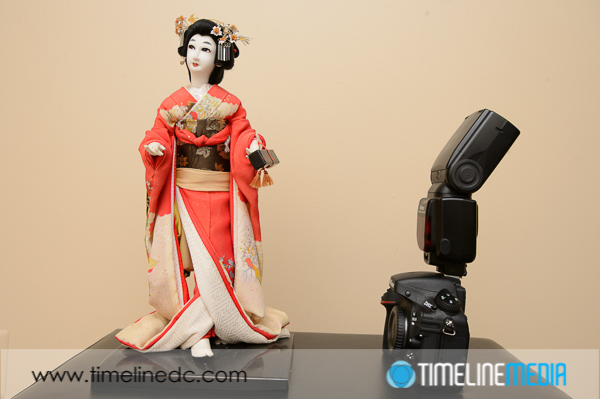
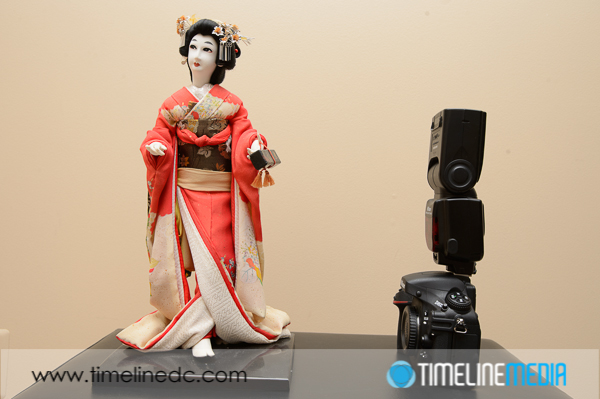
Flash with head pointed directly at subject - ©TimeLine Media
Flash with head pointed directly at subject – ©TimeLine Media

This first image shows the default direction for a speedlight flash mounted on a camera. The thinking here is what you want to brighten is right in front of the camera. So, firstly, point the flash directly in front of you. This will get you a sharp, bright photo. Likely, only whatever is right in front of the camera will get the light. There will be a dark, harsh shadow right behind your subject if you pose them against a wall. To make this light better, you can take your speedlight and point it straight up to the ceiling. Doing this will “bounce” the light from the ceiling back down to your subject.

Bounce Light

Flash with head in position to bounce off ceiling - ©TimeLine Media
Flash with head in position to bounce off ceiling – ©TimeLine Media

The result is that the light becomes very soft against your subject because you have made the light source much larger. Instead of coming from the front of the flash before hitting your subject, the light is spread out across the ceiling and surrounding walls. By the time it hits the subject, it is much larger in area, which makes light much softer. Easy!

Flash with head in position to bounce off ceiling - ©TimeLine Media
Flash with head in position to bounce off ceiling – ©TimeLine Media

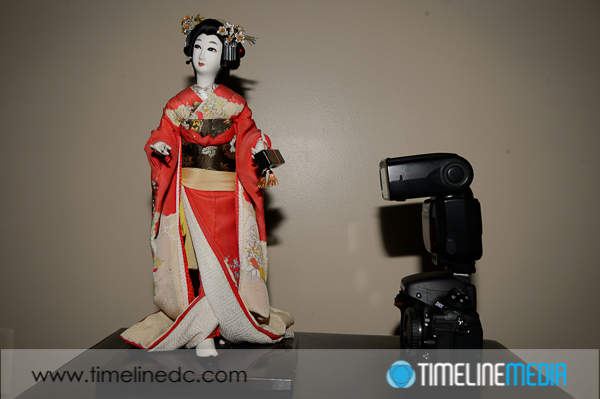
Some speedlights have a little white card inserted at the front of the flash. Pop this little accessory up to direct just a little more of the light forward if you are photographing a person. This will brighten their faces nicely with not as harsh a shadow behind the subject and keeping the overall light in the scene soft. If you are in a place with very high, or no ceiling, you can even point the flash directly behind the camera to bounce off a wall in back of you. It can give a similar result to bouncing off the ceiling. There are many other tips on using your speedlight flash, this is just the beginning. If you have any more questions on how to use your flash, let me know!

Flash with head in position to bounce behind wall - ©TimeLine Media
Flash with head in position to bounce behind wall – ©TimeLine Media

TimeLine Media – www.timelinedc.com
703-864-8208

Photo of the day – HDR Lincoln Memorial

Lincoln Memorial - HDR from HDR Efex Pro 2 - ©TimeLine Media

Below are photos of the Lincoln Memorial with some examples of how you can develop a photo in different ways. Firstly is just from one exposure with adjustments in Lightroom. In other words, a ‘normal’ processing from out of the camera.

Lincoln Memorial with only Lightroom adjustments - ©TimeLine Media
Memorial with only Lightroom adjustments – ©TimeLine Media

The other images were processed in HDR programs from 9 separate exposures. In summary, the images were bracketed at different exposures. Afterwards. these images were used as sources for HDR programs.

Memorial - HDR from Photomatix 5 - ©TimeLine Media
Lincoln Memorial – HDR from Photomatix 5 – ©TimeLine Media

This shows not only the possibilities with processing images in one program, but the amount of information available in combining exposures really opens up a lot of options! The HDR processing started from photo realistic presets.

Memorial - HDR from HDR Efex Pro - ©TimeLine Media
Memorial – HDR from HDR Efex Pro – ©TimeLine Media

Many of the “artistic” or “surrealistic” presets were a little off the chart for me. Especially with a subjects like the Lincoln Memorial, going too far on the processing would have really taken away from the image. Let me know which of these came out the best. If you have any tips for processing HDR images, or post processing architecture or landscape images, let me know!

Lincoln Memorial - HDR from HDR Efex Pro 2 - ©TimeLine Media
Lincoln Memorial – HDR from HDR Efex Pro 2 – ©TimeLine Media 

TimeLine Media – www.timelinedc.com
703-864-8208
New Camera for Christmas – Now What?

Gifts under the Christmas Tree - ©TimeLine Media

Gear Gifts

A shiny new camera was a popular item in the back of Santa’s sleigh this year! If you were like my mom, it was an exciting gift to get, but one that will definitely be giving out goodies for more than just the next year. After unboxing, and making sure everything turn on, it can be overwhelming to think about what to do next. Do I read the manual from cover to cover? Almost never. Do I need to buy more accessories and things to add to the body? Usually. Do I change any of the settings on the camera before using it? Absolutely. Why would I do any of these things?

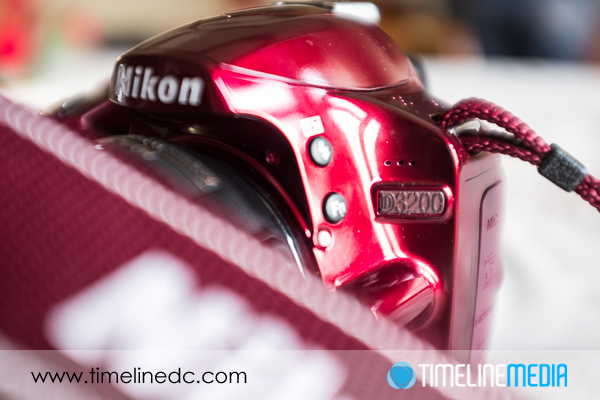
Red Nikon D3200 - ©TimeLine Media
Red Nikon D3200 – ©TimeLine Media

I would do what most kids do with their new toys. I would go out and play with it first! Take LOTS of photos with the new camera. If you had a previous model that was similar in type, you will be very comfortable with most of the layout of the control and the symbols printed on the camera. There may be some new buttons on there, but if you didn’t have them on your last camera, you will likely not need them on your new camera if you have not read about it yet. Most functions on cameras have not changed in decades. So it is likely that if you are used to a particular brand and how it displays functions, it will continue to do so on your new model.

Gifts under the Christmas Tree - ©TimeLine Media
Gifts under the Christmas Tree – ©TimeLine Media

New Camera

Taking lots of photos with your new camera will also get you comfortable with how it responds. If you left the settings exactly how it came out of the box, it will likely give you perfectly fine results. They may not look much different as images from a point and shoot, or smartphone camera, but they will be viewable, and will give you a starting point to play with the settings later. There is probably a lot of family, friends, and other holiday things going on right away, so don’t worry so much about the details with your new gear. Just start enjoying it by using it!

You have a lot of time to tinker with all the other fun that a camera can make when you are not stressed about the season. Just be sure to register the camera with the manufacturer before your lose the registration card, of the serial number rubs off the outside! That will ensure you get all the warranty and repair rights if something breaks along the way.

Capitol Christmas Tree at night - ©TimeLine Media
Capitol Christmas Tree at night – ©TimeLine Media

TimeLine Media – www.timelinedc.com
703-864-8208
1 3 4 5 6 7 10