Testing with a Statue
Today, I have been reviewing previous posts about a new camera, or perhaps a flash. I have been making these posts from the side of what advice would I give to someone that just received a new DSLR for Christmas and what would they do with their new toy. After the first few weeks of just taking photos, getting comfortable with how the camera feels in the hand, and being confident that it would not lose any of the photos that you take with it.
One of the first accessories that people use frequently, but often incorrectly, is the flash. Going around the tourist areas, or looking at the crowds at sporting events, there are so many people that use their flash. This is because the photos from their camera using their default settings are too dark for the situation. Indoors under artificial light, or any photo taken at night, the flash will pop on your camera to brighten the scene. You will definitely make your photos brighter with the flash, but a lot of times, the light will be ugly! Here is the reason why, and how you can make it better.
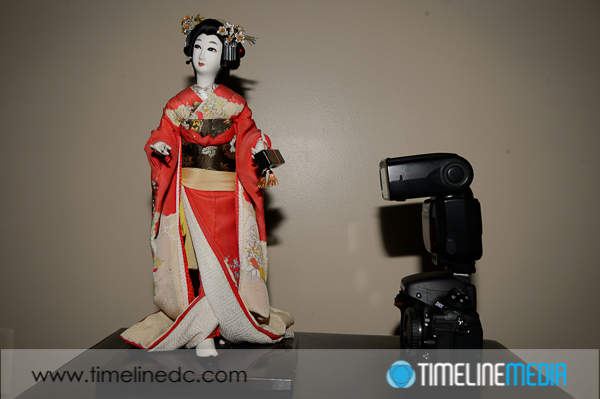
This first image shows the default direction for a speedlight flash mounted on a camera. The thinking here is what you want to brighten is right in front of the camera. So, firstly, point the flash directly in front of you. This will get you a sharp, bright photo. Likely, only whatever is right in front of the camera will get the light. There will be a dark, harsh shadow right behind your subject if you pose them against a wall. To make this light better, you can take your speedlight and point it straight up to the ceiling. Doing this will “bounce” the light from the ceiling back down to your subject.
Bounce Light
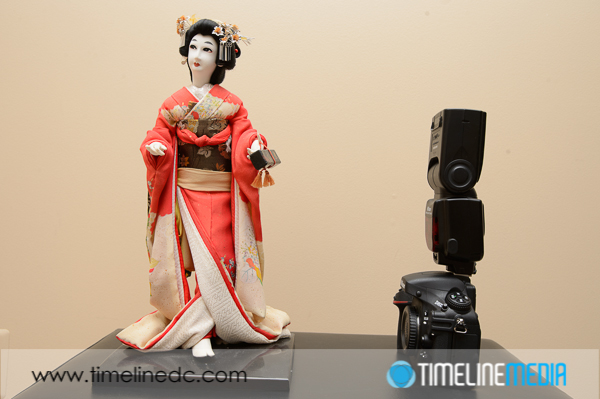
The result is that the light becomes very soft against your subject because you have made the light source much larger. Instead of coming from the front of the flash before hitting your subject, the light is spread out across the ceiling and surrounding walls. By the time it hits the subject, it is much larger in area, which makes light much softer. Easy!

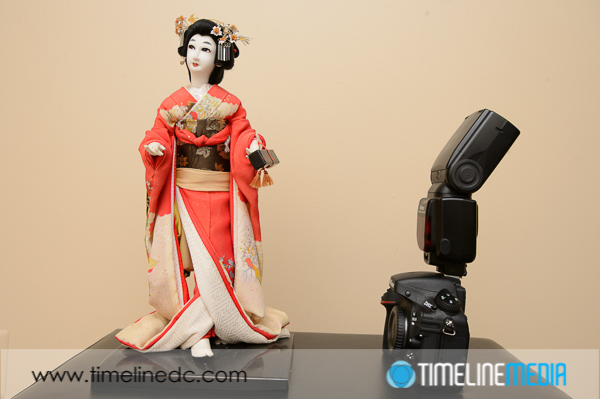
Some speedlights have a little white card inserted at the front of the flash. Pop this little accessory up to direct just a little more of the light forward if you are photographing a person. This will brighten their faces nicely with not as harsh a shadow behind the subject and keeping the overall light in the scene soft. If you are in a place with very high, or no ceiling, you can even point the flash directly behind the camera to bounce off a wall in back of you. It can give a similar result to bouncing off the ceiling. There are many other tips on using your speedlight flash, this is just the beginning. If you have any more questions on how to use your flash, let me know!
TimeLine Media – www.timelinedc.com
703-864-8208