Posts Tagged ‘Photoshop’

Photomerge using Photoshop CS5 – Tech Thursday

Pier Panorama of 14 combined images - ©TimeLine Media

From readers, I have received a lot of feedback and questions about the panoramic images I have posted. The added feature to smartphone camera apps and having it built into some digital cameras has made the practice of stitching photos more popular. It is now possible to expand the dimensions of images using multiple angles of the same scene. There are products that you can add to a tripod mount to make your panoramas more precise, and there are even robot controllers that can make multiple images for you to make stitched GIGA-pixel images.  

Photoshop Stitching

14 images opened in Photoshop

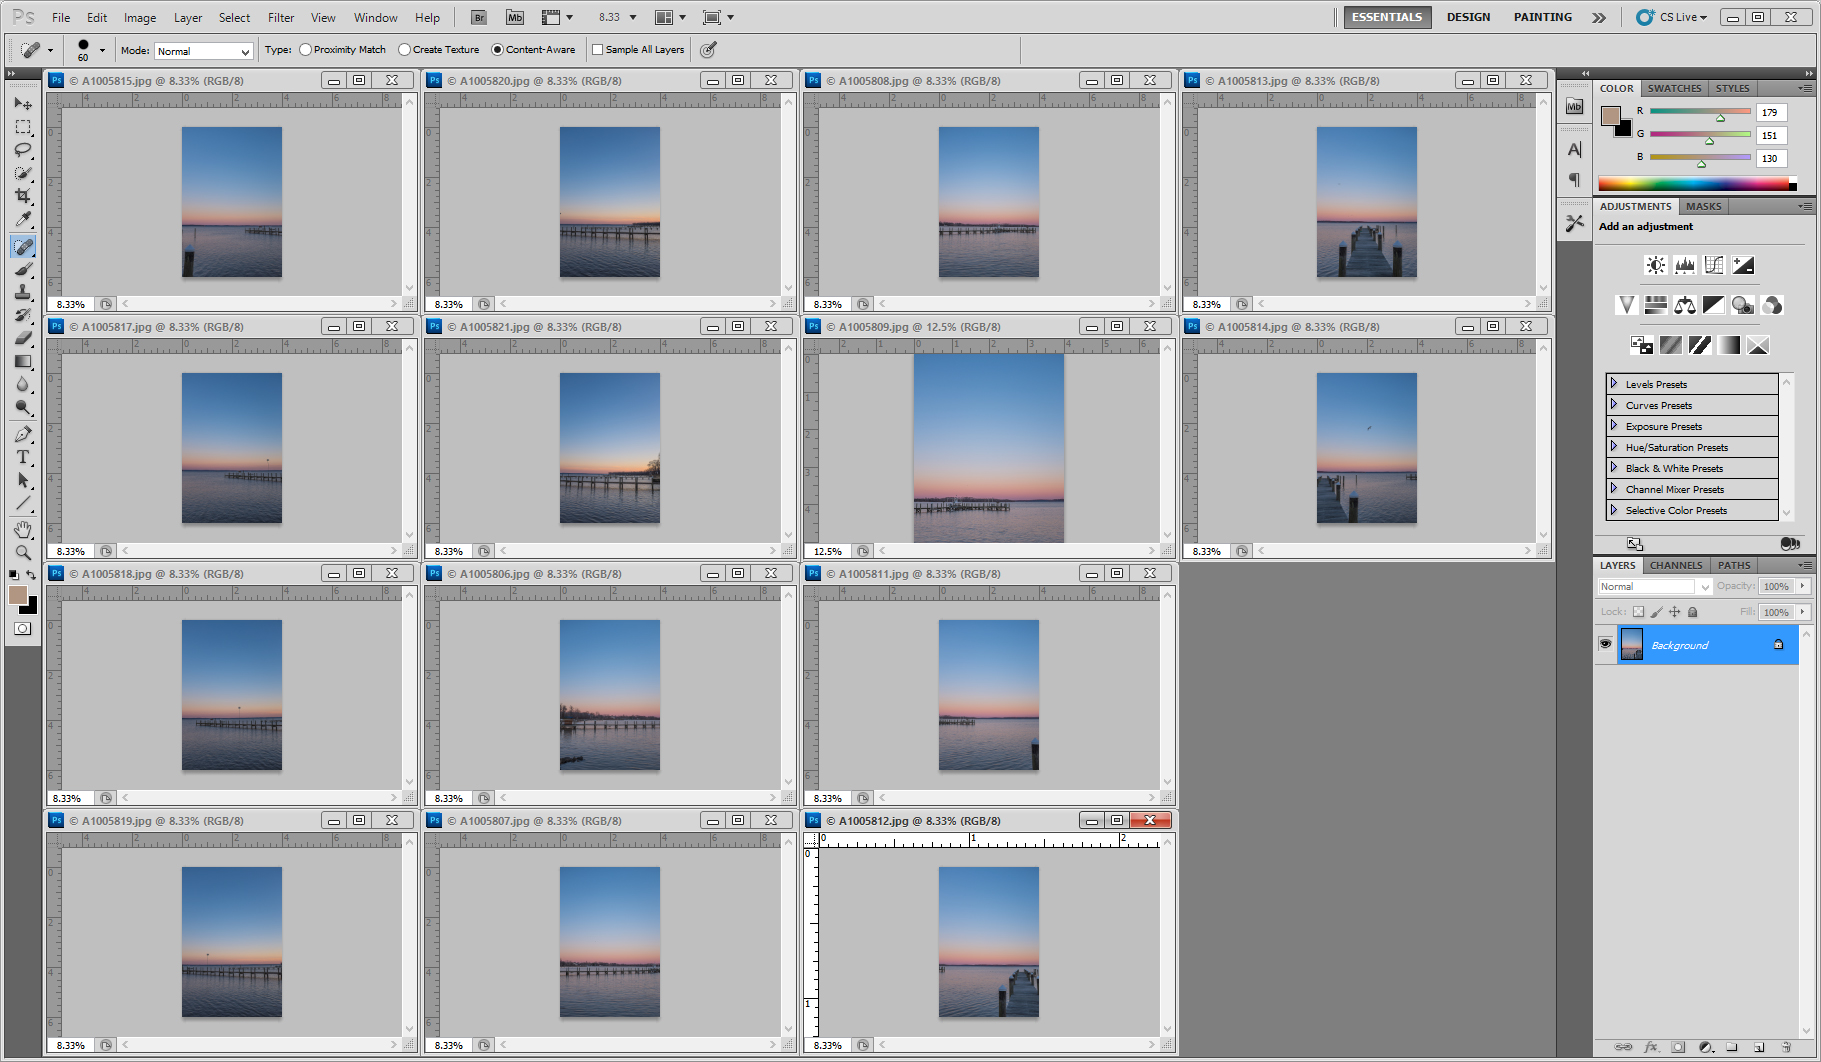
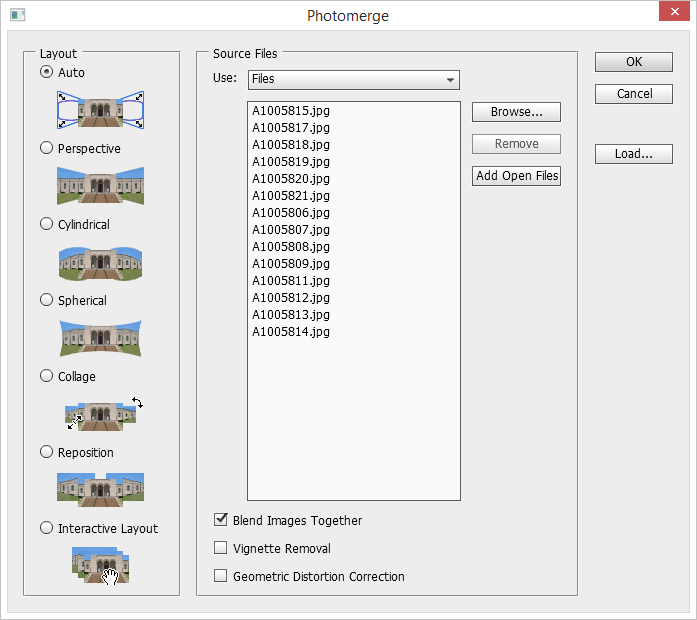
Since I am doing all of these hand held, I need to rely on the Photomerge function in Photoshop CS5. The first step was to open the 14 images that I intended to stitch together. There were taken in portrait orientation so that I could get more room to crop than if taken in landscape. Then, go to File > Automate > Photomerge:

Photomerge dialog box in Photoshop CS5

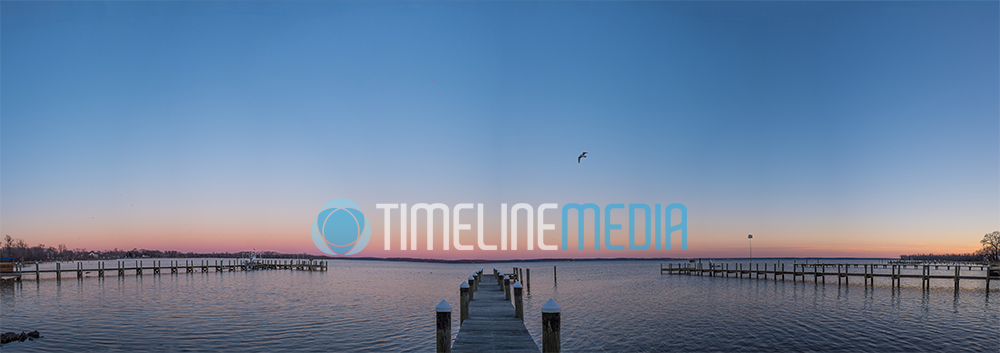
The result shows all the work that Photoshop does for you! It blends the images using the overlapping elements that were in each frame. The more information that it has to work with, the better the blending. I was happy with how the combination of the images turned out except for one section where the horizon dips a little in front of the middle pier. That area would have to be corrected manually – maybe in a future blog post!

Images stitched together - ©TimeLine Media
Images stitched together – ©TimeLine Media 

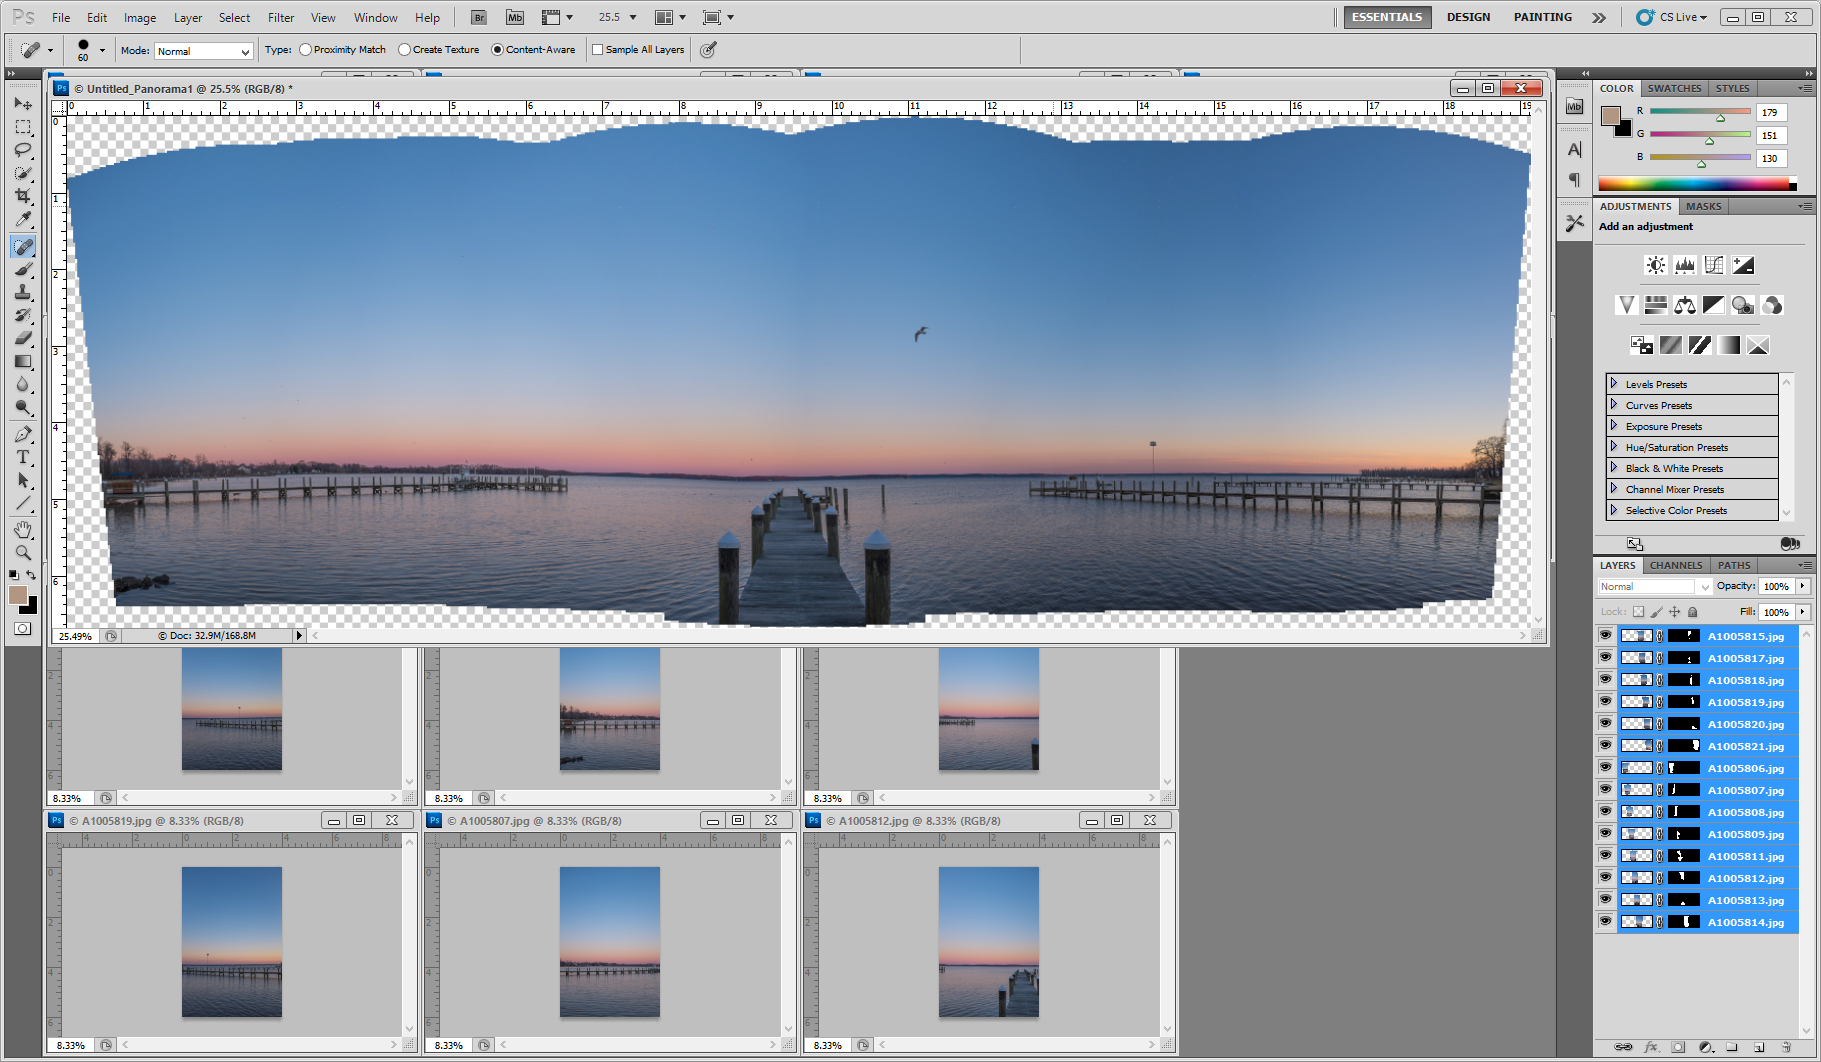
To finish the image, I make a new layer above these with all the lower layers flattened into one. Now I can work with all of these merged, but I still have the previous work still available so I can work without destroying the previous step.

Images stitched together - ©TimeLine Media
Images stitched together – ©TimeLine Media

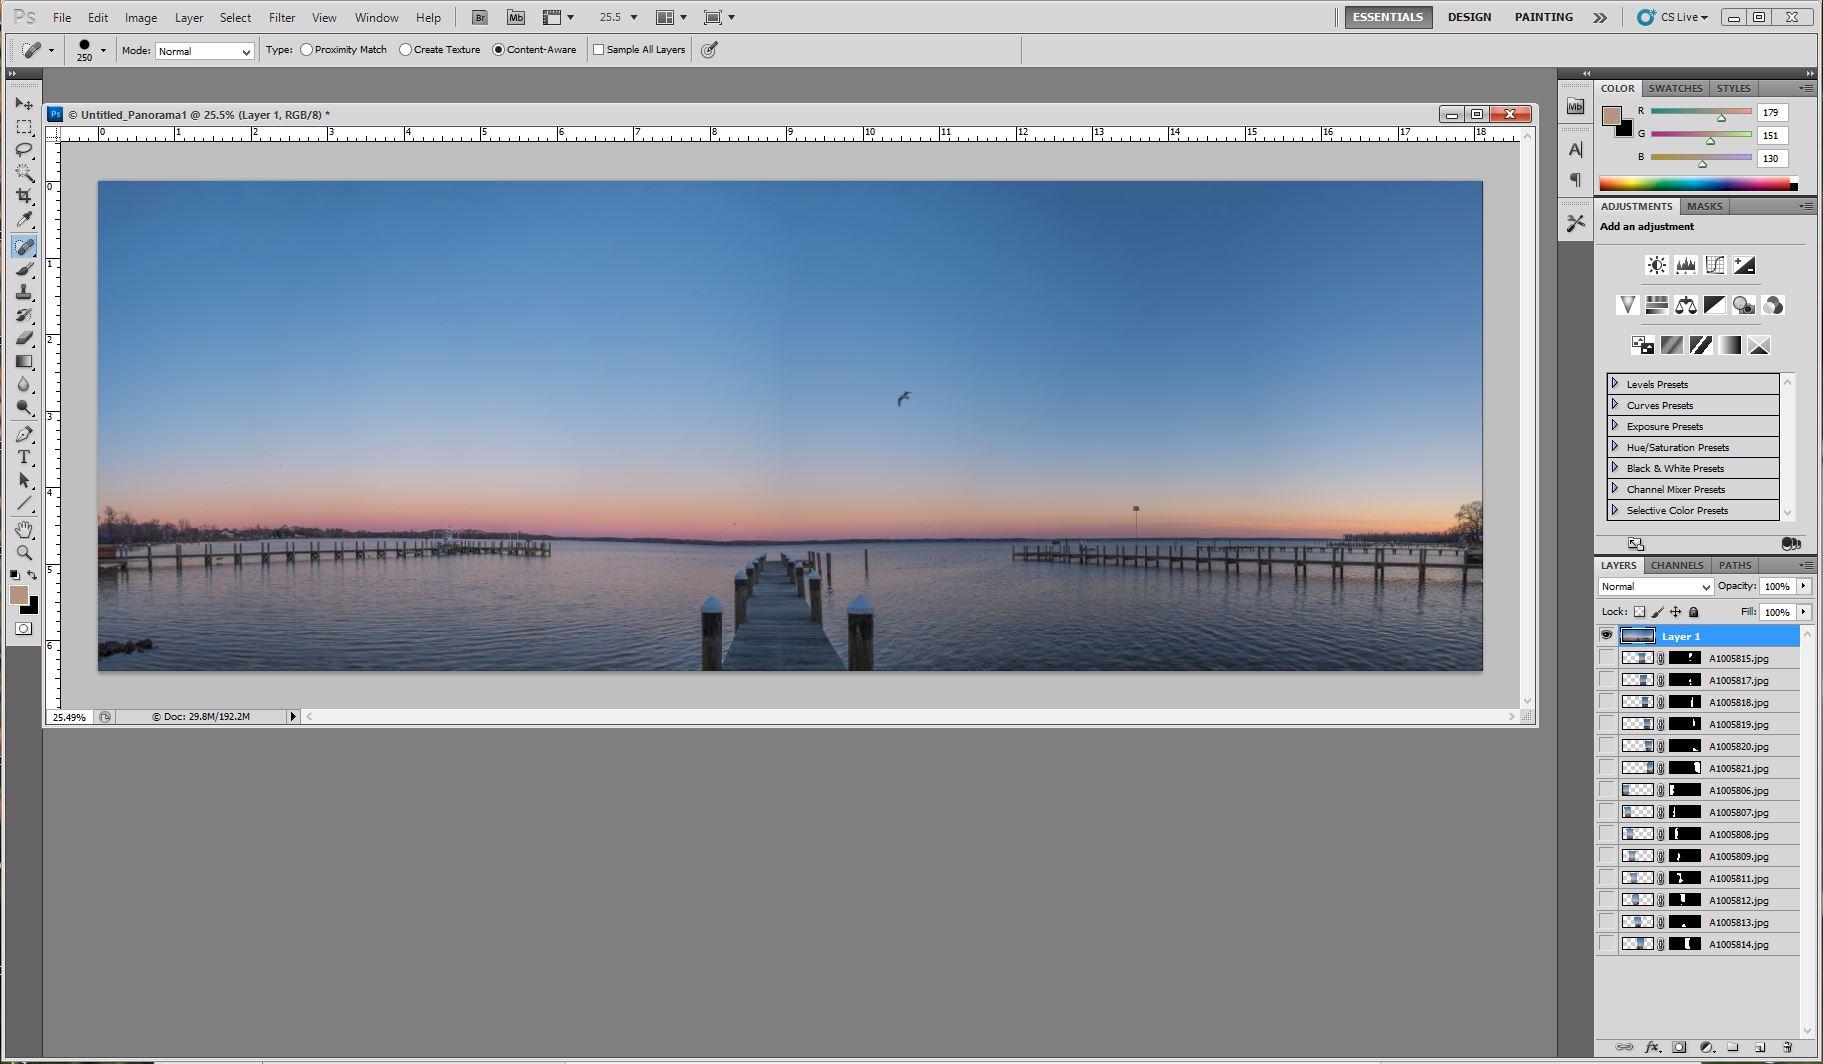
Now I just use the spot healing brush, and run it over the blank spots in the cropped image. This tool works really well for this image because of the large expanse of cloudless sky. You may have more trouble if the images you are using are busier, but you would be surprised at how good the math is with this tool!

Pier Panorama of 14 combined images - ©TimeLine Media
Pier Panorama of 14 combined images – ©TimeLine Media

TimeLine Media – www.timelinedc.com
703-864-8208

Great Gatsby Poster Part 1 – Tech Thursday

©TimeLine Media - portrait, background, and both merged

Movie Inspiration

This project came out of an event happening at our dance studio this October. An upcoming theme night in October would be dedicated to the novel and movie, “The Great Gatsby” by F. Scott Fitzgerald. With such an over-the-top production as Baz Luhrmann is stylistically known to produce, the poster likewise had to reflect the movie. We looked over all the posters from the recently released movie and found several types for different settings. All the photography was amazing, as well as the graphic design for the setting of the portraits. This particular version I thought would work well:

The Great Gatsby poster © 2013 Warner Bros.

The poster would have to have 7 portraits of the staff of the dance studio, so this would be perfect. Initially I cut faces out from photos I already have from the dance events, but my limited Photoshop skills did not make it work. So, I asked the studio if I could make 3/4 portraits of the staff to use for the poster. They were all excited about the idea, and we knocked out the shoot in 2 hours!

Afterwards, I thought that maybe I could just swap portraits in for the ones already in the poster. That did not work as it would be too difficult to take out the people underneath cleanly before putting in the new portrait. By now, I realize that I really underestimated what it would take to make this poster happen. So I went back to the original poster, and looked into creating the Great Gatsby poster from scratch.

Poster Design

There are repeating background for each of the portraits, and the text and borders were metallic to resemble gates surrounding a large estate. Illustrator would be used to make the backgrounds designs. I started drawing straight up and down lines and diagonal lines exactly 45 degrees from the original lines. When the space was filled, I copied the design, and flipped it horizonally to make a mirror images on the other half of the drawing to make the top of the image.

I then took these top two mirrored images, copied them together, and flipped it vertically to get the bottom half of the background. It actually turned out well! Here is how one of the portraits turned out. I’ll show you how I finished off the poster in a future post after the portraits and background were completed. From left to right are the starting portrait, the graphics made for the background, and both put together to be put into the poster.

©TimeLine Media - portrait, background, and both merged
©TimeLine Media – portrait, background, and both merged

TimeLine Media – www.timelinedc.com
703-864-8208