Posts Tagged ‘technique’

Clarity – Tech Thursday

©TimeLine Media - enhancing details in hair with the Clarity slider

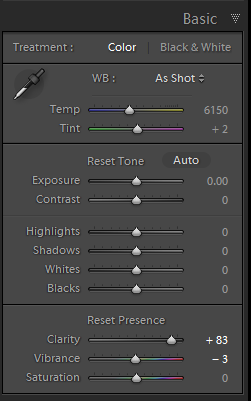
My photographic style is constantly evolving when it comes to my portrait and personal work. Since I have started shooting professionally, my style changed quite a few times. Whether this is normal for a photographer, I do not know! It seems like my style changes as software updates brings functionality to RAW processors. With each new feature,  I try what new changes I can make to photos, and implement them to more shoots. Also, my editing eye gets fatigued in putting the same effects to photos which is probably why I do not have many Lightroom Development presets any longer. My favorite slider that I am using more and more is the Clarity slider under “Presence” in the Develop module.

Adobe Lightroom - Develop Module Basic panel
Adobe Lightroom – Develop Module Basic panel

Adobe Lightroom

Clarity is a tool that has long been a part of Lightroom, but I have not used it much until version 4. It is a mid-tone adjustment which when applied to portraits, can give images a crisp edge that makes it look sharper overall when the value of the slider is increased. There is a contrast adjustment component to this slider that really focuses on edges as opposed to the entire frame making it less harsh than the Contrast slider when pushed to the limit. This works especially well with male portrait subjects or landscapes. On the other end of the scale, pushing the Clarity slider down will decrease edge sharpness and will soften edges. This was can easily be overdone resulting in a vaseline-on-the-lens look from vintage television programs.

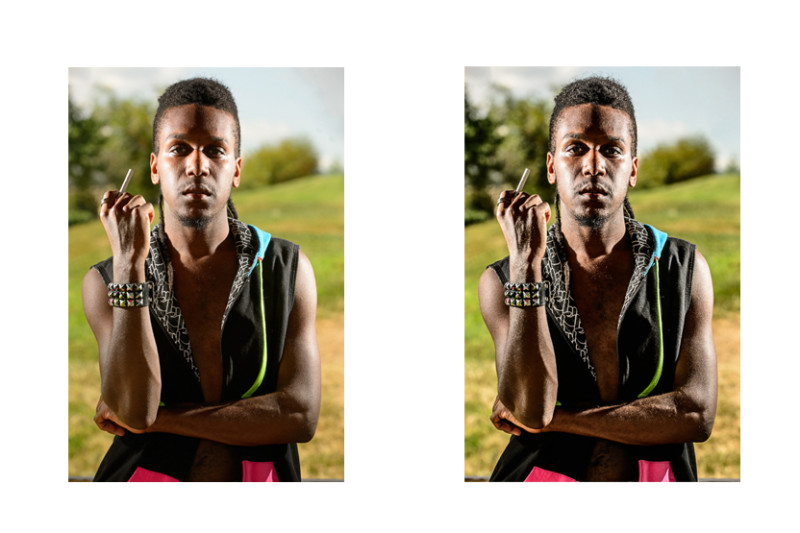
©TimeLine Media - Clarity slider example
©TimeLine Media – Clarity slider example

For the image above, the image on the left is with the default settings out of the camera. The image on the left is the same image with the Clarity slider adjusted to +83. It gives a grittier more edgy contrast that brings out more details in the portrait subject.

Pet Portraits

©TimeLine Media - enhancing details in hair with the Clarity slider
©TimeLine Media – enhancing details in hair with the Clarity slider

Just like every other slider that you can use on an image, it can be overdone. Just move the slider until you can see the Clarity effect start to show in hair, or around the eyes, then stop moving. For the most part, you can push it all the way to 100 without it having it destroy the photo, but it may become a muddy mess with dark areas that are crushed to nothing, and having it creep to areas that you do not necessarily want too dark. If printing the images, I use the default output print sharpening settings after adjusting sharpness with the Clarity slider. I have been pleased with the results so far!

©TimeLine Media - Portrait
©TimeLine Media – Portrait

TimeLine Media – www.timelinedc.com
703-864-8208

ISO – Tech Thursday

©TimeLine Media - ISO 8000 digital

For my professional photography career, I have been digital all the way. I am not nostalgic about the hey day of using film when capturing images. In the few times that I have used film, there is not much different in the way that the camera works. With later Nikon SLRs, the mechanics and ergonomics are almost exactly the same without the screen on the back for viewing images, of course. And then there is the ISO button.

One setting that is different on digital SLRs compared to film is the ISO button. This setting relates to the light sensitivity setting of the sensor and what I think what allowed digital photography to surpass film in quality and usability. Here is the reason why. ISO refers to the International Organization of Standards that creates the universal criteria for a variety of measures.

ISO Rating

The lower the ISO number on your camera, the LESS sensitive your sensor is to light (ie 100 or 200) . The higher the ISO number, the MORE light sensitive your sensor is to the light hitting the back of the camera (ie 1600, 3200 and higher). Back in the film days, you used to have to choose your film speed when you were at the store. This corresponds to the ISO setting in digital cameras. They would sell photos for bright daylight which would be ISO 100 or ISO 200, or you would choose an all-around film which would be rated at ISO 400, or you could get action film which usually would be black and white and be rated for 1600 or 3200.

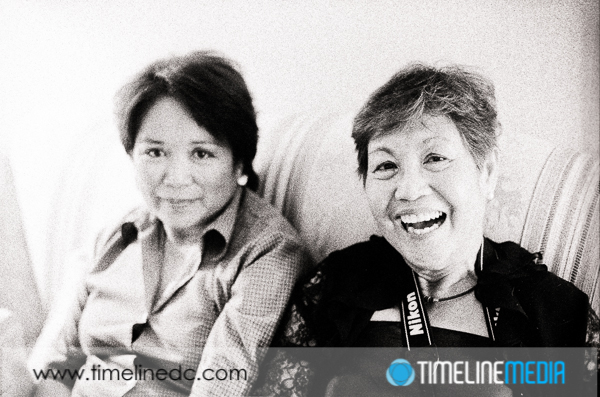
Why would you choose one over the other? In photography there are always trade-offs. In film, it is grain, in digital capture, it is digital noise. As your sensitivity goes up, so does the amount of grain or noise in your image. The lower ISO values give you the cleanest image without little dots of noise that do not accurately have represent the scene. Higher ISO values may introduce noise or grain artifacts, but it is possible for you to capture a sharp image with faster shutter speeds. Sometimes getting ANY image no matter how grainy is better than getting a completely blurry image without any grain. This was important for photo journalists that needed to get sports shots, or images in bad light without added lighting, and still be sharp enough for printing in the newspaper. Here is an example of a photo taken with Kodak T-Max that is ISO 3200:

©TimeLine Media - ISO 3200 film
©TimeLine Media – ISO 3200 film

Digital Grain

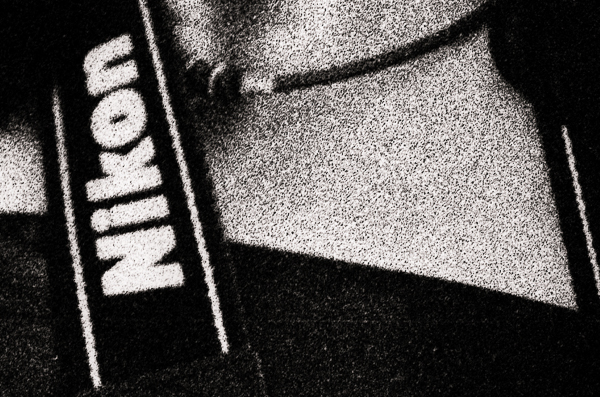
Yes, there is lots of grain in the image! But considering there was no added flash, and using only the ambient light from lamps in the room, you do get a sharp image, and you can make out the subject. Here is a 100% crop from this frame really showing the grain from the film:

©TimeLine Media - ASA 3200 film
©TimeLine Media – ISO 3200 film


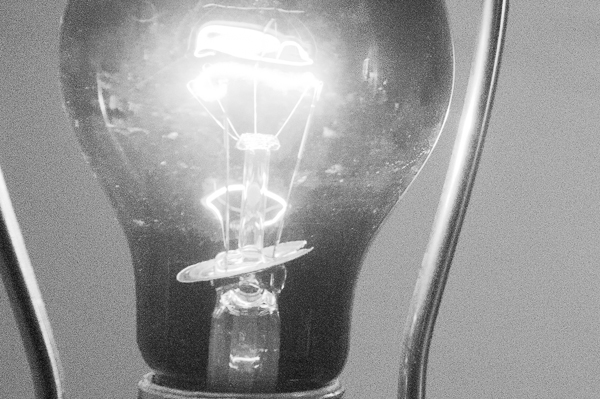
With digital photography changing at a rapid pace, the ability to shoot at higher ISO has become the next technological marking stick. Manufacturers have been making cameras that can shoot at higher and higher sensitivities. The magic in new hardware and software allows for this increased sensitivity without adding much noise to the image. Here is an example from a DSLR at ISO 8000 – almost 2 stops more sensitive than the film images above!

©TimeLine Media - ASA 8000 digital
©TimeLine Media – ISO 8000 digital


Here is the same image at a 100% crop:

©TimeLine Media - closeup of ASA 8000 digital
©TimeLine Media – ISO 8000 digital


The noise/grain is really minimized. From these developments, it really does not make as much sense to shoot film especially for sports or event photographers. This really changes what kinds of situations I can shoot, and what equipment I need to make good images. All digital cameras have an ISO setting, even the iPhone. You may not be able to control it, but you can go into the data for each of your images and see what was the sensitivity for each.

Camera Settings

At the beach on a bright sunny day, the ISO will be 50 or 100, and the computer in the camera will push the ISO up as it gets dark. With this changing automatically in point and shoot or smartphone cameras, you no longer have to worry about sensor sensitivity, but know that as it gets better, so will the quality of your indoor or lower light photos. Rest assured, the sensors in DSLRS are much larger making them much better, but it shows how much people want better low light photos for what they want to photograph.

TimeLine Media – www.timelinedc.com
703-864-8208
Color – Tech Thursday

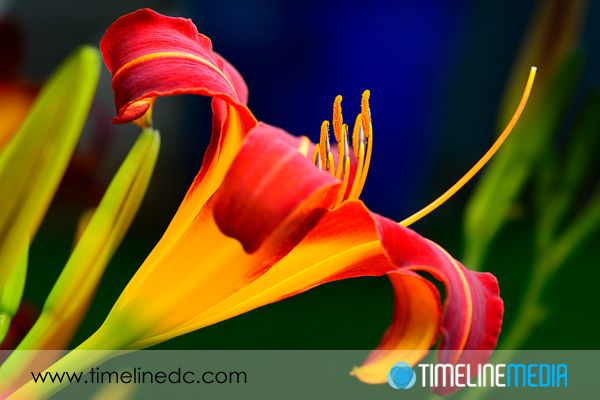
©TimeLine Media - Day Lilies

My photography has been primarily been in color. Ballroom dancers especially, love to show off their dresses and costumes in the vibrant hues with which they were made. In photography classes, I was first introduced to the color wheel and how the information it contains can help photography composition.

Color Wheel
Color Wheel

Color Theory

Examining the color wheel, you can see where lots of branding and logos get their colors. Complimentary colors lie across the color wheel from each other – red and green, or purple and yellow for example. Analogous colors are adjacent to each other on the wheel such as red and orange or blue and purple. This is another added element of creativity you can use in photography. As an example, here is another flower shoot that had some challenges.

This day lily has some beautiful color – newly bloomed, and early in the morning when the sun is lower in the sky, and not too harsh. It helps to keep the photographer cool too! So here is the first photo showing the flower with all the background elements surrounding the plot where they are planted.

©TimeLine Media - Day Lilies
©TimeLine Media – Day Lilies

A nice snap, but I don’t like a few things in this frame. There is an older lily that does not open any longer in the right side background of the frame. Then in the far back of the frame is a brown/gray area of the fence that was immediately behind the flowers. The first change I made was how close I was to the subject. Using a macro lens, you can get very close which easily eliminates some of these problems.

©TimeLine Media - Day Lilies
©TimeLine Media – Day Lilies

Adding flash to the photo also let me darken the background more than the first photo. This helps to take the fence out of the frame even more. The final change that I made was to use color to make a more pleasing background. Here is where card stock and a holder of some kind could help, but I did not have any of that available. So, I moved a large recycling bin into the background! It is a large, BLUE, plastic can that was easily maneuverable. On the color wheel, the reds/oranges are across from the blue range, so I thought it would be worth a shot.

I am happy with the results! It is subtle, but it added to the saturated look of the entire image. Try a color wheel experiment the next time you are shooting flowers, product shots, or fashion. The information from the color wheel can add to your creativity.

©TimeLine Media - Day Lilies
©TimeLine Media – Day Lilies

TimeLine Media – www.timelinedc.com
703-864-8208
1 14 15 16 17 18 19