Posts Tagged ‘technology’

Creating Vignettes with Flash

Lighting the Roosevelt Memorial with small flash - ©TimeLine Media

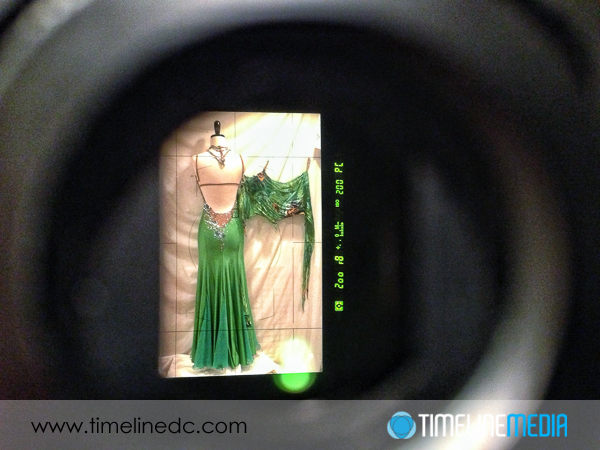
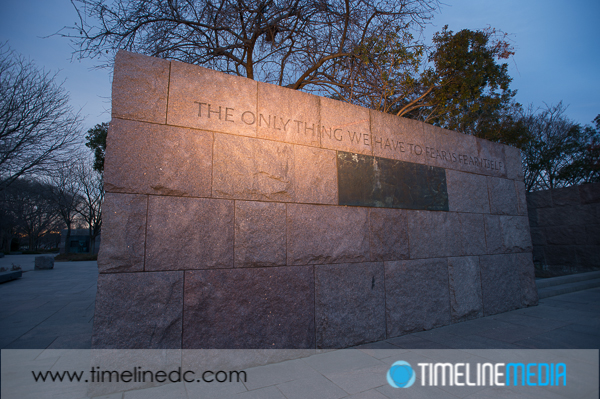
On yesterday’s post, I wrote about creating vignettes, in Photoshop. Today, I want to post some photos of another cool way to create vignettes, but this time, doing it in camera. I made these at the Franklin Delano Roosevelt Memorial in Washington, DC. In this walk-through park dedicated to the longest-serving US President, there are many of his quotes engraved into the large pink-colored blocks that make up the monument. You can use the color of the blocks to your advantage as pink and blue are next to each other on the color wheel, so they will work together well in a frame. Here is a frame of the manual exposure setup in the camera without the flash:

Roosevelt Memorial without flash - ©TimeLine Media
Roosevelt Memorial without flash – ©TimeLine Media

Washington, DC

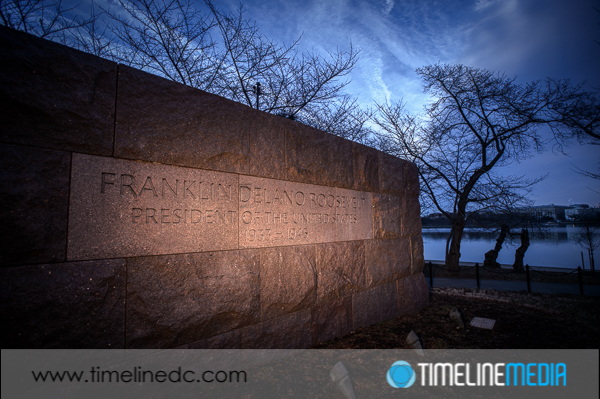
I am just looking to keep a dark, saturated blue in the sky. The flash will be used to illuminate the foreground and pop the subject out of the frame. To setup the flash, I put a warming gel over the front of the flash. Additionally I zoomed the head in to 180mm. This focuses the flash into a tight circle as opposed to just spilling light all over the scene. This is what creates the vignette effect which will draw your viewer’s eye to where you want it to go. I hand held the flash with my left hand, and made this photo:

Lighting the Roosevelt Memorial with small flash - ©TimeLine Media
Lighting the Roosevelt Memorial with small flash – ©TimeLine Media

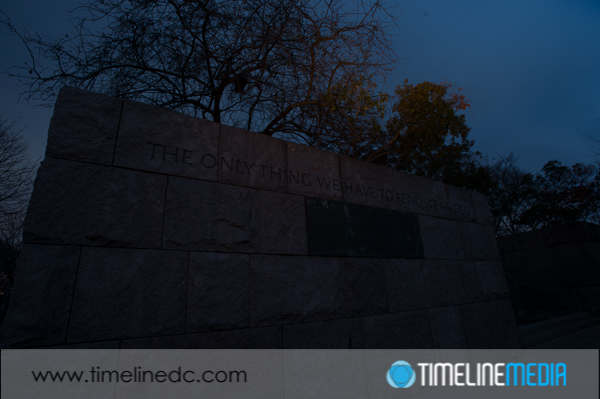
How far you zoom the head, can make the circle of light larger. Especially if you have more of an area you want to cover in light. This next photo, I zoomed the head out farther since I was standing farther away, and had more words that I wanted to light:

Lighting the Roosevelt Memorial with small flash - ©TimeLine Media
Lighting the Roosevelt Memorial with small flash – ©TimeLine Media

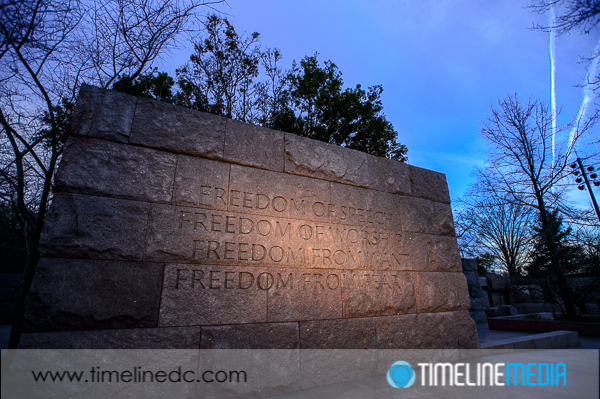
It was a challenge to get the light exactly right. Sometimes, I would flash the ground, sometimes, I would only light the trees above the blocks. It would be much easier to do this with the flash on a stand that you can control with more consistency, but I did not want to risk any entanglements with the park rangers. I simply used a hot shoe cable cord to get the flash off the camera, and fired away. Give it a try next time to get a different look at places that are photographed all the time!

Lighting the Roosevelt Memorial with small flash - ©TimeLine Media
Lighting the Roosevelt Memorial with small flash – ©TimeLine Media

TimeLine Mediawww.timelinedc.com
703-864-8208

Metering with Flash

Ballroom dance photo - ©TimeLine Media

From the post about starting with flash, I did get a question about how this affects the camera metering. Great question! As a review, the meter in the camera measures the amount of light that is reflected off your subject. When you shoot in manual mode where you specify the aperture and shutter speed of your photo, the in-camera meter will tell you whether or not your settings will produce a good exposure. A good exposure is or an overall 18% gray image.

The computer in the camera does not know anything about the subject you are photographing. Moreover it does not know what you are attempting to do. So it takes all the data from dark to light that is coming into the camera, and it spits out a scale. Where on the scale it meters will show you what your current settings will give you. If you are in the minus side of the scale, your overall image will be dark. However, if you are on the plus side of the scale, your image will be bright. The question came in from a recent image I posted from a product shoot where I photographed the viewfinder with my iPhone, and the scale was all the way to the minus side! Were my photographs all too dark or underexposed?

Flash Setup

Nikon viewfinder during product shoot - ©TimeLine Media
Nikon viewfinder during product shoot – ©TimeLine Media

This is where you need to add the flash, and the meter that is built into the flash can take over. If you are using the through-the-lens or TTL metering of your flash, there is a pre-flash burst that fires as you hit the shutter button. In that small time, this burst will be enough information for the flash to take in the scene, like your in-camera meter, then dial in the right amount of flash to add for a good exposure. You do not have to do any calculations or adjustments, the speedlight will do all that for you! This is one of the reasons these small units are so powerful. In quickly changing circumstances such as a wedding reception, or indoor event, you can turn in different directions very quickly and keep making flashes without changing your settings before each photo.

Bar Mitvah photo - ©TimeLine Media
Bar Mitvah photo – ©TimeLine Media

Just like using your in-camera meter, however, there can be some drawbacks. Depending on what you have in front of your lens, you may get over-exposed or under-exposed photos. Again, the camera cannot make any decisions on how you are composing your photo. It just sees dark and light. This is the reason why there are so many flash bulbs that will fire at the start of American football games – the cameras in the stands just see that light needs to be added to the scene. Why will using flash in this instance not work at all? I’ll post about that soon!

Ballroom dance photo - ©TimeLine Media
Ballroom dance photo – ©TimeLine Media

TimeLine Media – www.timelinedc.com
703-864-8208

Adding Light with Flash – Tech Thursday

Pet TTL flash portrait indoors - ©TimeLine Media

With the advances in digital photography, it is easier to explain how the camera calculates an exposure. Additionally, it is easy to visualize that a larger aperture opening will let more light into the frame, or a faster shutter speed will let in less light. Once you memorize that lower ISO values are less sensitive to light than higher ones, you have the basics of the “Exposure Triangle” mastered.

Flash Portrait

TTL flash portrait indoors - ©TimeLine Media
TTL flash portrait indoors – ©TimeLine Media

Getting photographers to start using flash is a difficult step. They start to freeze up. Almost as though they just put the camera back in Program mode again. They let the camera make all the decisions like they did when they first started taking photos. Just like the settings for Aperture, Shutter Speed, and ISO, working with flash can be straightforward. However, it does add another layer to the considerations when making images. I hope that through some posts, I can get you to experiment more with your flash. Hopefully you will learn how to control it to improve your photography. It will set you apart from “natural light” photographers that never add flash. There are many that choose to do this for artistic reasons, but do not be afraid to add this to your toolkit. You will be able to make images that are IMPOSSIBLE without the flash. If you have aspirations of photographing weddings, or events, you will need to use flash at some point in order to make images that grab attention.

Pet Portrait

Pet TTL flash portrait indoors - ©TimeLine Media
Pet TTL flash portrait indoors – ©TimeLine Media

In my previous post on flash, the settings on the speedlight were in the default TTL (Through-The-Lens) mode. This is the equivalent of the Program or P mode. The camera and flash work together to calculate how much light to add to your scene to get a good exposure. The computing power built into both ensure that you will get good exposures – and you can still control some of the aspects of the image. You can use TTL mode in Aperture priority so that you can set the depth of field in your image to keep that control over your composition. This is the first step – and likely you will get good results with the TTL settings on your camera. I’ll post how you can take control of this just as you do with your other settings in your camera to make even better images.

TTL flash portrait indoors - ©TimeLine Media
TTL flash portrait indoors – ©TimeLine Media

TimeLine Mediawww.timelinedc.com
703-864-8208

1 4 5 6 7 8 16