Archive of ‘Portrait’ category

Selfie

©TimeLine Media - self portrait

This photography term has become popular with the explosion of social media in the last few years. Back when film was the more popular medium for photos, I only saw a handful of instances where people made self-portraits with their cameras. Most of these would not be in focus. Or the subjects would not be in the frame, which would mean a wasted frame from your roll of film. Each frame was thought out more back then. With this in mind it would not be wise to use these for “throw-away” images that you attempt without looking through the viewfinder at the back of the camera.

Turning the Camera Around

I clearly remember the very first time I ever tried a “selfie”. It was at a big transition time in my life – just after college, and during the time when family was in town to pay final respects to my father. He had recently passed away, and we were surrounded by so many family and friends. It was a time where many photos were taken, and many trips were made to the drug store to get enlargements and copies. While taking photos with family outside, I turned an Advantix film camera (a graduation gift from my girlfriend’s mom) to me and my cousin, Vic. It is hard to take a bad photo of Vic – a talented singer that is used to working in front of an audience. For my first time, it actually worked!

©TimeLine Media - first "selfie"
©TimeLine Media – first “selfie”

I’m glad it turned out – so I kept trying.

©TimeLine Media - self portrait
©TimeLine Media – self portrait

With digital, I still take selfies. I do not own a mannequin head that photographers use test lighting, so I just put myself in the scene. I laugh like a madman at myself sometimes especially considering no one else is around. Thankfully it has helped to make shoots go smoother once the subjects arrive, and has helped me to be a better photographer by experimenting with a model that won’t stop posing until the shot is perfect.

©TimeLine Media - self portrait
©TimeLine Media – self portrait

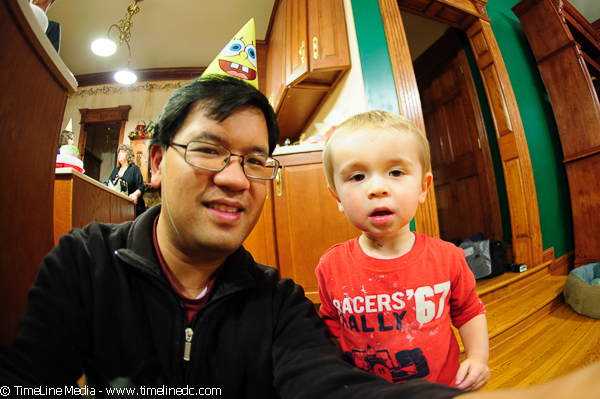
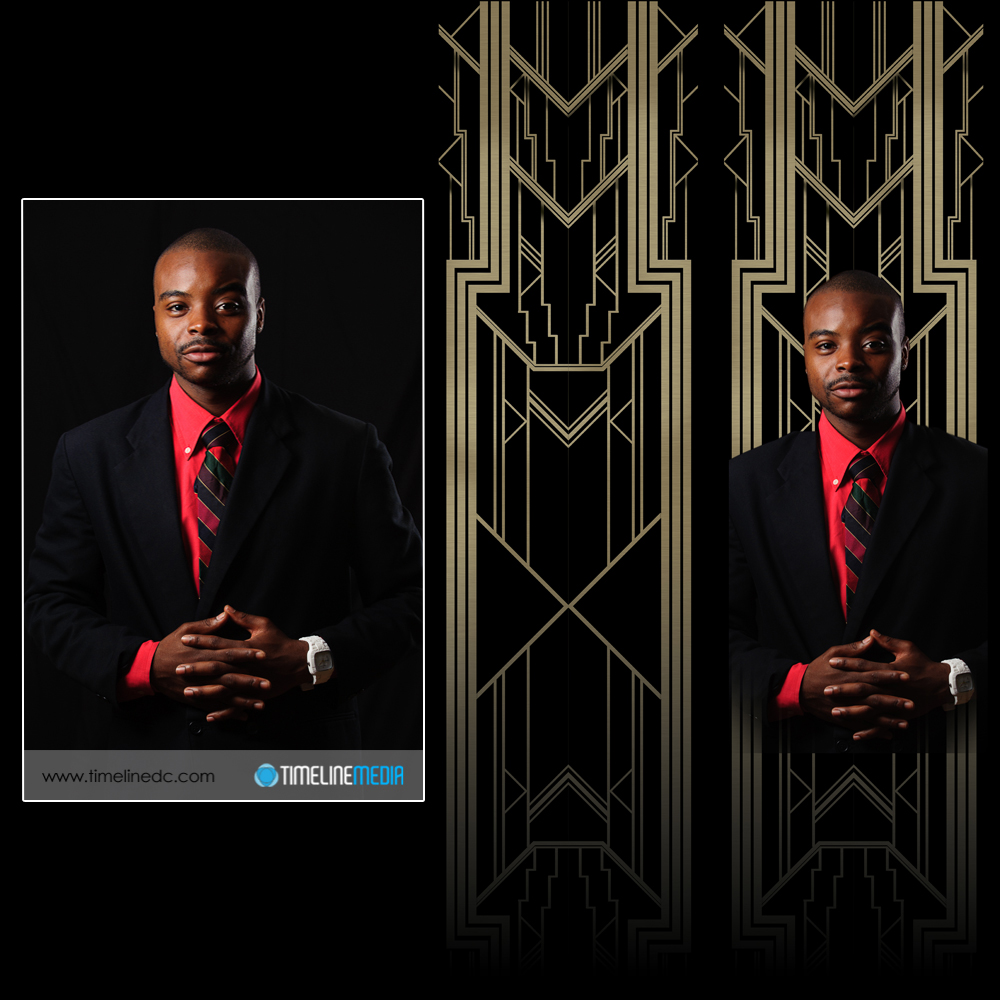
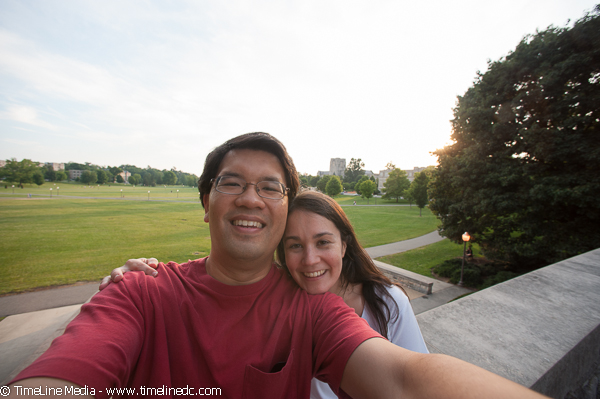
Large Camera Selfies

©TimeLine Media - self portrait
©TimeLine Media – self portrait
©TimeLine Media - self portrait
©TimeLine Media – self portrait
©TimeLine Media - self portrait
Author self-portrait ©TimeLine Media

TimeLine Media – www.timelinedc.com
703-864-8208

Great Gatsby Poster Part 2 – Tech Thursday

©TimeLine Media - Arthur Murray - Tysons Corner poster

Poster Creation

The last Tech Thursday, I posted about the Great Gatsby poster from the 2013 movie. I made myself a project to recreate the poster with our local dance studio since they are planning a party with a Great Gatsby theme this October. To start, I made portraits of all the staff, then made a background in Adobe Illustrator to place them. It was a background that was flipped and repeated so that it would give a consistent look to each of the portraits.

To come up with the dimensions for the backgrounds, I based it on a 20 x 30 image. This is a standard size for printing and framing of photos, and would be large enough to put 7 portraits on at one time. In Adobe Photoshop, you can create guides to help you line up elements in your image. So I started with a 20 x 30 image, then made guides all 14.3% apart from each other. This value comes from dividing 100 by 7, which is 14.28… Rounded to 14.3 would fill up the background close to 100% across – 100.1%, actually. Here are screen shots of how to do this:

New Guide option from the menu in Photoshop CS5

Select ‘View’ > ‘New Guide’ to create a guide on your image. The default units in this box are in inches, so change from in to %, and the guide will be placed 14.3% across the image vertically from the left.

Background Graphic Design

New guide at 14.3% of the background vertically

From here, I just selected the are to the left of the guide to get the dimensions to bring into Illustrator to create the background. Similarly, I made guides in Illustrator that divided the rectangle into quarters. I created the design in one corner, then flipped and moved the design until it filled up the entire area making the design nicely symmtrical:

©TimeLine Media - portrait background
©TimeLine Media – portrait background

I burned some of the smaller lines to make it look like they were continuing on under the larger lines. I also made a dark gradient towards the bottom of the frame to add more dimension to the background. Then I pasted the portraits on top of the background, and added them to the complete poster in my evenly spaced guides. This did take me about a day and a half to complete since I was learning a lot of new techniques in Adobe programs, but I think it came out nicely!

©TimeLine Media - Arthur Murray - Tysons Corner poster
©TimeLine Media – Arthur Murray – Tysons Corner poster

TimeLine Media – www.timelinedc.com
703-864-8208

Great Gatsby Poster Part 1 – Tech Thursday

©TimeLine Media - portrait, background, and both merged

Movie Inspiration

This project came out of an event happening at our dance studio this October. An upcoming theme night in October would be dedicated to the novel and movie, “The Great Gatsby” by F. Scott Fitzgerald. With such an over-the-top production as Baz Luhrmann is stylistically known to produce, the poster likewise had to reflect the movie. We looked over all the posters from the recently released movie and found several types for different settings. All the photography was amazing, as well as the graphic design for the setting of the portraits. This particular version I thought would work well:

The Great Gatsby poster © 2013 Warner Bros.

The poster would have to have 7 portraits of the staff of the dance studio, so this would be perfect. Initially I cut faces out from photos I already have from the dance events, but my limited Photoshop skills did not make it work. So, I asked the studio if I could make 3/4 portraits of the staff to use for the poster. They were all excited about the idea, and we knocked out the shoot in 2 hours!

Afterwards, I thought that maybe I could just swap portraits in for the ones already in the poster. That did not work as it would be too difficult to take out the people underneath cleanly before putting in the new portrait. By now, I realize that I really underestimated what it would take to make this poster happen. So I went back to the original poster, and looked into creating the Great Gatsby poster from scratch.

Poster Design

There are repeating background for each of the portraits, and the text and borders were metallic to resemble gates surrounding a large estate. Illustrator would be used to make the backgrounds designs. I started drawing straight up and down lines and diagonal lines exactly 45 degrees from the original lines. When the space was filled, I copied the design, and flipped it horizonally to make a mirror images on the other half of the drawing to make the top of the image.

I then took these top two mirrored images, copied them together, and flipped it vertically to get the bottom half of the background. It actually turned out well! Here is how one of the portraits turned out. I’ll show you how I finished off the poster in a future post after the portraits and background were completed. From left to right are the starting portrait, the graphics made for the background, and both put together to be put into the poster.

©TimeLine Media - portrait, background, and both merged
©TimeLine Media – portrait, background, and both merged

TimeLine Media – www.timelinedc.com
703-864-8208

1 17 18 19 20 21 23