Archive of ‘Technology’ category

Washington Monument at Sunrise

Washington Monument HDR - ©TimeLine Media

Frozen Reflecting Pool

We have traded the cold for rain! With this in mind, I have not been able to get out there to make more photos in the early morning. Overall, it has been too overcast and rainy to get me out there. I should have made the effort, however, I am backed up with other work . Additionally, I would need to gear up with rain repellent gear for me and the cameras. Needless to say, I got lazy this week. There is still a backlog of other images that I have not posted about on the blog. These are images of the Washington Monument at sunrise from the reflecting pool that is situated at the front of the Lincoln Memorial.

Washington Monument - out of camera exposure - ©TimeLine Media
Washington Monument – out of camera exposure – ©TimeLine Media

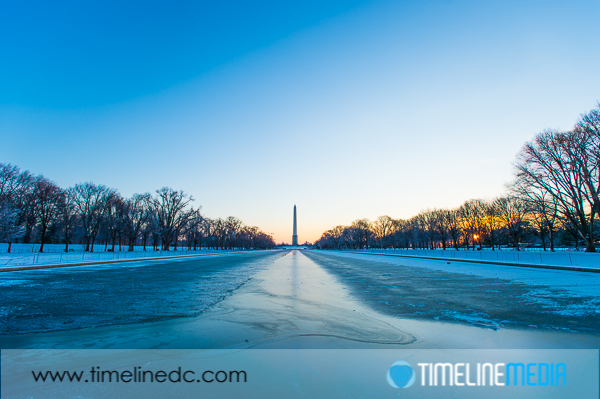
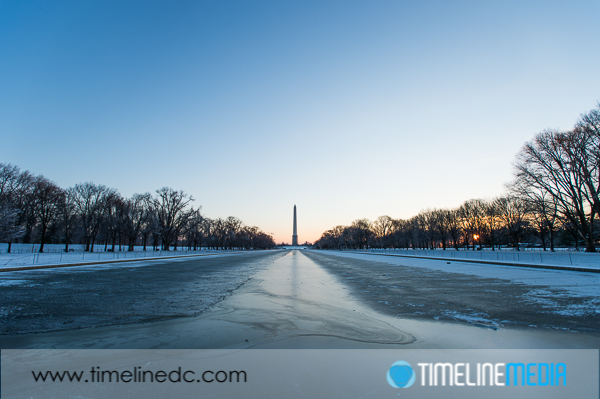
Washington Monument

This is one of the images taken straight out of the camera. In this case, I took a bracketed series of photos around this exposure to combine into an HDR final image. From this file, you can make edits right in Lightroom to bump up the Exposure, Shadows and contrast, then adjust the vibrance to make this image:

Washington Monument - out of camera adjusted exposure - ©TimeLine Media
Washington Monument – out of camera adjusted exposure – ©TimeLine Media

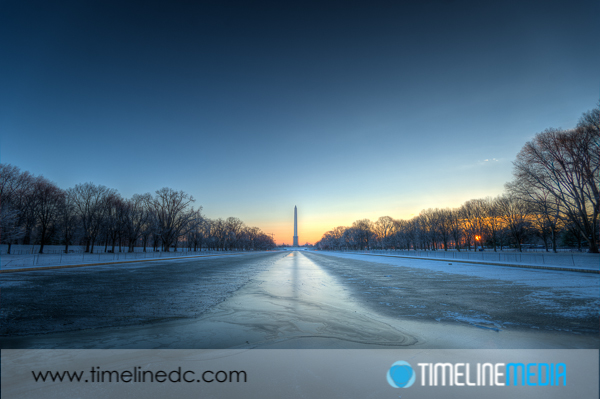
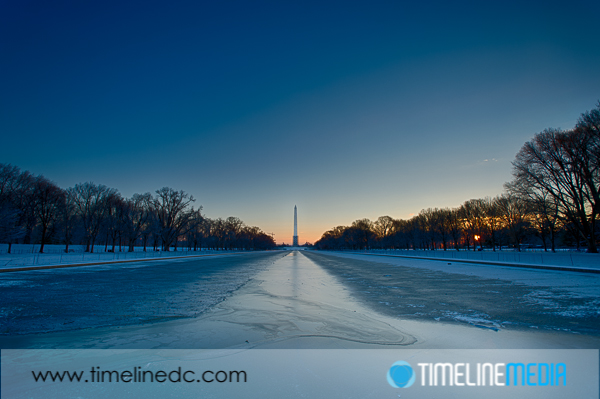
HDR image

I was surprise to see how much data you can pull from one Raw file! Processing the 9 different exposures into HDR Efex Pro 2, I adjusted the sliders in that program to get something similar. My goal was to bring out more detail in the monument face and trees lining the pool on either side since those areas were so dark.

Washington Monument HDR - ©TimeLine Media
Washington Monument HDR – ©TimeLine Media

When editing in HDR Efex Pro 2, I was able to use control points to directly edit the face of the monument. Sunrise is not the best time to photograph the Washington Monument from this angle. It loses a lot of the luster and shine with the backlight from the rising sun. I tried to pick HDR treatments where I could bring back the light color of the monument bricks. I already have some places in mind that are situated better in the early morning light to photograph next. If you have any suggestions, please let me know! Stay tuned-

Washington Monument HDR - ©TimeLine Media
Washington Monument HDR – ©TimeLine Media

TimeLine Mediawww.timelinedc.com
703-864-8208

Flash basics – Tech Thursday

Flash with head in position to bounce off ceiling - ©TimeLine Media

Testing with a Statue

Today, I have been reviewing previous posts about a new camera, or perhaps a flash. I have been making these posts from the side of what advice would I give to someone that just received a new DSLR for Christmas and what would they do with their new toy. After the first few weeks of just taking photos, getting comfortable with how the camera feels in the hand, and being confident that it would not lose any of the photos that you take with it.

One of the first accessories that people use frequently, but often incorrectly, is the flash. Going around the tourist areas, or looking at the crowds at sporting events, there are so many people that use their flash. This is because the photos from their camera using their default settings are too dark for the situation. Indoors under artificial light, or any photo taken at night, the flash will pop on your camera to brighten the scene. You will definitely make your photos brighter with the flash, but a lot of times, the light will be ugly! Here is the reason why, and how you can make it better.

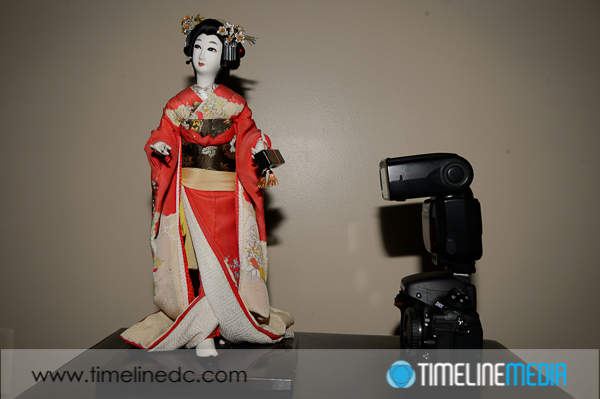
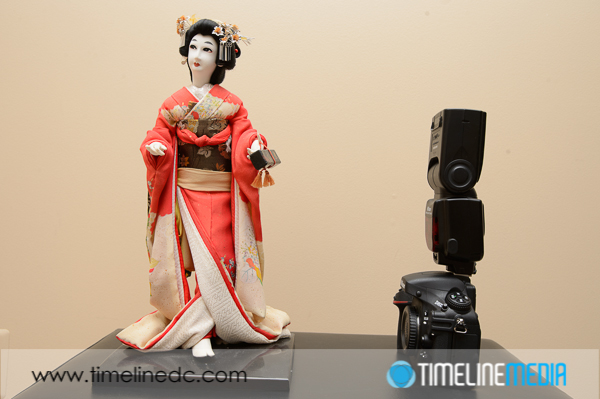
Flash with head pointed directly at subject - ©TimeLine Media
Flash with head pointed directly at subject – ©TimeLine Media

This first image shows the default direction for a speedlight flash mounted on a camera. The thinking here is what you want to brighten is right in front of the camera. So, firstly, point the flash directly in front of you. This will get you a sharp, bright photo. Likely, only whatever is right in front of the camera will get the light. There will be a dark, harsh shadow right behind your subject if you pose them against a wall. To make this light better, you can take your speedlight and point it straight up to the ceiling. Doing this will “bounce” the light from the ceiling back down to your subject.

Bounce Light

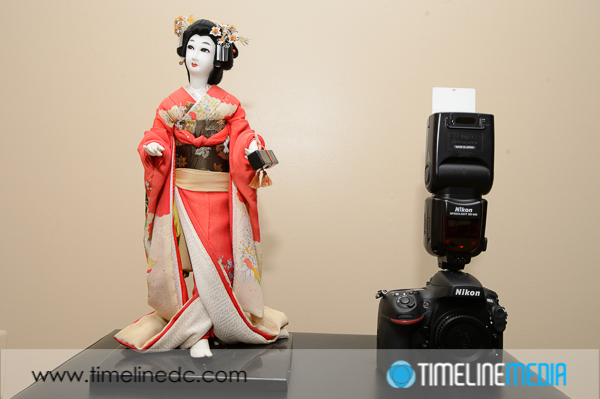
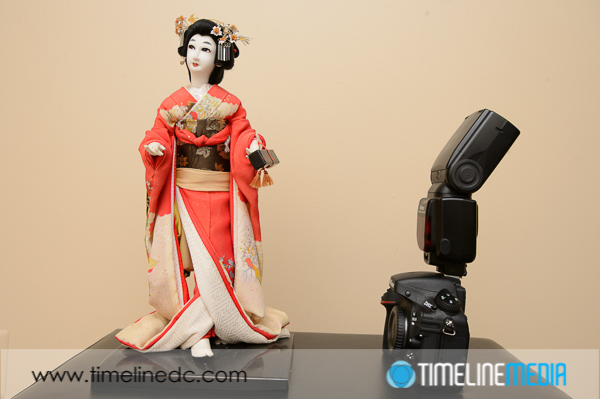
Flash with head in position to bounce off ceiling - ©TimeLine Media
Flash with head in position to bounce off ceiling – ©TimeLine Media

The result is that the light becomes very soft against your subject because you have made the light source much larger. Instead of coming from the front of the flash before hitting your subject, the light is spread out across the ceiling and surrounding walls. By the time it hits the subject, it is much larger in area, which makes light much softer. Easy!

Flash with head in position to bounce off ceiling - ©TimeLine Media
Flash with head in position to bounce off ceiling – ©TimeLine Media

Some speedlights have a little white card inserted at the front of the flash. Pop this little accessory up to direct just a little more of the light forward if you are photographing a person. This will brighten their faces nicely with not as harsh a shadow behind the subject and keeping the overall light in the scene soft. If you are in a place with very high, or no ceiling, you can even point the flash directly behind the camera to bounce off a wall in back of you. It can give a similar result to bouncing off the ceiling. There are many other tips on using your speedlight flash, this is just the beginning. If you have any more questions on how to use your flash, let me know!

Flash with head in position to bounce behind wall - ©TimeLine Media
Flash with head in position to bounce behind wall – ©TimeLine Media

TimeLine Media – www.timelinedc.com
703-864-8208

Photo of the day – HDR Lincoln Memorial

Lincoln Memorial - HDR from HDR Efex Pro 2 - ©TimeLine Media

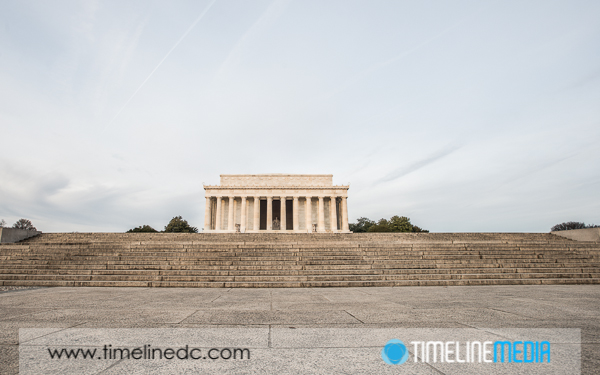
Below are photos of the Lincoln Memorial with some examples of how you can develop a photo in different ways. Firstly is just from one exposure with adjustments in Lightroom. In other words, a ‘normal’ processing from out of the camera.

Lincoln Memorial with only Lightroom adjustments - ©TimeLine Media
Memorial with only Lightroom adjustments – ©TimeLine Media

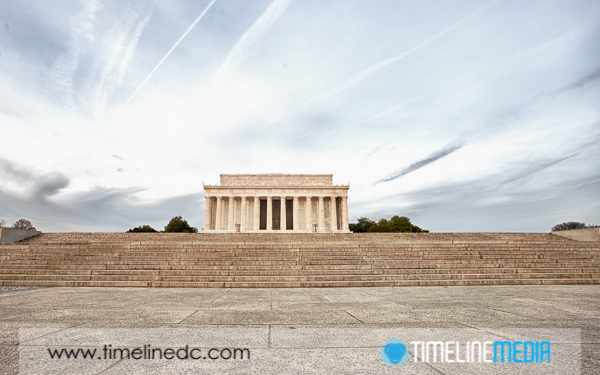
The other images were processed in HDR programs from 9 separate exposures. In summary, the images were bracketed at different exposures. Afterwards. these images were used as sources for HDR programs.

Memorial - HDR from Photomatix 5 - ©TimeLine Media
Lincoln Memorial – HDR from Photomatix 5 – ©TimeLine Media

This shows not only the possibilities with processing images in one program, but the amount of information available in combining exposures really opens up a lot of options! The HDR processing started from photo realistic presets.

Memorial - HDR from HDR Efex Pro - ©TimeLine Media
Memorial – HDR from HDR Efex Pro – ©TimeLine Media

Many of the “artistic” or “surrealistic” presets were a little off the chart for me. Especially with a subjects like the Lincoln Memorial, going too far on the processing would have really taken away from the image. Let me know which of these came out the best. If you have any tips for processing HDR images, or post processing architecture or landscape images, let me know!

Lincoln Memorial - HDR from HDR Efex Pro 2 - ©TimeLine Media
Lincoln Memorial – HDR from HDR Efex Pro 2 – ©TimeLine Media 

TimeLine Media – www.timelinedc.com
703-864-8208
1 19 20 21 22 23 41