Posts Tagged ‘lens’

Smithsonian Buildings Tilt Shift

Washington, DC

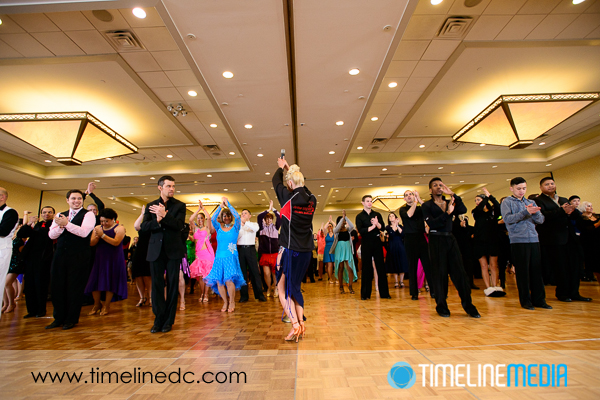
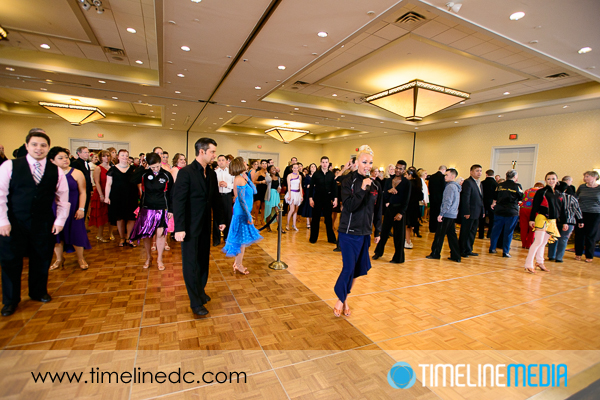
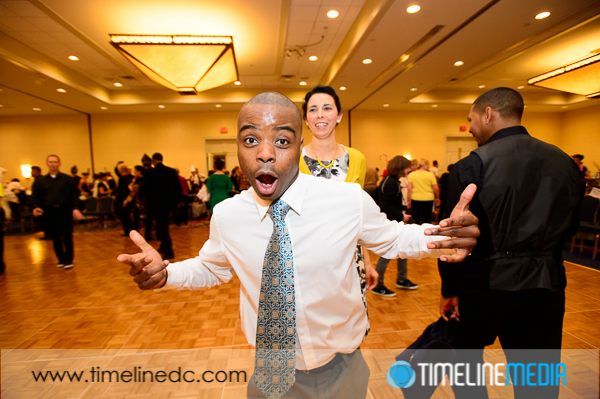
The blog has been very ballroom dance heavy the last week. The dancing photos have just been a big part of my computer time, so I had them at the top of mind lately. I’ll start switching the subject out today. A few weeks ago, I had the opportunity to walk around some Smithsonian museum buildings in Washington, DC.

Kryptos statue - Washington, DC - ©TimeLine Media
Kryptos statue – Washington, DC – ©TimeLine Media

During the summertime months, the area is filled with groups of tourists, school groups, and other visitors to the city. Mixed with all the government workers going about their business, it is a busy time for this area. I blended in much more with the tourists pointing their cameras at all the recognizable buildings.

Lens Practice

For this walk, I just had one lens on my camera – the 24mm PC-E tilt shift. I wanted to make more comparisons with some larger buildings than the ones in my neighborhood. The Hirshhorn Museum was one that I wanted to try. There are usually not as many pedestrians or large buses parked by the Jefferson Street side, so I went there for my test. Here are the two images, the first uncorrected with the camera pointing up towards the building, the second shifted to straighten the lines of the facade.

Hirshhorn Musem - Washington, DC - perspective uncorrected - ©TimeLine Media
Hirshhorn Musem – Washington, DC – perspective uncorrected – ©TimeLine Media
Hirshhorn Musem - Washington, DC - perspective corrected - ©TimeLine Media
Hirshhorn Musem – Washington, DC – perspective corrected – ©TimeLine Media

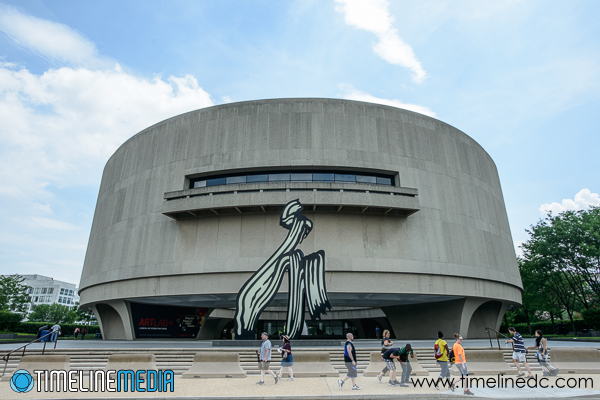
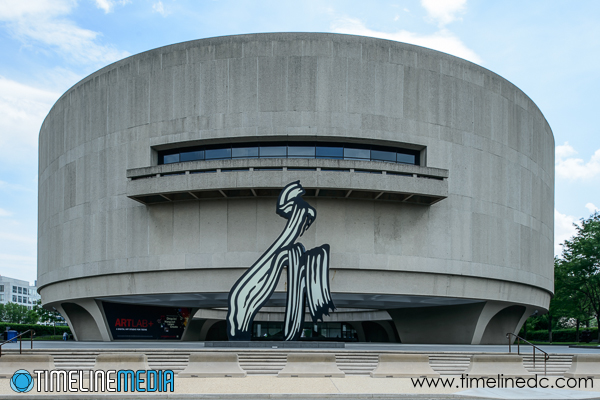
The second is really a different view than what you see as you drive by. The main circular section looks to be suspended in mid air one story above street level. As you take photos of the building when you walk by, the “leaning back” perspective is what you normally see from close below the structure. The corrected version seems so straight, that it does not look right to my eyes! When drawing straight lines, though, everything lines up as it would on a sheet of paper if you were making a blueprint of the building. This was my first try, and it will probably not be the last time that I go back to a familiar place that I am accustomed to seeing with distorted vision due to perspective.

TimeLine Media – www.timelinedc.com
703-864-8208

Changing Backgrounds in Photos – Tech Thursday

Wide angle lens pointed upwards - ©TimeLine Media

Chantilly, Virginia

If you were doing an internet search for this topic, you may expect to have an extended Photoshop tutorial. This is definitely not a selection/replacement background tutorial as I am really not the most creative with software. The post comes from looking over backgrounds in ballroom dance photos. This idea works best from the last Arthur Murray Spring Freestyles event that was held at the Westfields Marriott hotel in Chantiily, VA.

The main ballroom has some interesting lights hanging from the ceiling. They are pyramid shape, and hung with the small pointed side facing downwards towards the floor. Moreover, they have very large plain sides creating their shape which makes them an interesting background element in the photos. They do not have the small, rounded out of focus circles that you get from chandelier or smaller light sources. Here, the entire shape can take on a different look depending on the focal length of the lens used. This first image is taken at a very wide angle of 17mm:

Wide angle lens pointed straight ahead- ©TimeLine Media

Working the Angles

This makes the lights clearly in focus along with the dancers on the floor. You can clearly see all the detail, mounting, and edges of the lights. From this angle which was taken from a standing height with the lens pointed towards the dancers. It is possible to drastically change the background in the photo by changing only the angle of the camera. In this next photo, the focal length is still 17mm, but I changed my position by going to my knees, and pointing the lens up towards the ceiling. With this wide angle lens, the lamps on the ceiling become much more elongated looking much larger than in the previous photo!

Wide angle lens pointed upwards - ©TimeLine Media
Wide angle lens pointed upwards – ©TimeLine Media

This can be to your advantage when shooting events. You can to give viewers different looks from the event by changing backgrounds. Once you already have one angle, change where you are shooting and more around the scene to see what different looks you can get when the action is not changing much. It keeps your eyes looking through the frame and avoiding fatigue. It will also make for different looks to see when post processing later.

Spring Freestyles Photos Released - ©TimeLine Media
Spring Freestyles Photos Released – ©TimeLine Media

TimeLine Media – www.timelinedc.com
703-864-8208

Leaf Shutter Lenses Part 2 – Tech Thursday

Outdoor portrait with leaf shutter lens and flash - ©TimeLine Media

Last Tech Thursday, I had the first post on using leaf shutter lenses. In doing a little research, there are not too many of these that are available in convenient or “affordable” kits. The ones that are available cost most than most DSLRs bundles with lenses – for the lens alone! These are normally in the realm of the medium format cameras with much larger sensors, and much higher price tags. A new medium format camera is in the $15,000 – $40,000 range with the accompanying leaf shutter lenses starting at $4500+.

So you can see why I was excited to learn that the relatively inexpensive Fuji X100s has a leaf shutter. As a refresher, here is a photo taken without any added flash outside. It is the metered exposure from the camera, and has a nice shallow depth of field with the trees and the shed going out of focus. The settings were 1/1000th second at f/2.0 ISO 200. The shutter speed was very fast due to the open aperture. There was bright sun that is starting to set but is still high overhead.

Flash Photography Test

Flat outdoor portrait without fill flash - ©TimeLine Media
Flat outdoor portrait without fill flash – ©TimeLine Media

With a typical DSLR, you would not be able to use these settings to get proper exposure*. The 1/1000th of a second exposure time is too fast for the flash to fully expose the frame. You will have a black bar along one of the long sides of the frame where the shutter is still covering part of the frame. You are limited to 1/200th or 1/160th of a second on most cameras. To find your, look in your manual, and look for the maximum flash sync speed. On the Fuji X100s, however, the leaf shutter lens is able to sync with the flash up to this fast shutter speed. This is the biggest benefit to using these types of lenses – having more control over balancing the available light in the scene with added light from a flash or strobe.

Outdoor portrait with leaf shutter lens and flash - ©TimeLine Media
Outdoor portrait with leaf shutter lens and flash – ©TimeLine Media

You can keep the nice darker blue sky, and saturate the other colors by underexposing the background with a high shutter speed. The flash power you can control from the strobe or by adjusting the aperture. Even though in some of these, the aperture was not wide open, it was only closed about 1 stop which keeps the background nicely out of focus compared to your subject. I cannot wait to do more shooting with this setup! It gives a lot more flexibility in what time of day to make outdoor portraits.

Outdoor portrait with leaf shutter lens and flash - ©TimeLine Media
Outdoor portrait with leaf shutter lens and flash – ©TimeLine Media

TimeLine Mediawww.timelinedc.com
703-864-8208

1 2 3