Posts Tagged ‘post processing’

Analog Efex Pro 2 – Tech Thursday

Post Processing

There is a proliferation of images these days. Affordable digital cameras, and smartphones has made photography so accessible to so many. Looking on Flickr, one of the most used social networks for sharing photos shows that the 4 most popular cameras used in its community are iPhone models! With so many of these similar cameras in use, it is easy to see why Instagram, VSCO, and other filter apps are popular. They all have filters that allow users to easily change the default image coming out of the camera. There is enough in these apps that you can drastically change an image right on your phone prior to sharing. This adds to the popularity of taking and sharing images online.

Original photo out of camera - ©TimeLine Media
Original photo out of camera – ©TimeLine Media

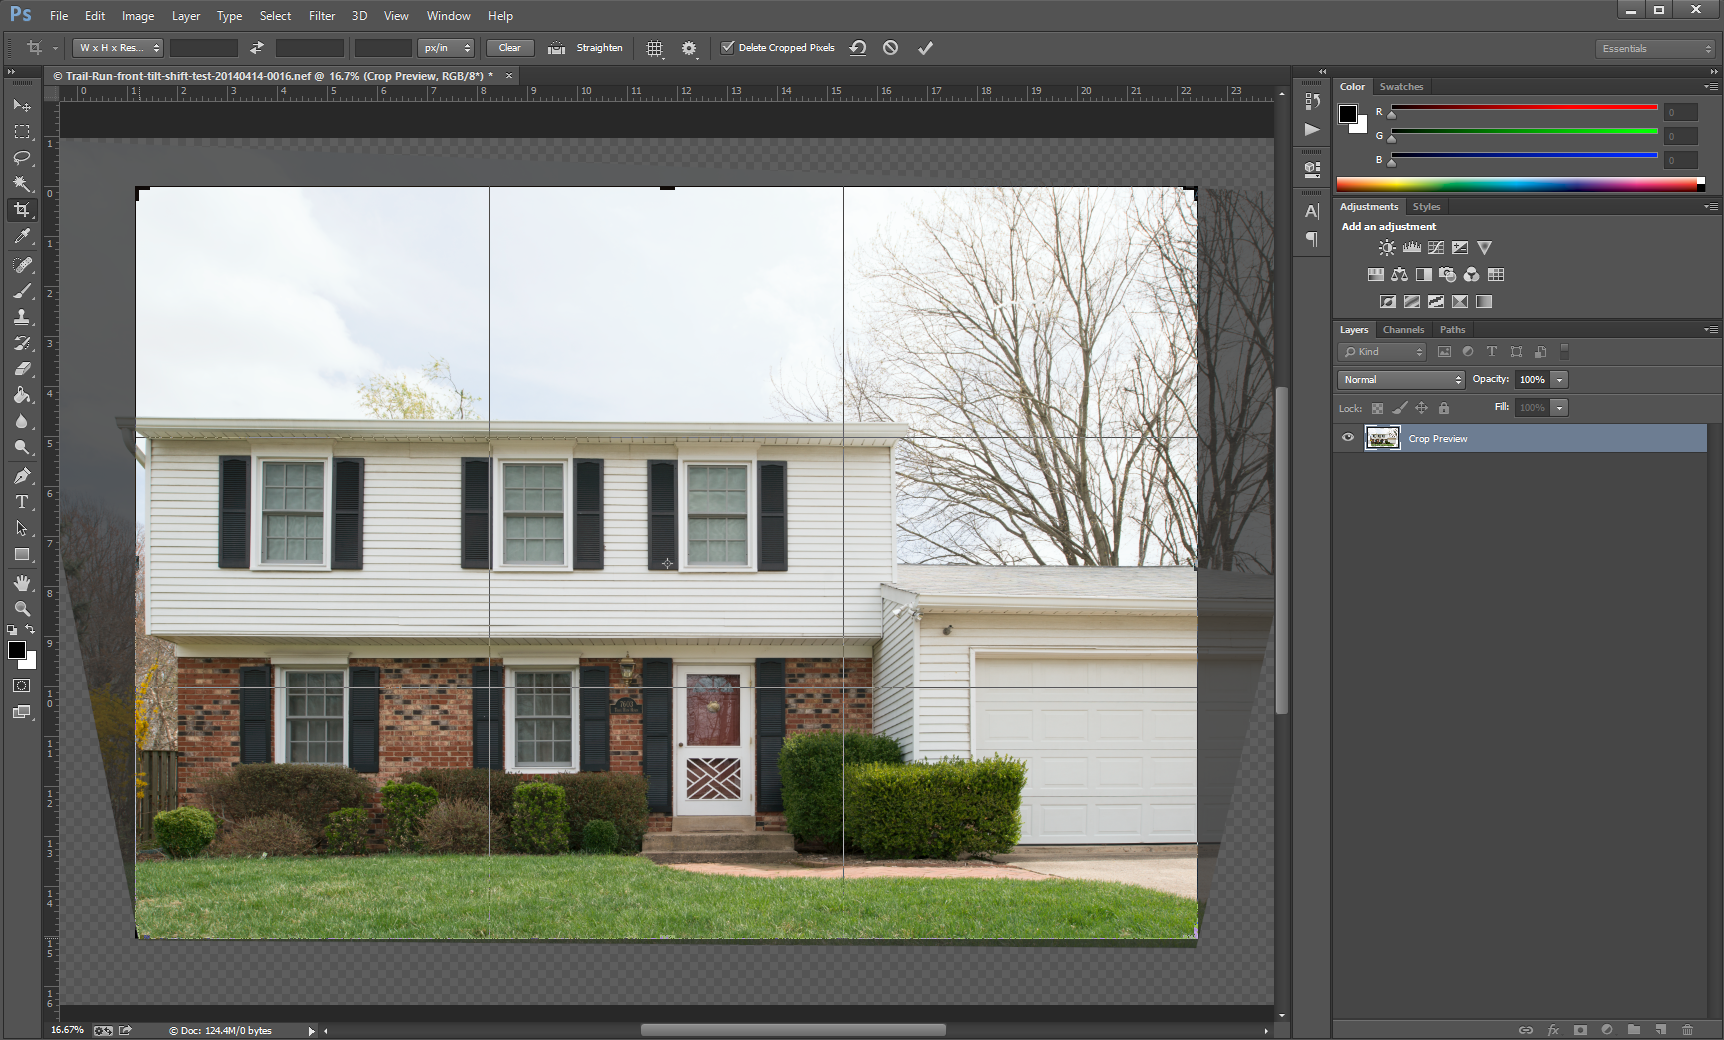
For professional photographers, these kinds of tools have been available in Photoshop and Lightroom for many versions. The difference to me is the ease of use. The complexity of these programs keeps photographers from taking advantage of these tools. Lightroom does come with presets that can give your images different looks by applying adjusted sliders to an image. Instantly you can get a different look by changing color, contrast, or any of the sliders in Lightroom.

Software Plugin

Lightroom edit of original photo - ©TimeLine Media
Lightroom edit of original photo – ©TimeLine Media

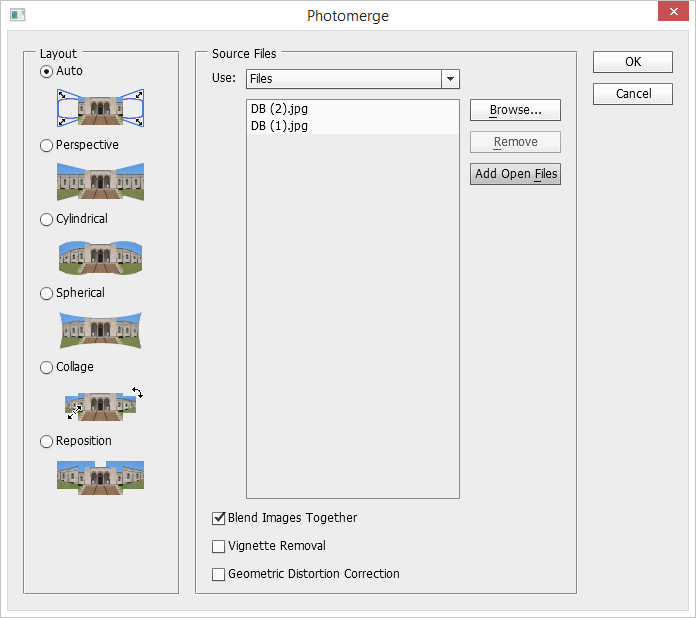
Some functionality you cannot get in Lightroom includes adding frames edges, creating double exposures, or adding grunge with layers. This is a function that is typically done in Photoshop which is not really my specialty. That is where Analog Efex Pro 2 from the Google Nik Collection. This is a plugin for Photoshop that allows you to make changes like adding dust, grain, and light leaks. You can also add a grunge, or sloppy frame that makes your photo look like it was taken out of a developer bath in the darkroom.

Analog Efex Pro 2 edit of photo - ©TimeLine Media
Analog Efex Pro 2 edit of photo – ©TimeLine Media

Analog Efex Pro makes it easy for you to made adjustments using sliders. There is no complicated switches or menus that you encounter in Photoshop, so it makes it easier to experiment and try different settings before finalizing your image. I’ll post more about this new program as it is really in depth as to what you can do. It is very powerful, and a great tool to add to your post processing.

Arthur Murray Chevy Chase - ©TimeLine Media
Arthur Murray Chevy Chase – ©TimeLine Media

TimeLine Media – www.timelinedc.com
703-864-8208

Software Perspective Correction

Final software corrected image

Post Processing

Thanks to feedback from my photographer friend, Jae, I decided to try editing the photo from yesterday’s post in software. In that case, I compared two images from a Nikon PC (perspective correction) or tilt-shift lens. Overall you can use this special lens to straighten angles of buildings that you photograph. Concurrently, the images will not have that “falling away” look. This is usually what you get when the camera is pointed up towards the top. With this in mind, here is a repost of the two images – the one on the left uncorrected, and the one on the right straightened.

Tilt Shift comparison - ©TimeLine Media
Tilt Shift comparison – ©TimeLine Media

Today, I attempted to do the same correction on the left photos, but in Photoshop CC to see how close you can get in post. In Photoshop, I selected the Perspective Warp tool by selecting it under the Edit menu. This is the dialog box that pops up:

Adobe Photoshop

Adobe Photoshop Perspective Warp - 1
Adobe Photoshop Perspective Warp – 1

It tells you to draw a box around the areas that you would like to straighten. I go for the top half of the house as this is where I saw the biggest change in the photo.

Adobe Photoshop Perspective Warp - 2
Adobe Photoshop Perspective Warp – 2

Next, I moved the corner dots to the edges of that section of the house that I wanted to line up:

Adobe Photoshop Perspective Warp - 3
Adobe Photoshop Perspective Warp – 3

Turning on the Grid lines, it makes it easier to adjust the dots to be straight to each other, and the rest of the photo adjusts along with them:

Adobe Photoshop Perspective Warp - 4
Adobe Photoshop Perspective Warp – 4

Clicking the check mark gives you this image:

Adobe Photoshop Perspective Warp - 5
Adobe Photoshop Perspective Warp – 5

This is very close to the corrected image! Unfortunately, you can see how much of the photo needs to be cropped out, which means that I will lose some of the structure in order to fill in the black background.

Adobe Photoshop Perspective Warp - 6
Adobe Photoshop Perspective Warp – 6

This is the real power of the tilt shift lens. In this case, the background is just made of lawn and driveway. You may need to have that area for indoor photos, or other larger projects. This also shows that this is a very specialized lens that will really show its magic in specific circumstances. It was fun trying this tool in Photoshop, and am happy that I could use this in a pinch! I would just need to set the camera back a little farther if I want to get more in the frame.

Final software corrected image

TimeLine Media – www.timelinedc.com
703-864-8208

Photoshop – the Best Jig Saw Puzzle Solver

Source image for photo merge

I am working on a personal project to preserve as much of my photo history before everything fades away. My memory will not hold for very long either, I suspect! In some cases, there are some publications where my photos are used, and these larger formats are difficult to preserve digitally. Due to the size of some of these publications, it is not possible to capture the entire spread with one pass of the scanner which is only letter sized. To do this before was a very complicated puzzle-building process. I would have to scan as much of the newspaper-sized pages on the scanner in sections making many different parts that overlapped each other in content. Sometimes, I would have up to 8 different images depending on the size of the print. In this example, I only have 2 separate images:

Source image for photo merge

Photo Merging

Source image for photo merge

As can be seen in this example all the overlap between the text and the images on the page. In older versions of Photoshop, I would bring in both source images, and lay one on top of the other on a large empty background. Then I would reduce the opacity of the top layer, and maneuver it until the overlapping parts were right over each other on the layer below. It was time consuming, but it was possible. In the newer Photoshop versions, there is a nice automated way of doing this. First, open both images in Photoshop, then click on “File > Automate > Photomerge” which bring up this dialog box:

Photoshop CC Photomerge dialog box

Click the Add Open Files button to add the open images to the process box. Make sure the box – Blend Images Together is selected, then click ‘OK’. Now Photoshop will quickly merge these two images using the overlapping information from each piece to create one large, merged document! This couldn’t be easier. I now only have to make sure that I have lots of overlapping areas from the large print. Knowing that the computer will do all of the aligning, you can scan in as many images as you would like. I have done this with up to 10 different images with no problem.

Large Merged Document

TimeLine Mediawww.timelinedc.com
703-864-8208

1 2 3 4 5 7