Posts Tagged ‘Speedlight’

Light Modifier Reflections – Tech Thursday

Musician Portraits

I have been doing a lot of great portraits lately! Luckily for me, the people that have been in front of the lens have been great subjects. It seems like it would be easier to have a person giving you all the attention for the photograph. Compared to event or dance photos where it is more up to me to catch a great image. Making portraits is a different challenge. It is a true collaboration with your subject that needs input from the photographer to make it happen.

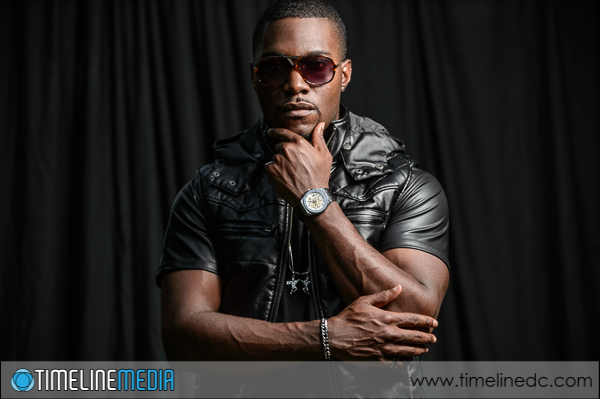
Portrait with Nikon D4, SB-910, Westcott Rapid Box - ©TimeLine Media
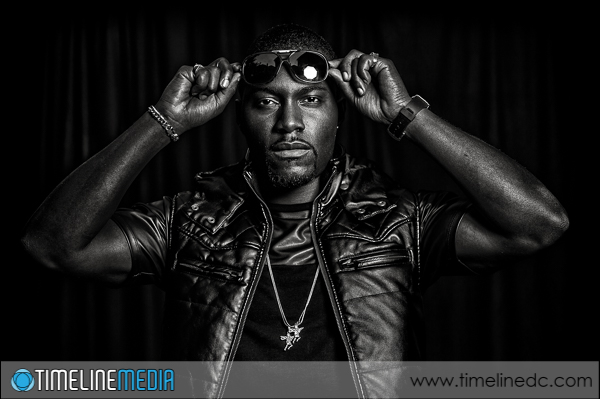
Portrait with Nikon D4, SB-910, Westcott Rapid Box light modifier – ©TimeLine Media

Studio Portrait

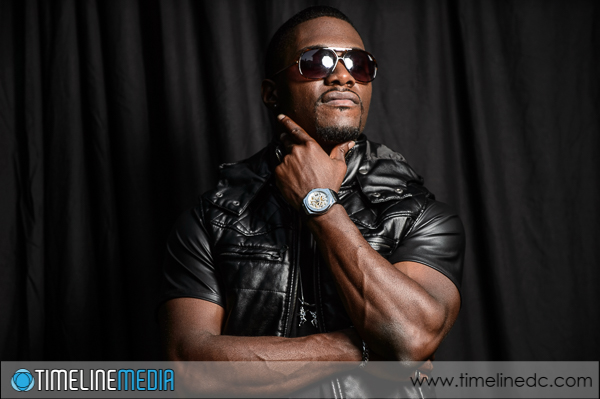
This setup on a black background was at the suggestion of the subject. The easiest way to have the most control over the light is to use a strobe to light a subject with the dark material as a backdrop. For this, I used a Nikon Speedlight firing through a Westcott Rapid Box Octa. The flash was triggered with the FlexTT5 from PocketWizard. The great thing about these triggers is that they use the TTL ability built into the Nikon camera body. Thus the computer in the flash will set the power. This is different from shooting with moonlight strobes that I typically use as those are set manually. But for this, the TTL worked very well as I setup the flashes, so I kept using them so that we could change backgrounds, and setups quickly as needed.

Portrait with Nikon D4, SB-910, Westcott Rapid Box - ©TimeLine Media
Portrait with Nikon D4, SB-910, Westcott Rapid Box light modifier – ©TimeLine Media

When photographing people with clear eyeglasses, it is not typical that you would want to have the light reflected from the glass. With sunglasses, and the kind of photos we were making here, the reflection actually turned out to be a nice element to the face!

Portrait with Nikon D4, SB-910, Westcott Rapid Box - ©TimeLine Media
Portrait with Nikon D4, SB-910, Westcott Rapid Box – ©TimeLine Media

I did make images that also did not have the reflection so that the subject would have options. In case the later use of these images would not work with the octagonal light reflection, we had both in the can. My favorite, was when he just moved the glasses above his eyes so we could see underneath – this was the best of the session in my opinion.

Portrait with Nikon D4, SB-910, Westcott Rapid Box - ©TimeLine Media
Portrait with Nikon D4, SB-910, Westcott Rapid Box – ©TimeLine Media

TimeLine Media – www.timelinedc.com
703-864-8208

Missing Cherry Blossoms

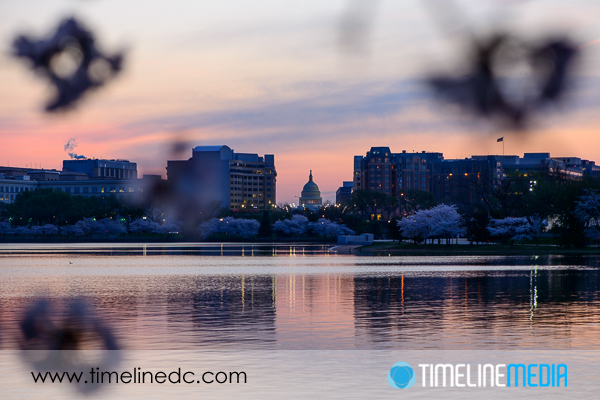
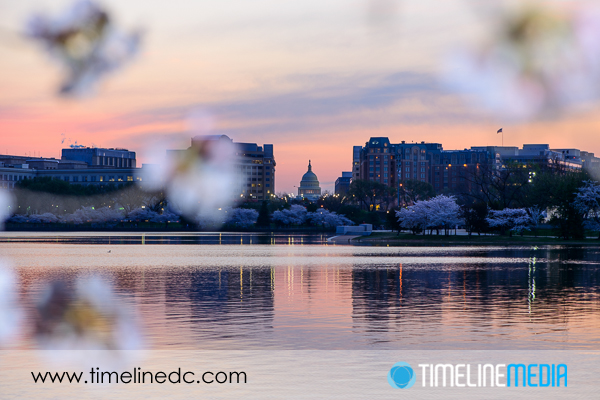
Cherry Blossoms and the Capitol Building in Washington, DC - ©TimeLine Media

Washington, DC

It just happened, but I am already missing the cherry blossoms this year. The photos from this year’s blooms were really satisfying. The weather, and the amount of time that I had to take advantage of their peak really came together nicely. Morning, afternoon, and evening, were all available to me this time. Moreover, I did not have to rush around as in other years. There were so many photographers around the Tidal Basin this year, with all kinds of gear! There were so many that were trying different angles, and strategies to get the perfect photo. I joined them with my own attempts. Of course, not everything will work when you first try, and this was probably my biggest disappointment.

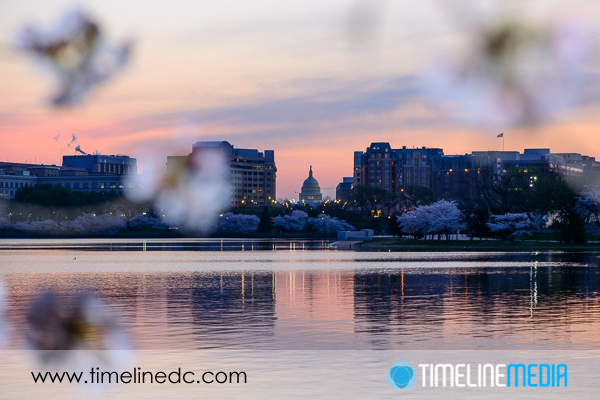
Cherry Blossoms and the Capitol Building in Washington, DC - ©TimeLine Media
Cherry Blossoms and the Capitol Building in Washington, DC – ©TimeLine Media

From this spot, most images are of the blossoms in the foreground with either the Washington Monument in the background towards the left, or the Jefferson Memorial towards the right. In between these two familiar sites is a clear view of the Capitol Building that is much further away. Because of the distance, it is much smaller than the other two memorials in the frame. Consequently it is not as popular a subject from here.

But I wanted to try going for it since it seemed really easy to see this morning. I used the longest lens I had in the bag, a 105mm focal length. This was giving me what I wanted as anything much longer would have made the building larger, but the blossoms would have been harder to distinguish. In the first frame above without any added light, the blossoms were really in shadow, and look like really ugly clouds or debris in front of the lens.

Sunrise Blossoms

Cherry Blossoms and the Capitol Building in Washington, DC - ©TimeLine Media
Cherry Blossoms and the Capitol Building in Washington, DC – ©TimeLine Media

My next thought was that I should add some light from a speedlight to illuminate the blossoms, and show off more of their color. I held the flash off of the camera with a sync cord so that the light would not be positioned directly in front of the blooms. Here is the result:

Cherry Blossoms and the Capitol Building in Washington, DC - ©TimeLine Media
Cherry Blossoms and the Capitol Building in Washington, DC – ©TimeLine Media

It was as expected, but not that great to my eye. I tried a few more frames changing the flash power, the angle of the flash, but it did not change much. Perhaps I could have tried “painting” on the light with a small flashlight or had a softer modifier for the speedlights, but I did not have any more time as the sun started to rise quickly out of the horizon really changing the look of the overall scene. Turns out – THAT was what I needed to make a better frame.

Cherry Blossoms and the Capitol Building in Washington, DC - ©TimeLine Media
Cherry Blossoms and the Capitol Building in Washington, DC – ©TimeLine Media

TimeLine Media – www.timelinedc.com
703-864-8208
Flash basics – Tech Thursday

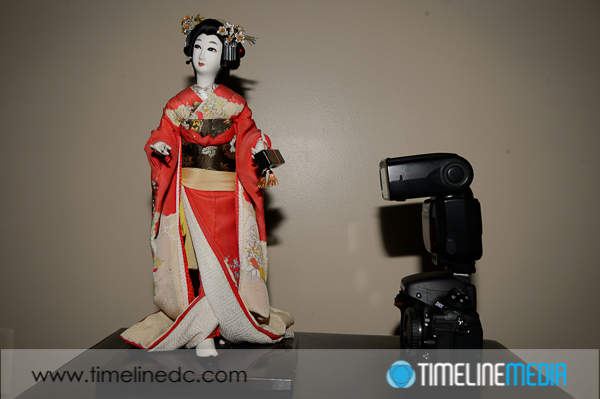
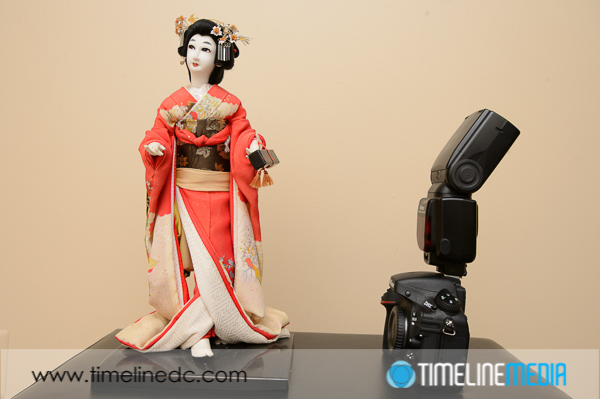
Flash with head in position to bounce off ceiling - ©TimeLine Media

Testing with a Statue

Today, I have been reviewing previous posts about a new camera, or perhaps a flash. I have been making these posts from the side of what advice would I give to someone that just received a new DSLR for Christmas and what would they do with their new toy. After the first few weeks of just taking photos, getting comfortable with how the camera feels in the hand, and being confident that it would not lose any of the photos that you take with it.

One of the first accessories that people use frequently, but often incorrectly, is the flash. Going around the tourist areas, or looking at the crowds at sporting events, there are so many people that use their flash. This is because the photos from their camera using their default settings are too dark for the situation. Indoors under artificial light, or any photo taken at night, the flash will pop on your camera to brighten the scene. You will definitely make your photos brighter with the flash, but a lot of times, the light will be ugly! Here is the reason why, and how you can make it better.

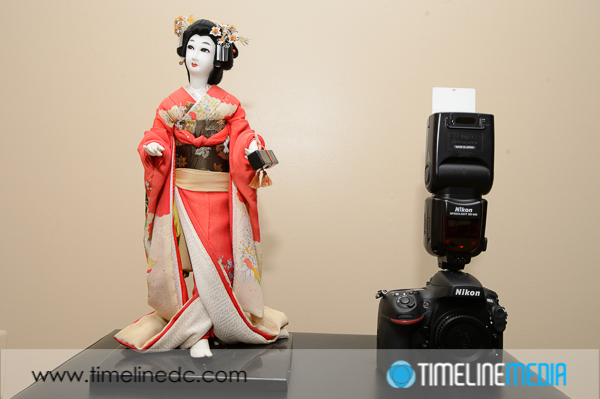
Flash with head pointed directly at subject - ©TimeLine Media
Flash with head pointed directly at subject – ©TimeLine Media

This first image shows the default direction for a speedlight flash mounted on a camera. The thinking here is what you want to brighten is right in front of the camera. So, firstly, point the flash directly in front of you. This will get you a sharp, bright photo. Likely, only whatever is right in front of the camera will get the light. There will be a dark, harsh shadow right behind your subject if you pose them against a wall. To make this light better, you can take your speedlight and point it straight up to the ceiling. Doing this will “bounce” the light from the ceiling back down to your subject.

Bounce Light

Flash with head in position to bounce off ceiling - ©TimeLine Media
Flash with head in position to bounce off ceiling – ©TimeLine Media

The result is that the light becomes very soft against your subject because you have made the light source much larger. Instead of coming from the front of the flash before hitting your subject, the light is spread out across the ceiling and surrounding walls. By the time it hits the subject, it is much larger in area, which makes light much softer. Easy!

Flash with head in position to bounce off ceiling - ©TimeLine Media
Flash with head in position to bounce off ceiling – ©TimeLine Media

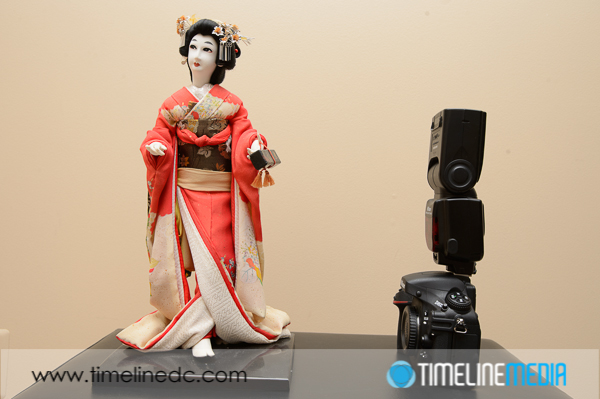
Some speedlights have a little white card inserted at the front of the flash. Pop this little accessory up to direct just a little more of the light forward if you are photographing a person. This will brighten their faces nicely with not as harsh a shadow behind the subject and keeping the overall light in the scene soft. If you are in a place with very high, or no ceiling, you can even point the flash directly behind the camera to bounce off a wall in back of you. It can give a similar result to bouncing off the ceiling. There are many other tips on using your speedlight flash, this is just the beginning. If you have any more questions on how to use your flash, let me know!

Flash with head in position to bounce behind wall - ©TimeLine Media
Flash with head in position to bounce behind wall – ©TimeLine Media

TimeLine Media – www.timelinedc.com
703-864-8208

1 2