Posts Tagged ‘technology’

Washington Monument at Sunrise

Washington Monument HDR - ©TimeLine Media

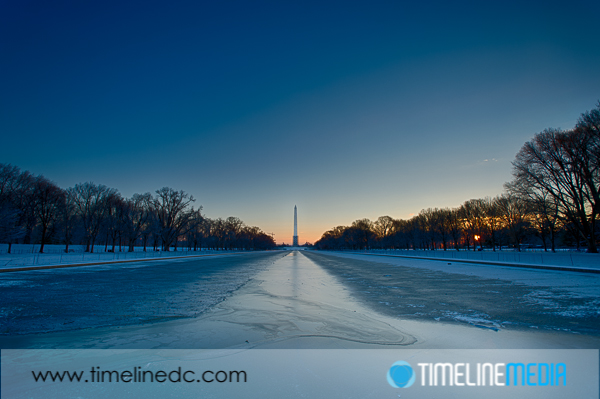
Frozen Reflecting Pool

We have traded the cold for rain! With this in mind, I have not been able to get out there to make more photos in the early morning. Overall, it has been too overcast and rainy to get me out there. I should have made the effort, however, I am backed up with other work . Additionally, I would need to gear up with rain repellent gear for me and the cameras. Needless to say, I got lazy this week. There is still a backlog of other images that I have not posted about on the blog. These are images of the Washington Monument at sunrise from the reflecting pool that is situated at the front of the Lincoln Memorial.
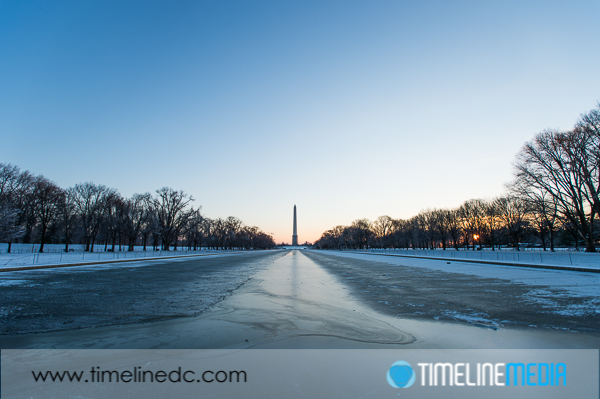
Washington Monument - out of camera exposure - ©TimeLine Media
Washington Monument – out of camera exposure – ©TimeLine Media

Washington Monument

This is one of the images taken straight out of the camera. In this case, I took a bracketed series of photos around this exposure to combine into an HDR final image. From this file, you can make edits right in Lightroom to bump up the Exposure, Shadows and contrast, then adjust the vibrance to make this image:
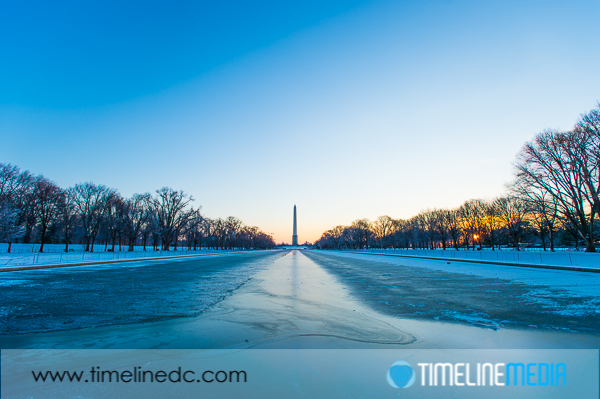
Washington Monument - out of camera adjusted exposure - ©TimeLine Media
Washington Monument – out of camera adjusted exposure – ©TimeLine Media

HDR image

I was surprise to see how much data you can pull from one Raw file! Processing the 9 different exposures into HDR Efex Pro 2, I adjusted the sliders in that program to get something similar. My goal was to bring out more detail in the monument face and trees lining the pool on either side since those areas were so dark.

Washington Monument HDR - ©TimeLine Media
Washington Monument HDR – ©TimeLine Media

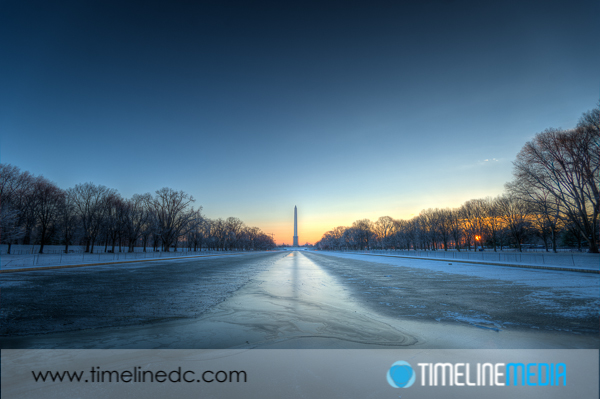
When editing in HDR Efex Pro 2, I was able to use control points to directly edit the face of the monument. Sunrise is not the best time to photograph the Washington Monument from this angle. It loses a lot of the luster and shine with the backlight from the rising sun. I tried to pick HDR treatments where I could bring back the light color of the monument bricks. I already have some places in mind that are situated better in the early morning light to photograph next. If you have any suggestions, please let me know! Stay tuned-

Washington Monument HDR - ©TimeLine Media
Washington Monument HDR – ©TimeLine Media

TimeLine Mediawww.timelinedc.com
703-864-8208

Flash basics – Tech Thursday

Flash with head in position to bounce off ceiling - ©TimeLine Media

Testing with a Statue

Today, I have been reviewing previous posts about a new camera, or perhaps a flash. I have been making these posts from the side of what advice would I give to someone that just received a new DSLR for Christmas and what would they do with their new toy. After the first few weeks of just taking photos, getting comfortable with how the camera feels in the hand, and being confident that it would not lose any of the photos that you take with it.

One of the first accessories that people use frequently, but often incorrectly, is the flash. Going around the tourist areas, or looking at the crowds at sporting events, there are so many people that use their flash. This is because the photos from their camera using their default settings are too dark for the situation. Indoors under artificial light, or any photo taken at night, the flash will pop on your camera to brighten the scene. You will definitely make your photos brighter with the flash, but a lot of times, the light will be ugly! Here is the reason why, and how you can make it better.

Flash with head pointed directly at subject - ©TimeLine Media
Flash with head pointed directly at subject – ©TimeLine Media

This first image shows the default direction for a speedlight flash mounted on a camera. The thinking here is what you want to brighten is right in front of the camera. So, firstly, point the flash directly in front of you. This will get you a sharp, bright photo. Likely, only whatever is right in front of the camera will get the light. There will be a dark, harsh shadow right behind your subject if you pose them against a wall. To make this light better, you can take your speedlight and point it straight up to the ceiling. Doing this will “bounce” the light from the ceiling back down to your subject.

Bounce Light

Flash with head in position to bounce off ceiling - ©TimeLine Media
Flash with head in position to bounce off ceiling – ©TimeLine Media

The result is that the light becomes very soft against your subject because you have made the light source much larger. Instead of coming from the front of the flash before hitting your subject, the light is spread out across the ceiling and surrounding walls. By the time it hits the subject, it is much larger in area, which makes light much softer. Easy!

Flash with head in position to bounce off ceiling - ©TimeLine Media
Flash with head in position to bounce off ceiling – ©TimeLine Media

Some speedlights have a little white card inserted at the front of the flash. Pop this little accessory up to direct just a little more of the light forward if you are photographing a person. This will brighten their faces nicely with not as harsh a shadow behind the subject and keeping the overall light in the scene soft. If you are in a place with very high, or no ceiling, you can even point the flash directly behind the camera to bounce off a wall in back of you. It can give a similar result to bouncing off the ceiling. There are many other tips on using your speedlight flash, this is just the beginning. If you have any more questions on how to use your flash, let me know!

Flash with head in position to bounce behind wall - ©TimeLine Media
Flash with head in position to bounce behind wall – ©TimeLine Media

TimeLine Media – www.timelinedc.com
703-864-8208

Photomerge using Photoshop CS5 – Tech Thursday

Pier Panorama of 14 combined images - ©TimeLine Media

From readers, I have received a lot of feedback and questions about the panoramic images I have posted. The added feature to smartphone camera apps and having it built into some digital cameras has made the practice of stitching photos more popular. It is now possible to expand the dimensions of images using multiple angles of the same scene. There are products that you can add to a tripod mount to make your panoramas more precise, and there are even robot controllers that can make multiple images for you to make stitched GIGA-pixel images.  

Photoshop Stitching

14 images opened in Photoshop

Since I am doing all of these hand held, I need to rely on the Photomerge function in Photoshop CS5. The first step was to open the 14 images that I intended to stitch together. There were taken in portrait orientation so that I could get more room to crop than if taken in landscape. Then, go to File > Automate > Photomerge:

Photomerge dialog box in Photoshop CS5

The result shows all the work that Photoshop does for you! It blends the images using the overlapping elements that were in each frame. The more information that it has to work with, the better the blending. I was happy with how the combination of the images turned out except for one section where the horizon dips a little in front of the middle pier. That area would have to be corrected manually – maybe in a future blog post!

Images stitched together - ©TimeLine Media
Images stitched together – ©TimeLine Media 

To finish the image, I make a new layer above these with all the lower layers flattened into one. Now I can work with all of these merged, but I still have the previous work still available so I can work without destroying the previous step.

Images stitched together - ©TimeLine Media
Images stitched together – ©TimeLine Media

Now I just use the spot healing brush, and run it over the blank spots in the cropped image. This tool works really well for this image because of the large expanse of cloudless sky. You may have more trouble if the images you are using are busier, but you would be surprised at how good the math is with this tool!

Pier Panorama of 14 combined images - ©TimeLine Media
Pier Panorama of 14 combined images – ©TimeLine Media

TimeLine Media – www.timelinedc.com
703-864-8208

1 5 6 7 8 9 16