Posts Tagged ‘wide angle’

Changing Backgrounds in Photos – Tech Thursday

Wide angle lens pointed upwards - ©TimeLine Media

Chantilly, Virginia

If you were doing an internet search for this topic, you may expect to have an extended Photoshop tutorial. This is definitely not a selection/replacement background tutorial as I am really not the most creative with software. The post comes from looking over backgrounds in ballroom dance photos. This idea works best from the last Arthur Murray Spring Freestyles event that was held at the Westfields Marriott hotel in Chantiily, VA.

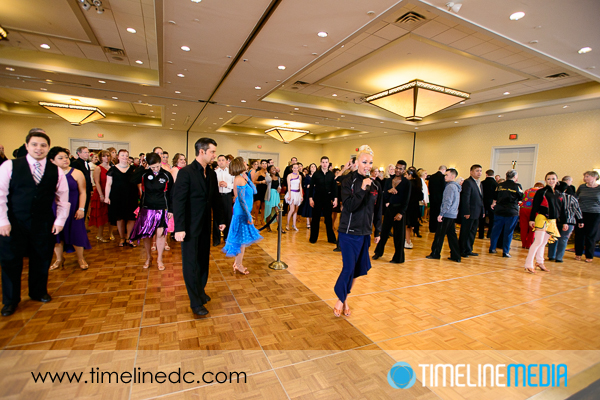
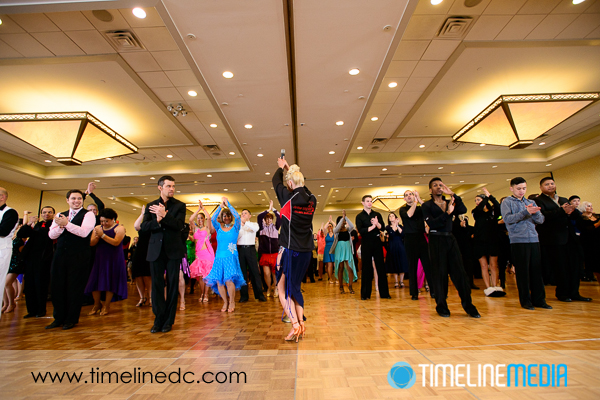
The main ballroom has some interesting lights hanging from the ceiling. They are pyramid shape, and hung with the small pointed side facing downwards towards the floor. Moreover, they have very large plain sides creating their shape which makes them an interesting background element in the photos. They do not have the small, rounded out of focus circles that you get from chandelier or smaller light sources. Here, the entire shape can take on a different look depending on the focal length of the lens used. This first image is taken at a very wide angle of 17mm:

Wide angle lens pointed straight ahead- ©TimeLine Media

Working the Angles

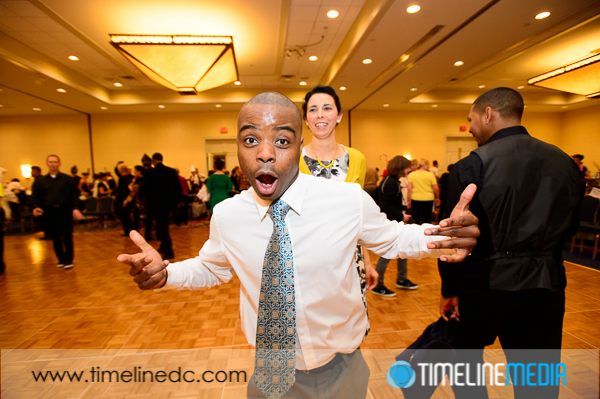
This makes the lights clearly in focus along with the dancers on the floor. You can clearly see all the detail, mounting, and edges of the lights. From this angle which was taken from a standing height with the lens pointed towards the dancers. It is possible to drastically change the background in the photo by changing only the angle of the camera. In this next photo, the focal length is still 17mm, but I changed my position by going to my knees, and pointing the lens up towards the ceiling. With this wide angle lens, the lamps on the ceiling become much more elongated looking much larger than in the previous photo!

Wide angle lens pointed upwards - ©TimeLine Media
Wide angle lens pointed upwards – ©TimeLine Media

This can be to your advantage when shooting events. You can to give viewers different looks from the event by changing backgrounds. Once you already have one angle, change where you are shooting and more around the scene to see what different looks you can get when the action is not changing much. It keeps your eyes looking through the frame and avoiding fatigue. It will also make for different looks to see when post processing later.

Spring Freestyles Photos Released - ©TimeLine Media
Spring Freestyles Photos Released – ©TimeLine Media

TimeLine Media – www.timelinedc.com
703-864-8208

Tech Thursday – Fisheye Lens

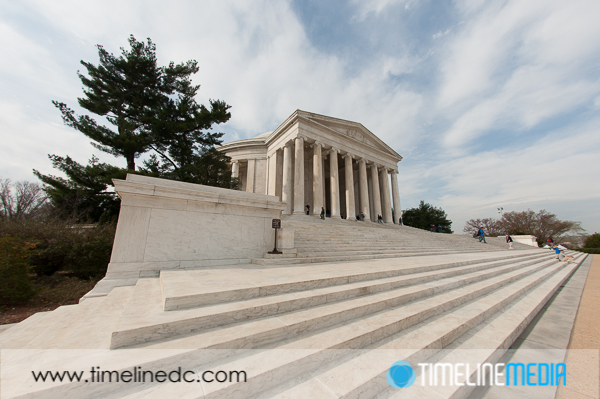
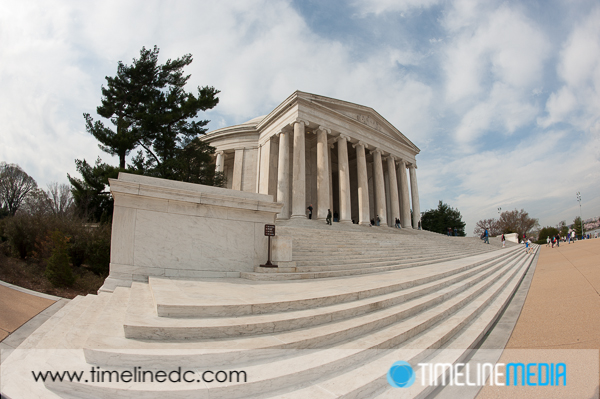
©TimeLine Media - Fisheye Jefferson Memorial Corrected

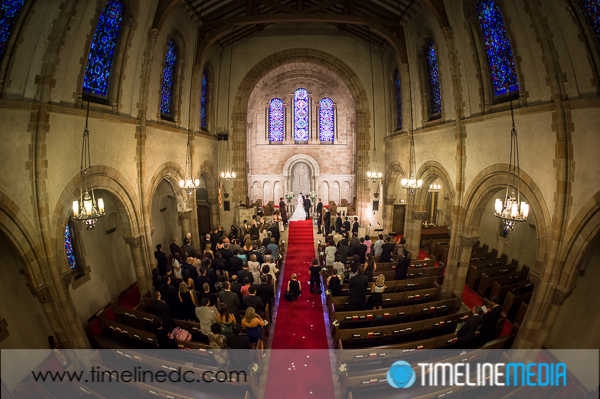
For today’s Tech Thursday post, I wanted to go to the opposite side of the focal length scale. Last time, I posted about the 70-200mm f/2.8 lens. This is by far the longest lens I use on a regular basis. One of the widest lenses that I have is the 16mm Fisheye lens from Nikon. This is undoubtedly an extremely wide-angle lens. In sum, it allows for a complete 180-degree field of view in the camera frame. This is one piece of camera gear that is overused by photographers when they first get their hands on it. You definitely need to get this out of your system with interiors and landscape images. Here is an example of a shot with the Fisheye lens from the balcony of a church overlooking a wedding ceremony.

Wedding Photography

©TimeLine Media - Fisheye wedding ceremony
©TimeLine Media – Fisheye wedding ceremony

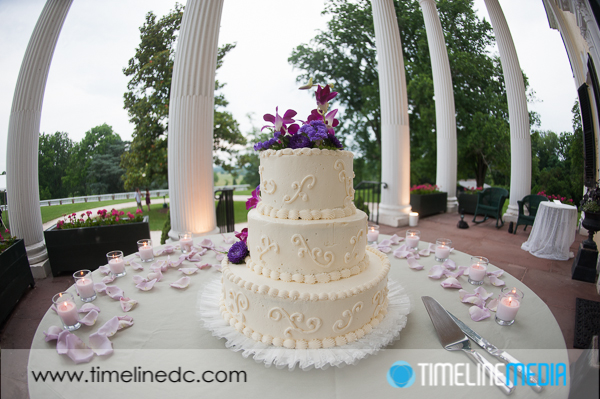
These make nice scene setting images for wedding albums. These are suited for photos where people faces are not prominent. The bowing of the image at the sides do not make this a good portrait lens. No one likes to be the curved/distorted one at the edge of a fisheye image! The wide field of view allows you to put lots of elements into a frame without resorting to a lot of post-production work to combine images. Here is another wedding image to put the cake in it’s complete setting.

©TimeLine Media - Fisheye wedding cake
©TimeLine Media – Fisheye wedding cake

The characteristic fisheye distortion is clearly seen in the columns. You will notice that the distortion is not as bad through the center of the picture. Place your subject as close to the middle of the frame to reduce the effect of the lens on your subject. This makes it challenging to keep the rule-of-thirds in the frame, but that is normal with these extreme lenses. If you do not want to have the curvature in the image, this can be corrected easily with software. In Adobe Lightroom 4, there is a lens correction feature that will fix the distortion in the image with a few clicks. I took a photo of the Jefferson Memorial in Washington, DC and corrected it Lightroom. Here are both the corrected and uncorrected versions of the photo:

Washington, DC

©TimeLine Media - Fisheye Jefferson Memorial Uncorrected
©TimeLine Media – Fisheye Jefferson Memorial Uncorrected
©TimeLine Media - Fisheye Jefferson Memorial Corrected
©TimeLine Media – Fisheye Jefferson Memorial Corrected

Now the angles have all been straightened, and the photo looks more “normal”. But you have the added benefit of having more of the area in the photo than is possible with a straight or rectilinear lens. Give these lenses a try next time you are thinking of visiting somewhere large expanses of views, or enourmous ceiling heights. They can be a lot of fun!

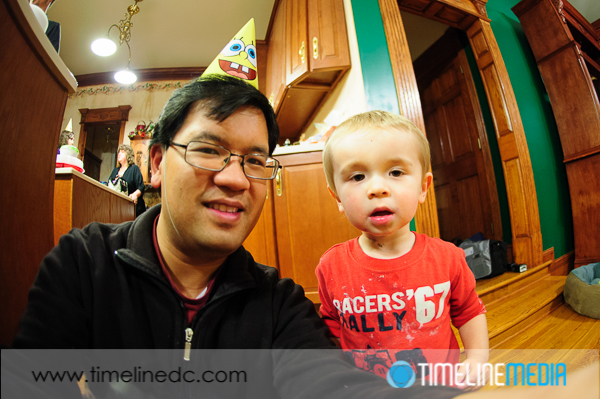
©TimeLine Media - example Fisheye photo
©TimeLine Media – example Fisheye photo

TimeLine Media www-timelinedc.com
703-864-8208