Posts Tagged ‘DSLR’

Tools for Bracketing Exposures – Part 2 – Tech Thursday

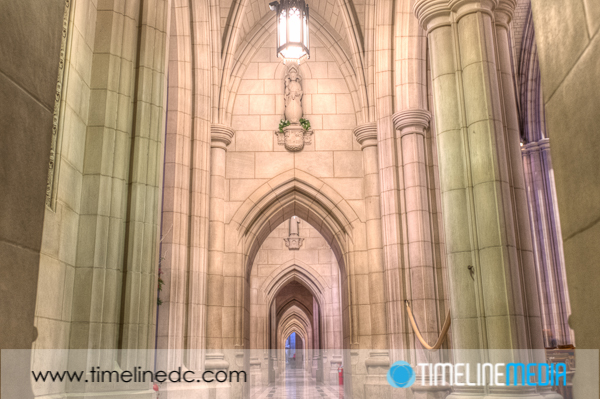
HDR photos of National Cathedral, Washington, DC - ©TimeLine Media

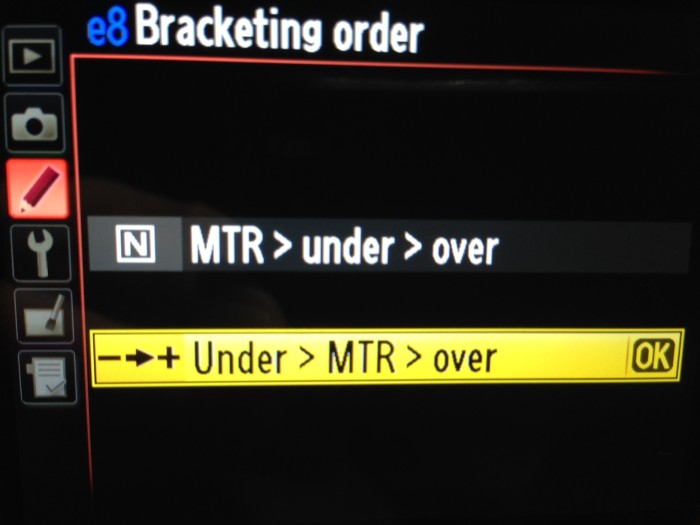
In the menus for Nikon cameras that have a bracketing feature. With this feature you can specify the order that the bracketed exposures are created. In this menu, it shows that the exposures start from underexposed frames first. Then the metered exposure (MTR), and finally the overexposed frames.

Bracketing Setup

Nikon bracketing setup
Nikon bracket setup

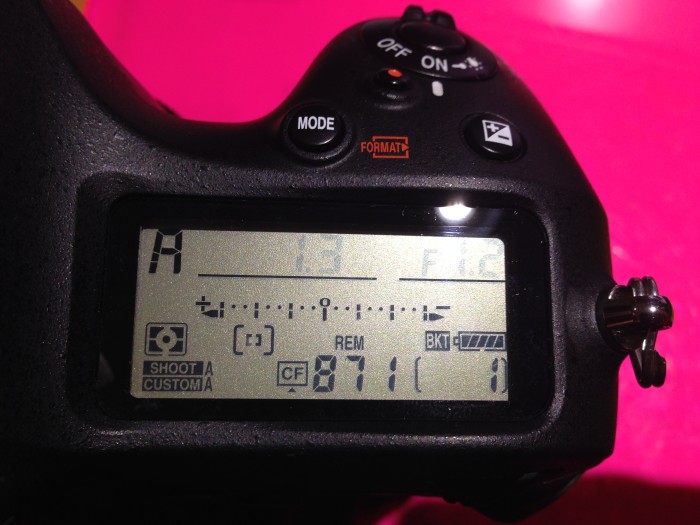
After that is all setup, go back and put your camera in Aperture priority. In this semi-automated mode, you can ensure that the aperture will not change as you make the bracketed exposures. The camera will then change the exposures from under to over. It does this changing the shutter speed after each time the shutter is fired. You can tell that your camera is set to make bracketed exposures by the tick marks along the exposure scale. This is an important indicator as you may setup your camera to make bracketed exposures, then forget, then wonder why your camera seems to have gone crazy with all these strange settings.

Nikon LCD screen setup for bracketing - ©TimeLine Media
Nikon LCD screen setup for bracketing – ©TimeLine Media

Camera Setup

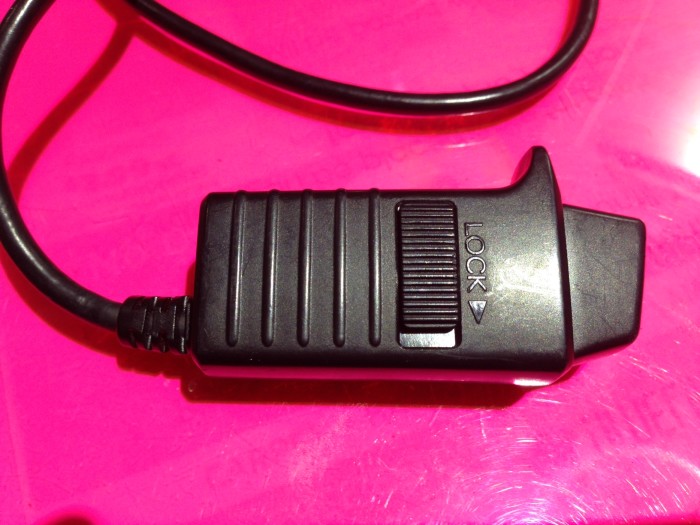
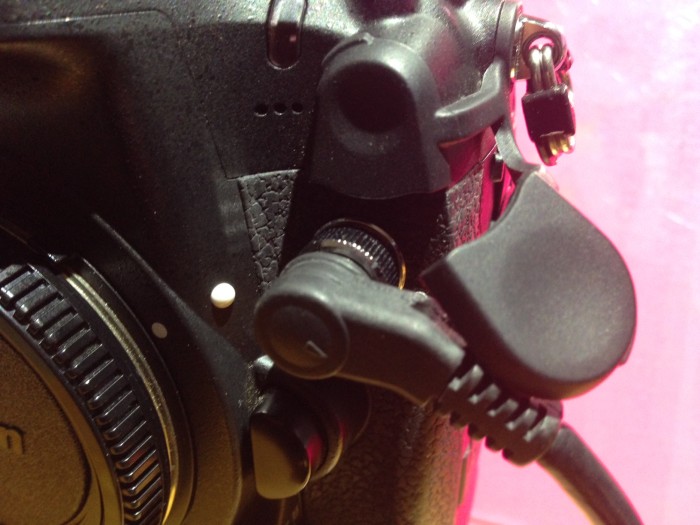
Once you have the camera setup for bracketing exposures, change the motor drive mode for the camera to the highest frame rate that is can shoot. On some cameras like this D4, you will be able to shoot a bracket of photos very quickly! In this case, if you have the bracket setup as above going from the underexposed to the overexposed frames, you will be able to hear the shutter slow as you go through the series. It is an especially nice audible check to know that the bracket was setup directly. Having a shutter release remote like the MC-30 for Nikon DSLRs will take your hands off of the camera body making the exposure even sharper by avoiding the camera shake from pressing the shutter button.

Nikon MC-30 remote shutter release
Nikon remote connection to DSLR

Just click and hold the big button on top until you hear the camera make all of the exposure that you had setup. In this case, it was setup to make 9 exposures, so I just held it down until it was done. Very easy! Now you will have all the exposures you need, that are easily brought into your favorite HDR program for processing.

HDR photos of National Cathedral, Washington, DC - ©TimeLine Media
HDR photos of National Cathedral, Washington, DC – ©TimeLine Media

TimeLine Media – www.timelinedc.com
703-864-8208

Baltimore – iPhone 5

©TimeLine Media - Graphic design on side of car hauler

I felt bad about the comparison I made last week comparing the iPhone 5 images to a Nikon D4, a full-frame DSLR. Although, I was testing the limits of the smart phone camera that early in the morning without much help from any natural light. So today I will post some photos from bright, sunny conditions. This will show what it can do in very bright light. Comparatively, this should even the competition. This is not the “best” light for photos. Most of these are in the middle of the day without many clouds in the sky. Addtionally the sun is almost directly overhead. Portraits would not look very good in this light. However buildings, structures and other non-faces can be done. Additionally, with some post-processing they can look decent even from the iPhone.

iPhone Comparison

©TimeLine Media - Baltimore Transamerica Tower with iPhone
©TimeLine Media – Baltimore Transamerica Tower with iPhone
©TimeLine Media - Bank of America Building & William Donald Schaefer Building with iPhone
©TimeLine Media – Bank of America Building & William Donald Schaefer Building with iPhone

Baltimore, MD has the tallest buildings in the state of Maryland. Just a few blocks off the Inner Harbor, and you are in the canyons of streets lined with these buildings. Having plenty of overhead sun and no clouds in the sky are emphatically perfect conditions for a point and shoot or smartphone camera to perform it’s best. The smaller sensor in these devices require much more light than larger cameras, so these images are almost as good as what they can produce.

Indycar Paddock

©TimeLine Media - Graphic design on side of car hauler
©TimeLine Media – Graphic design on side of car hauler

With just a touch of clarity and contrast, the graphics painted onto the side of this truck are and the sharpness of the text in the license plate are indistinguishable from images taken with any other camera. The bright light in the area means that there is no camera shake from slow shutter speeds. Especially when taking photos of dark subjects, the smartphone camera will compensate for the lack of light by increasing the shutter speed which is very difficult to hold still without introducing shake. These cameras were not designed to be mounted on a tripod, and are hard to hold steady for very long. Give a scene lots of light, though, and that problem goes away.

With the low ISO settings in the bright light, vivid colors can be reproduced. In this last photo, the bright red paint on this hauler is faithfully reproduced. Adding more Clarity in Lightroom is the only adjustment needed to finish this image. If only the iPhone were able to write the RAW data from the sensor, it could be a viable replacement in the right situations!

©TimeLine Media - detail of racing hauler
©TimeLine Media – detail of racing hauler

TimeLine Mediawww.timelinedc.com
703-864-8208

iPhone vs. DSLR in Early Morning – Tech Thursday

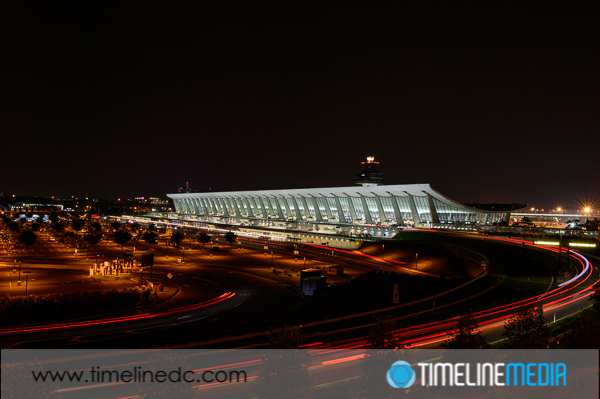
©TimeLine Media - Dulles Airport Main Terminal - Nikon D4

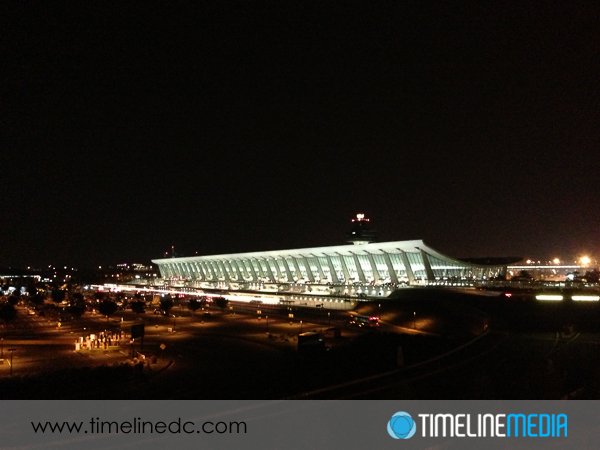
Earlier this week, I needed to bring my uncle to the airport for an early morning departure. With a 6:30 departure time, it was a VERY early morning for us. With the days being so long in the summer, I have not had the inspiration to get up before the sun. This is the best time to get landscape or architecture photos. Unfortunately this time was a little TOO early since the sky was still black as night, but I took advantage of the beautiful Main Terminal at Dulles International Airport to make photos of another landmark of the Washington, DC area. I tried making images with both the iPhone and my DSLR for comparison.

My father, an architect that had a great appreciation for clean, contemporary design, would always start to lecture as we approached this building. Designed by Finnish-American architect Eero Saarinen, the main terminal at Dulles is a panoramic structure of concrete and glass that echoes the air supporting the planes coming into and out of the airport. My dad would talk about the open concept interior, the rain management system that you do not even notice in the center of the airport, and the overall design that still looks modern even though it was designed in the 1950’s. The airport was just starting to wake up. There was minimal activity and traffic going into the terminal at 5AM in the morning. I found a nice spot in the Daily Garage closest to the main terminal. Walking to the top level to provides a nice clear view of the main terminal. Here is are the completely images from both uncropped, out of the camera:

Comparing iPhone Imaging

©TimeLine Media - Dulles Airport Main Terminal - iPhone
©TimeLine Media – Dulles Airport Main Terminal – iPhone
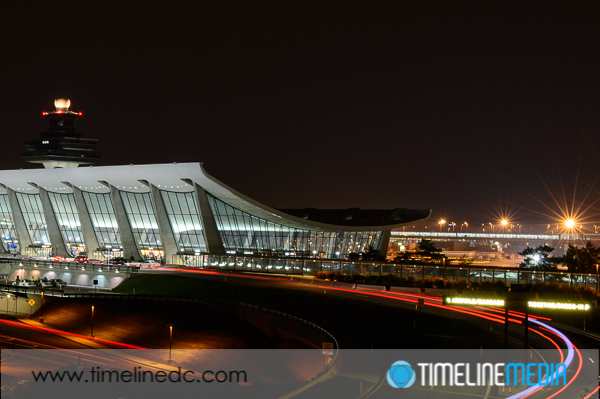
©TimeLine Media - Dulles Airport Main Terminal - Nikon D4
©TimeLine Media – Dulles Airport Main Terminal – Nikon D4


I was a little surprised at the results. The iPhone did remarkably well considering what I was asking it to do. I had put the exposure measurement cursor right in the middle of the terminal. The default image would have made the terminal overexposed without any detail. In this case the camera compensates for the large portion of the frame that was dark, or completely black. This image would be sufficient for using on Instagram or Facebook if you are just establishing where you were travelling.

Comparing DSLR Imaging

When I setup the DSLR, I put the camera right on the edge of the wall of the garage to stabilize the camera, and manually set the exposure. I wanted it to be similar – with the terminal not over exposed. With the controls that are available on the DSLR, I set the aperture down to f/11 so that the exposure time is increased to 5 seconds. This makes for some really cool light trails from the cars coming into the terminal! This is really the main difference between these two photos when zoomed out to their default views.

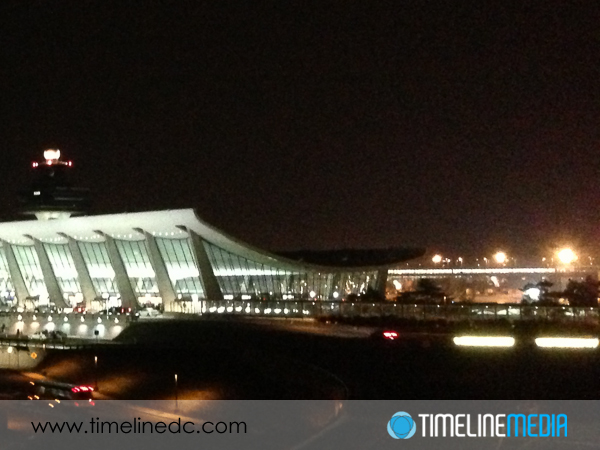
As expected, though, the iPhone image really loses when you zoom in to see any detail in the photo. These conditions are really pushing the limits of the tiny sensor in this camera which is best when used in bright conditions. When you zoom into the DSLR photo, you can also see some nice star-like flares in the lights on the tarmac behind the terminal. These are a result of the aperture of f/11 which is a much smaller opening than f/2.4 that the iPhone was using to try to get as much light into the camera. This example clearly shows a few of the features that a camera with full controls can get for you compared to point-and-shoot or smartphone cameras.

©TimeLine Media - Dulles Airport Main Terminal - iPhone
©TimeLine Media – Dulles Airport Main Terminal – iPhone
©TimeLine Media - Dulles Airport Main Terminal - Nikon D4
©TimeLine Media – Dulles Airport Main Terminal – Nikon D4

TimeLine Media – www.timelinedc.com
703-864-8208
1 2 3 4