Posts Tagged ‘software’

Lincoln Memorial – HDR photos

Lincoln Memorial - HDR Image - ©TimeLine Media

Extending Dynamic Range

Recently, a new version of Photomatix was released by HDR Soft. This program create high dynamic range (or HDR) images from bracketed exposures. I have posted a few times previously about HDR images which are a very controversial topic in photography forums. My previous HDR images were made using the Google Nik application named HDR Efex Pro. It has been a little while since this has been updated with new features, so I decided to download the trial for Photomatix.

v4

Why is there so much controversy with HDR? It can take scenes with very dark tones, and light tones, and make both more viewable through tone mapping. I think the problem with a lot of HDR programs is that so many use the default settings, or they try a preset then do not do any additional work passed this point. This means that all pre-visualization has gone out the window. The images have just been plugged into a program, then you let the software decide how your final image will look.
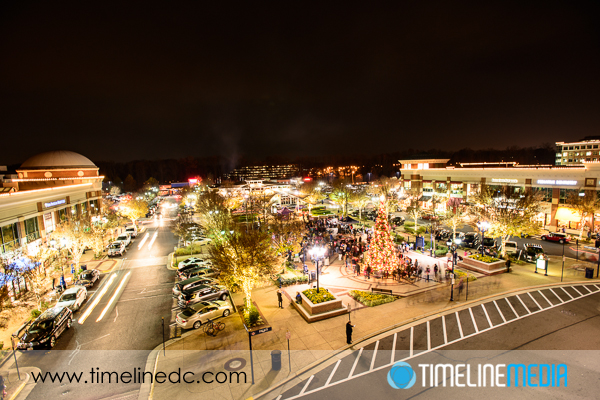
Washington, DC

Lincoln Memorial - HDR Image - ©TimeLine Media
Lincoln Memorial – HDR Image – ©TimeLine Media

It is because of this that many think this is a form of cheating, and may be a different art form from photography all together! I think that this kind of processing is just new. It could not exist without the computing power that we have available to us today. But in the film darkroom, there have been tools available to selectively adjust dark and light tones in a frame. This is where the terms “dodge” and “burn” originate. As these techniques have had decades to mature, I think the same will be said about HDR in the future as the software improves and photographers take advantage of these tools.

Gettysburg Address in the Lincoln Memorial - HDR Image - ©TimeLine Media
Gettysburg Address in the Lincoln Memorial – HDR Image – ©TimeLine Media

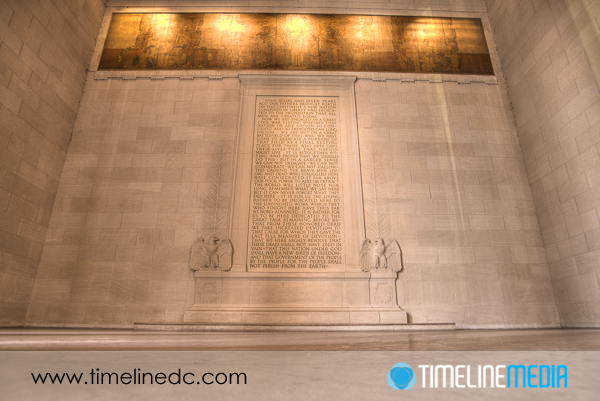
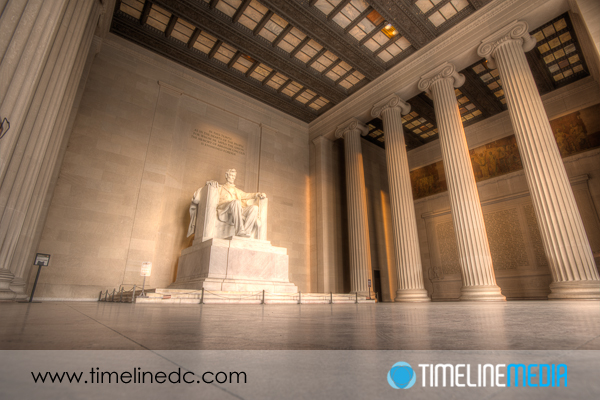
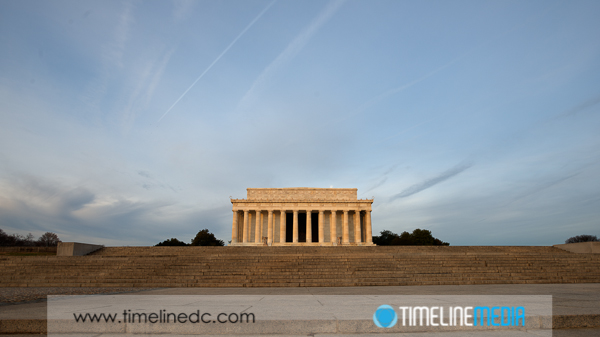
These are just a few examples from my first try with the Photomatix software. There are a few new features that I am testing with these, but I am really happy with the results so far! Photos from the Memorial are made from 9 image brackets that are 1EV apart from a Nikon D800. I am doing more comparisons, and will post more when I have worked more with the program.

Lincoln Memorial - HDR Image - ©TimeLine Media
Lincoln Memorial – HDR Image – ©TimeLine Media

TimeLine Media – www.timelinedc.com
703-864-8208

Watermark Images – Tech Thursday

©TimeLine Media - Fairfax Corner Christmas Tree Lighting

A few readers and Facebook friends have asked about how I watermark my images. This is the “TimeLine Media” bar that I add to the bottom edge of all the photos I post online. Currently, there is a hot debate online about the use of watermarks when posting photos online. With software, most watermarks are easily removed, and their addition to your image will add a VERY distracting element to the frame.

Yes, it may deter some from stealing your image, but if someone is out to take your image, they would never have been a paying client for you whether you added the it or not. That being the case, I continue to add watermarks to all my images – selfishly to see the images used around the web, and in case I forget that I made a particular photo. In case you were wondering, if you purchase a digital download (any size) from the proofing website, there is no mark whatsoever on the file. If you paid for it, you should have a clean image! As the debate goes on, I may change my stance on my personal posting, but for now, the watermarks stay. Here is how to watermark your images easily with  Adobe Lightroom.

Adobe Lightroom

©TimeLine Media - Fairfax Corner Christmas Tree Lighting
©TimeLine Media – Fairfax Corner Christmas Tree Lighting

First, create a PNG file in Photoshop or other image editor like Microsoft Powerpoint with the design that you want for your watermark. I have a transparent bar at the bottom with my logo and text with my website. The file is sized 600 px by 400 px, my default size for posting images on the blog. Create your watermark with a transparent background, then save as a PNG file which will preserve the transparency over the larger part of the image which you do not want covered in any way. This is easily done in Photoshop, and here is a screen shot from my layer setup of the watermark image.

Watermark Images

Adobe Photoshop - watermark setup
Adobe Photoshop – watermark setup

In Lightroom, you can add a watermark at the bottom of the Export dialog box. From this box, you can add a text watermark such as “©TimeLine Media” or you can select your PNG file as your watermark. You can adjust many settings in this box including the font of the watermark (if using a text watermark). how much the watermark takes up in the photo, and whether you want it in a corner or over the center of the image.

Lightroom Export Image dialog box

With Lightroom, you can select a group of photos to export at one time. If you choose to add a mark with this dialog box, it will add it to every image you export. If you like how it looks, and you think that you will use it more in the future, you can create a preset of your watermark that you can add with one click each time you import a batch of photos. Let me know how this goes for you, or if you have any other questions on how this is done. If you have any thoughts on the use of watermarks in general, please let me know!

TimeLine Media – www.timelinedc.com
703-864-8208

Working with Lightroom Catalogs – Tech Thursday

©TimeLine Media - US Capitol Building, Washington, DC

Adobe Lightroom is the best photo editing software available today. At this time it has support of all the major camera manufacturers and is best suited to handle professional RAW files from digital cameras. Many of my Tech Thursday articles have talked about working in the program, but I want to post today about the backend of working with Lightroom, specifically Catalogs. These are files that have the “.lrcat” extension. There are different strategies for working with these files, but I wanted to show you how I work with them to keep things organized, and to keep your hard work safe from potential data loss.

Catalogs in Lightroom

With this in mind, I create a new catalog file for every big event that I photograph. If it is a wedding, I will create a new catalog “brides_name__grooms_name.lrcat”, if it is a ballroom dance event, I will make a catalog “year_eventname.lrcat”. Afterwards, I will import only the files from each event into the catalogs, and work with them from there. There are some that will add every image from every shoot into one large catalog. With the metadata searching power of the Library, I can see the advantage of doing this. According to Adobe, there is no limit to the amount of photos you can have in one catalog – some have reported using catalogs with 800,000 images and more!

I separate my shoots into separate catalogs for 2 reasons. The first is that I have experienced catalog corruption when working with some Lightroom catalogs. In these cases, there was some data errors in the lrcat file which prevented the file from being opened! All of the edits from that event  with ~1200 photos were lost, and had to be redone. What if that were to happen in a catalog with 800,000+ photos! From then on, I have clicked the “Automatically write changes into XMP” under Catalog Settings so that if a catalog was corrupted, the work would be saved in the XMP sidecar files along with the RAW files, and the catalog could easily be recreated. Let me know if you have any tips with working on your Lightroom catalogs.

Enough with the geeky talk, here’s a pretty photo. The Capitol building will need major renovations which are scheduled to begin later this year. Here is a late afternoon photo before all of the scaffolding goes up. Enjoy!

©TimeLine Media - US Capitol Building, Washington, DC
©TimeLine Media – US Capitol Building, Washington, DC

TimeLine Media – www.timelinedc.com
703-864-8208

1 2 3 4 5