Posts Tagged ‘Tech Thursday’

Synchronize Photos – Tech Thursday

Synchronize files - Adobe Lightroom

Having multiple cameras on a shoot is a must for professional photographers. Your camera will only fail at the worst time! There is never a good time to have your equipment fail. However, if you are at a wedding, or covering an important dance performance, or VIP meeting, you want to make sure you have a backup on hand in case something goes wrong. Another reason is to keep your creative options open. Having two different lenses on the cameras allows you to get a variety of images from what is happening right in front of you.

Now that you have things covered with your equipment, you may now have another problem. Unless you and your assistants are diligent, the clocks on your cameras may not be set to the correct time. Will this be important? It depends on what you are shooting, and how your clients will be viewing the photos. In most cases, people like to view their photos in chronological order. On a wedding day, you want to see the day starting with preparations before the ceremony. From there you progress to the ceremony, then the reception. Having some reception photos while still viewing ceremony or portrait shots, make the presentation confusing. If you are photographing dancers, you want to make sure that all the photos from a heat are together. This is so the dancers can find all their photos together after the event.

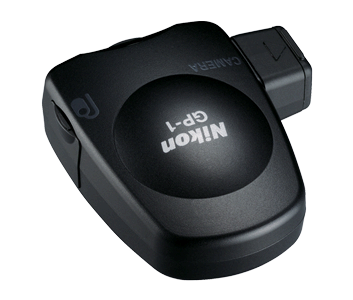
If you are using the same camera brand, use a GPS unit like this one from Nikon – the GP-1. This can synchronize the cameras to get your location information as well as synchronize your camera’s clock to the GPS clocks. No more accurate way to get your times right!

Nikon GP-1 - GPS unit
Nikon GP-1 – GPS unit

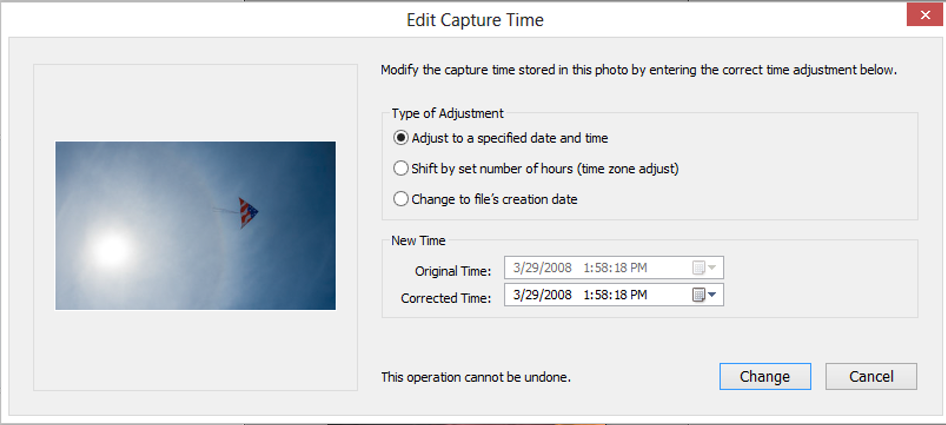
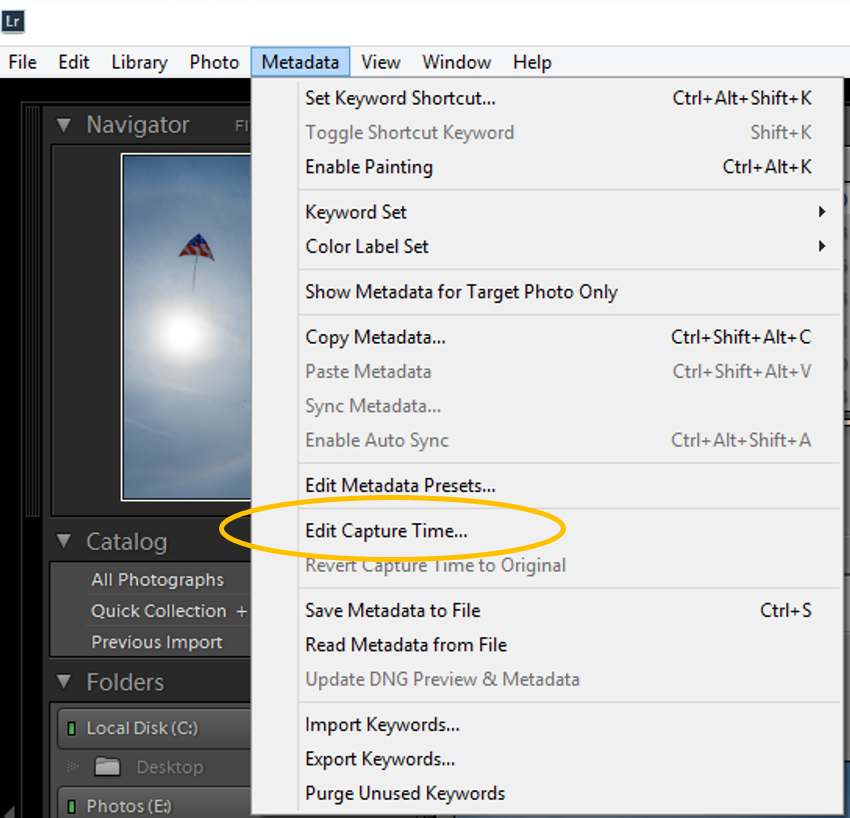
If you have different cameras, you can line up all your cameras and take one photo at the same time. Then after the event, go back to these photos, and set the time for the photos from one camera to match the others. I do this in Adobe Lightroom where I do most of my editing, but this can be done in other metadata managing programs such as Photo Mechanic. In the Library module in Lightroom, select all the photos from a camera, go to the Metadata menu and select “Edit Capture Time”.

Synchronize files - Adobe Lightroom
Synchronize files – Adobe Lightroom

Here you can enter in a time that exactly corresponds with the time from another camera taken at the same time. Now, if you sort all the photos by capture time in the Library, they should all be organized chronologically. This has saved me lots of time in finding dancer photos from long events, and has helped to organize wedding photos for viewing. Hope this helps!

Synchronize files - Adobe Lightroom
Synchronize files – Adobe Lightroom

TimeLine Media – www.timelinedc.com
703-846-8208

Tech Thursday – Fisheye Lens

©TimeLine Media - Fisheye Jefferson Memorial Corrected

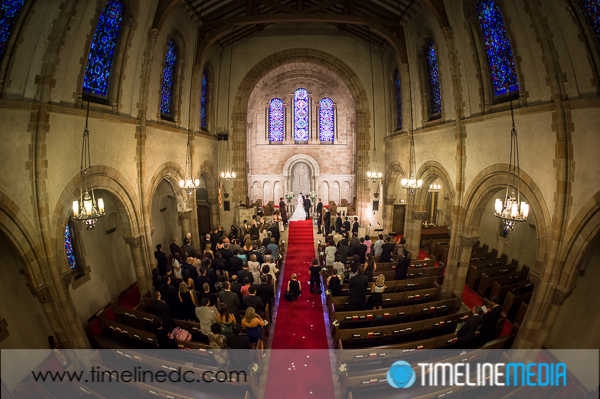
For today’s Tech Thursday post, I wanted to go to the opposite side of the focal length scale. Last time, I posted about the 70-200mm f/2.8 lens. This is by far the longest lens I use on a regular basis. One of the widest lenses that I have is the 16mm Fisheye lens from Nikon. This is undoubtedly an extremely wide-angle lens. In sum, it allows for a complete 180-degree field of view in the camera frame. This is one piece of camera gear that is overused by photographers when they first get their hands on it. You definitely need to get this out of your system with interiors and landscape images. Here is an example of a shot with the Fisheye lens from the balcony of a church overlooking a wedding ceremony.

Wedding Photography

©TimeLine Media - Fisheye wedding ceremony
©TimeLine Media – Fisheye wedding ceremony

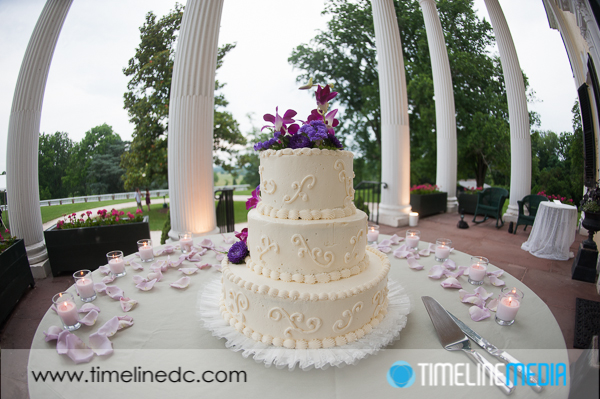
These make nice scene setting images for wedding albums. These are suited for photos where people faces are not prominent. The bowing of the image at the sides do not make this a good portrait lens. No one likes to be the curved/distorted one at the edge of a fisheye image! The wide field of view allows you to put lots of elements into a frame without resorting to a lot of post-production work to combine images. Here is another wedding image to put the cake in it’s complete setting.

©TimeLine Media - Fisheye wedding cake
©TimeLine Media – Fisheye wedding cake

The characteristic fisheye distortion is clearly seen in the columns. You will notice that the distortion is not as bad through the center of the picture. Place your subject as close to the middle of the frame to reduce the effect of the lens on your subject. This makes it challenging to keep the rule-of-thirds in the frame, but that is normal with these extreme lenses. If you do not want to have the curvature in the image, this can be corrected easily with software. In Adobe Lightroom 4, there is a lens correction feature that will fix the distortion in the image with a few clicks. I took a photo of the Jefferson Memorial in Washington, DC and corrected it Lightroom. Here are both the corrected and uncorrected versions of the photo:

Washington, DC

©TimeLine Media - Fisheye Jefferson Memorial Uncorrected
©TimeLine Media – Fisheye Jefferson Memorial Uncorrected
©TimeLine Media - Fisheye Jefferson Memorial Corrected
©TimeLine Media – Fisheye Jefferson Memorial Corrected

Now the angles have all been straightened, and the photo looks more “normal”. But you have the added benefit of having more of the area in the photo than is possible with a straight or rectilinear lens. Give these lenses a try next time you are thinking of visiting somewhere large expanses of views, or enourmous ceiling heights. They can be a lot of fun!

©TimeLine Media - example Fisheye photo
©TimeLine Media – example Fisheye photo

TimeLine Media www-timelinedc.com
703-864-8208

Compression – Tech Thursday

Arthur-Murray-ballroom-dance-photo-www.timelinedc.com

Tysons, Virginia

A few posts ago, I posted about depth of field in photography, and how you can use it to make more compelling images. When the aperture of the lens is opened, things in the frame that are not under the focus point will blur. Additionally have blurred background will not be distracting to the viewer. This pops the subject out from the frame and in particular gives a pleasing out-of-focus background for the main subject. Compression is another aspect relating to depth of field. Especially in the Spring Freestyles shoot I noticed that you can put to creative use in your photography.

If you want to experiment with your camera, set your F-stop to the lowest number available on your lens. In this case, this is printed right on your lens. For “kit” lenses that have variable apertures, it will say 1:3.5 – 5.6. On more expensive lenses it will only have one number like 1:2.8 or 1:1.4. The numbers 3.5, 2.8, or 1.4 designate what the largest aperture setting is possible with that lens. On variable aperture lenses, the largest aperture will vary depending on focal length. To put it another way, how far you have zoomed your lens will change the maximum aperture. At the wide, or lower end of the 1:3.5-5.6 lens the maximum aperture is f/3.5, zoomed all the way out, the maximum aperture is f/5.6. This is one of the specifications that makes professional lenses so much more expensive!

Compression

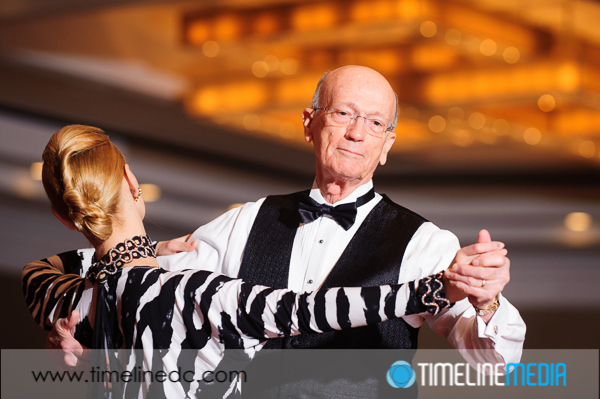
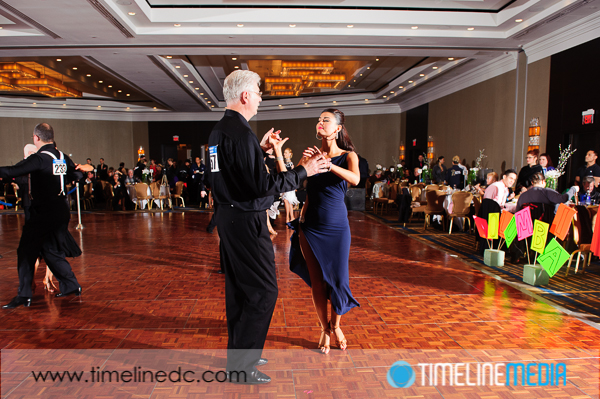
In looking through the Spring Freestyles photos, I saw compression, and small depth of field really changed a bank of lights in the ceiling of the ballroom. Take a look at these two photos, and notice the very yellow bank of square lights in the background:

Arthur-Murray-ballroom-dance-photo-www.timelinedc.com
©TimeLine Media – photo taken at a focal length of 24mm and an aperture of f/4

They are small, high in the frame, not really adding much to the background. This was taken at wide length (24mm) taking in the dancer’s full bodies, and much of the surrounding audience. Compare that to the image below:

Arthur-Murray-ballroom-dance-photo-www.timelinedc.com
©TimeLine Media – photo taken at a focal length of 150mm and an aperture of f/4

These were taken from the same shooting position, but I was crouched to the ground, and zoomed the lens to 150mm. This brings the bank lights much closer to the subject, and larger in the frame. With the large aperture of f/4, the lights, even though they take a  larger part of the image, are blurred to not be distracting. The longer focal length and shooting higher in the room also takes away the surrounding audience and other elements making this a nice portrait right on the dance floor.

Get out and try this next time you are shooting. Whether indoors or out, this concept works. You can bring mountains, a full moon, or (gasp!) cherry blossoms closer or farther from your subject depending on how your want to compose your image. Let me know if you have any other good examples from your work. Good luck!

TimeLine Media – www.timelinedc.com
703-864-8208

1 4 5 6 7