Posts Tagged ‘technique’

Adobe InDesign Intro – Tech Thursday

Arthur Murray - Chevy Chase, MD - ©TimeLine Media

The Adobe InDesign software is becoming a larger part of my photography as I learn more about the power of this program. The first time I used the program was with the CS5 suite as it was included with a package of programs from Adobe that included Photoshop, Illustrator and Lightroom. I did not think I would have any use for InDesign, but many photographers started to show videos on how they use InDesign for making album templates. It was then that it clicked!

Page Layout Design

Adobe InDesign CC Splash screen

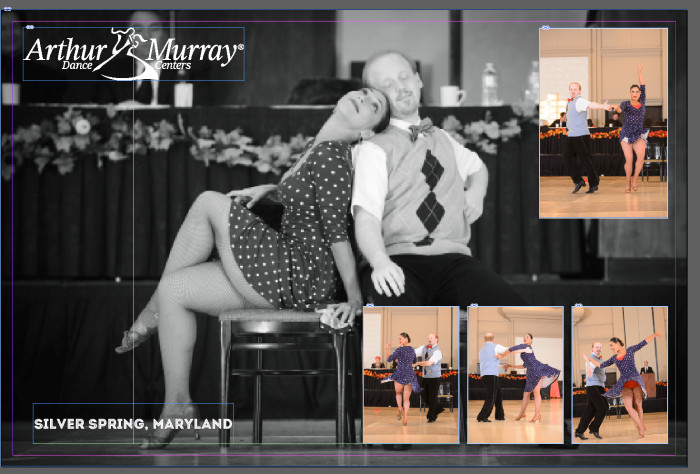
If keeping things perfectly centered, perfectly aligned with other elements, or perfectly aligned on a page, then this program is for you. It is amazingly useful for making album layouts. I use them for Ballroom Brag Books or wedding albums. Additionally it is really easy to make collages like I did recently for the TimeLine Media Facebook photo contest:

InDesign working layout - ©TimeLine Media
InDesign working layout – ©TimeLine Media

Frames are the basis for working in InDesign. You create the frame where you would like to place your element. These can be photos, text, illustration, or any other digital object. When adding text, you need to draw out the size of the box that you would like, then type. Afterwards, the text box acts like a text box in any other application. The powerful part of InDesign is that the frame can be moved anywhere on the image. Also, there are live guides (colored green) that will pop up when the text box is centered to another frame, or when the bottom of the frame will align with others. This has helped to lay elements out perfectly straight. Concurrently it will save you a lot of time if you are mixing images and text.

Speaking of which, I have a friendly photo contest going on at the TimeLine Media Facebook page. To help us decide which of the professional shows to feature at the upcoming Spring Freestyles, I have made posters from all the shows at the last Showcase. The 2 posters that received the most votes will be printed and displayed at the event. Please visit the page to vote for your favorites with a click of the “Like” button. Thank you!

Arthur Murray - Chevy Chase, MD - ©TimeLine Media
Arthur Murray – Chevy Chase, MD – ©TimeLine Media

TimeLine Media – www.timelinedc.com
703-864-8208

New Nikon D4S Announcement – Tech Thursday

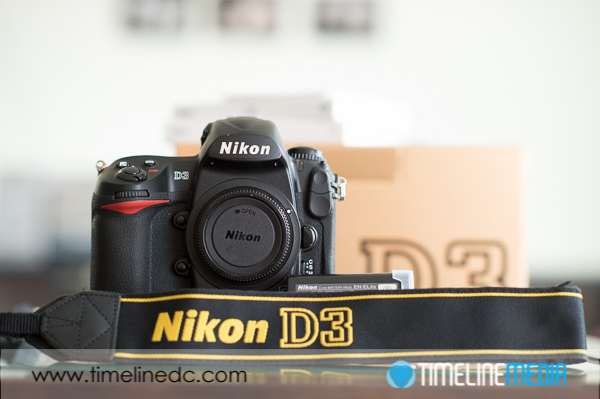
Nikon D3 - ©TimeLine Media

Upgrading Tech

Has it been 2 years already? Nikon releases new camera bodies less frequently for their top end professional line (thank goodness). For them to take such a long time in between the release of a new body, they try to make improvements making it worthwhile for users. You can find rumor and review sites to read the specs. However here are my impressions on the new developments for their flagship Nikon D4S that was just recently announced.

  1. 16.2 megapixel sensor – This is a redesigned sensor from the Nikon D4. Additionally it does have some better improvements with the link EXPEED 4 image processor. I like that they did not up the megapixel count! The 36 megapixels in the D800 are a bit of a chore to work with. They take up so much hard drive space, and they take a big chunk of memory to process on workstations.
  2. Group area Autofocus – This is a feature that Canon digital cameras have had. Consequently, I was waiting to see it in a Nikon. Something has changed in the way that Nikon has designed their auto focus systems that has made me have a little less faith in how accurate they are in locking focus. Both the D4 and D800 have had more misses due to backfocus, or other missing focus compared to older models. Considering they have not changed the options and setup of auto focus in the camera menus, I am having more trouble with them. I am hopeful that grouping together a bunch of focus points to cover an area to track focus will improve the performance.
  3. XQD and Compact Flash card slots – Disappointing! Till now, I have not seen any other still camera manufacturer support the XQD card format. I do like that it handles like a more robust SD card with super quick transfer speeds, but having to carry around two different formats of cards neither of which have built in readers for laptops is a pain. I would have preferred 2 XQD cards, or even two of the new UHS-II SDXC cards – they can transfer at up to 280MB/s, with readers that are readily available on almost any laptop.

In any case, it is nice to see that Nikon is still trying to improve on image quality. Images that I shot with the top end Nikons from 4 years ago are holding up nicely especially compared to any image made on a smartphone, and many modern DSLRs. But it still depends mostly on what is in front of the lens to make the photo. It is just fun to geek out once in a while.

Nikon D3 - ©TimeLine Media
Nikon D3 – ©TimeLine Media

TimeLine Media – www.timelinedc.com
703-864-8208

Tech Thursday – Snow Melting!

Melting snow with +1 stop exposure - ©TimeLine Media

We are starting a thaw out from last week’s wintry weather! It has taken a week, but finally we are starting to see some grass peeking out from under the snow. While it was falling heavily, I did not have the urge to take many photos. I am sure that there were some spectacular opportunities to do so. However, it just did not happen for me this time. Perhaps it was the preparation for the big ballroom dance event that stopped me from getting out. I have all the cameras and lenses to make something out there but I missed an opportunity.

Adjusting Exposure

Melting Snow - ©TimeLine Media
Melting Snow – ©TimeLine Media

With the shooting of the event now completed, and the warmer air outside, I wanted to get some photos before ALL the snow had melted. Going out there with the Fuji X100s made it easy to illustrate the first lesson that everyone learns when photographing in the snow. You need to “overexpose” or add more light to the scene than you normally would when taking photos.

The meter built into your camera is designed to measure the light coming in through the lens. It will tell you what settings will make for a balanced exposure. Technical photographers will call this calculating the exposure for “middle gray”. In other words, the brightest areas will not be too bright that they lose detail. Concurrently the darkest areas will not be too dark to lose detail. Unfortunately, these settings will make your snow look like “middle gray” as in the example here:

Melting snow with metered exposure - ©TimeLine Media
Melting snow with metered exposure – ©TimeLine Media

Adjusting Defaults

To restore the snow to its pretty white brightness, I had to add 1 stop of exposure, or overexpose the meter reading by one stop to get a nice white from the snow. Either the shutter speed is slowed down by one stop, or your can close down the aperture by one stop. Because I do not care to see any detail in the snow as it does not add to the photo, go ahead and let it be too bright. It is only a base or background for the frame, and does not need to be as detailed as the branches of the tree.

This technique not only works for snow, but works for window light, backlighting, or any other elements that are in your frame, but are not the main subject. They can be blown out, or overexposed without affecting the portrayal of your subject – the one thing you do want to see.

Melting snow with +1 stop exposure - ©TimeLine Media
Melting snow with +1 stop exposure – ©TimeLine Media

TimeLine Media www.timelinedc.com
703-846-8208

1 6 7 8 9 10 19