Tysons, Virginia
I received some questions about this photo from a few post ago:
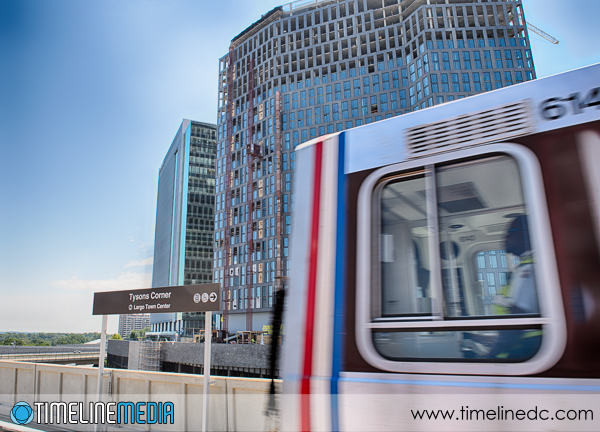
This was a high-dynamic range (HDR) photo from the Metro platform with an incoming train going through the frame. I really did not know if this would work at the time I took the images. For HDR, you need to make a series of exposures that differ in shutter speed. This will create a range of images that vary from underexposed to overexposed. Using the bracketing functions built into the camera, you can set this up in camera.
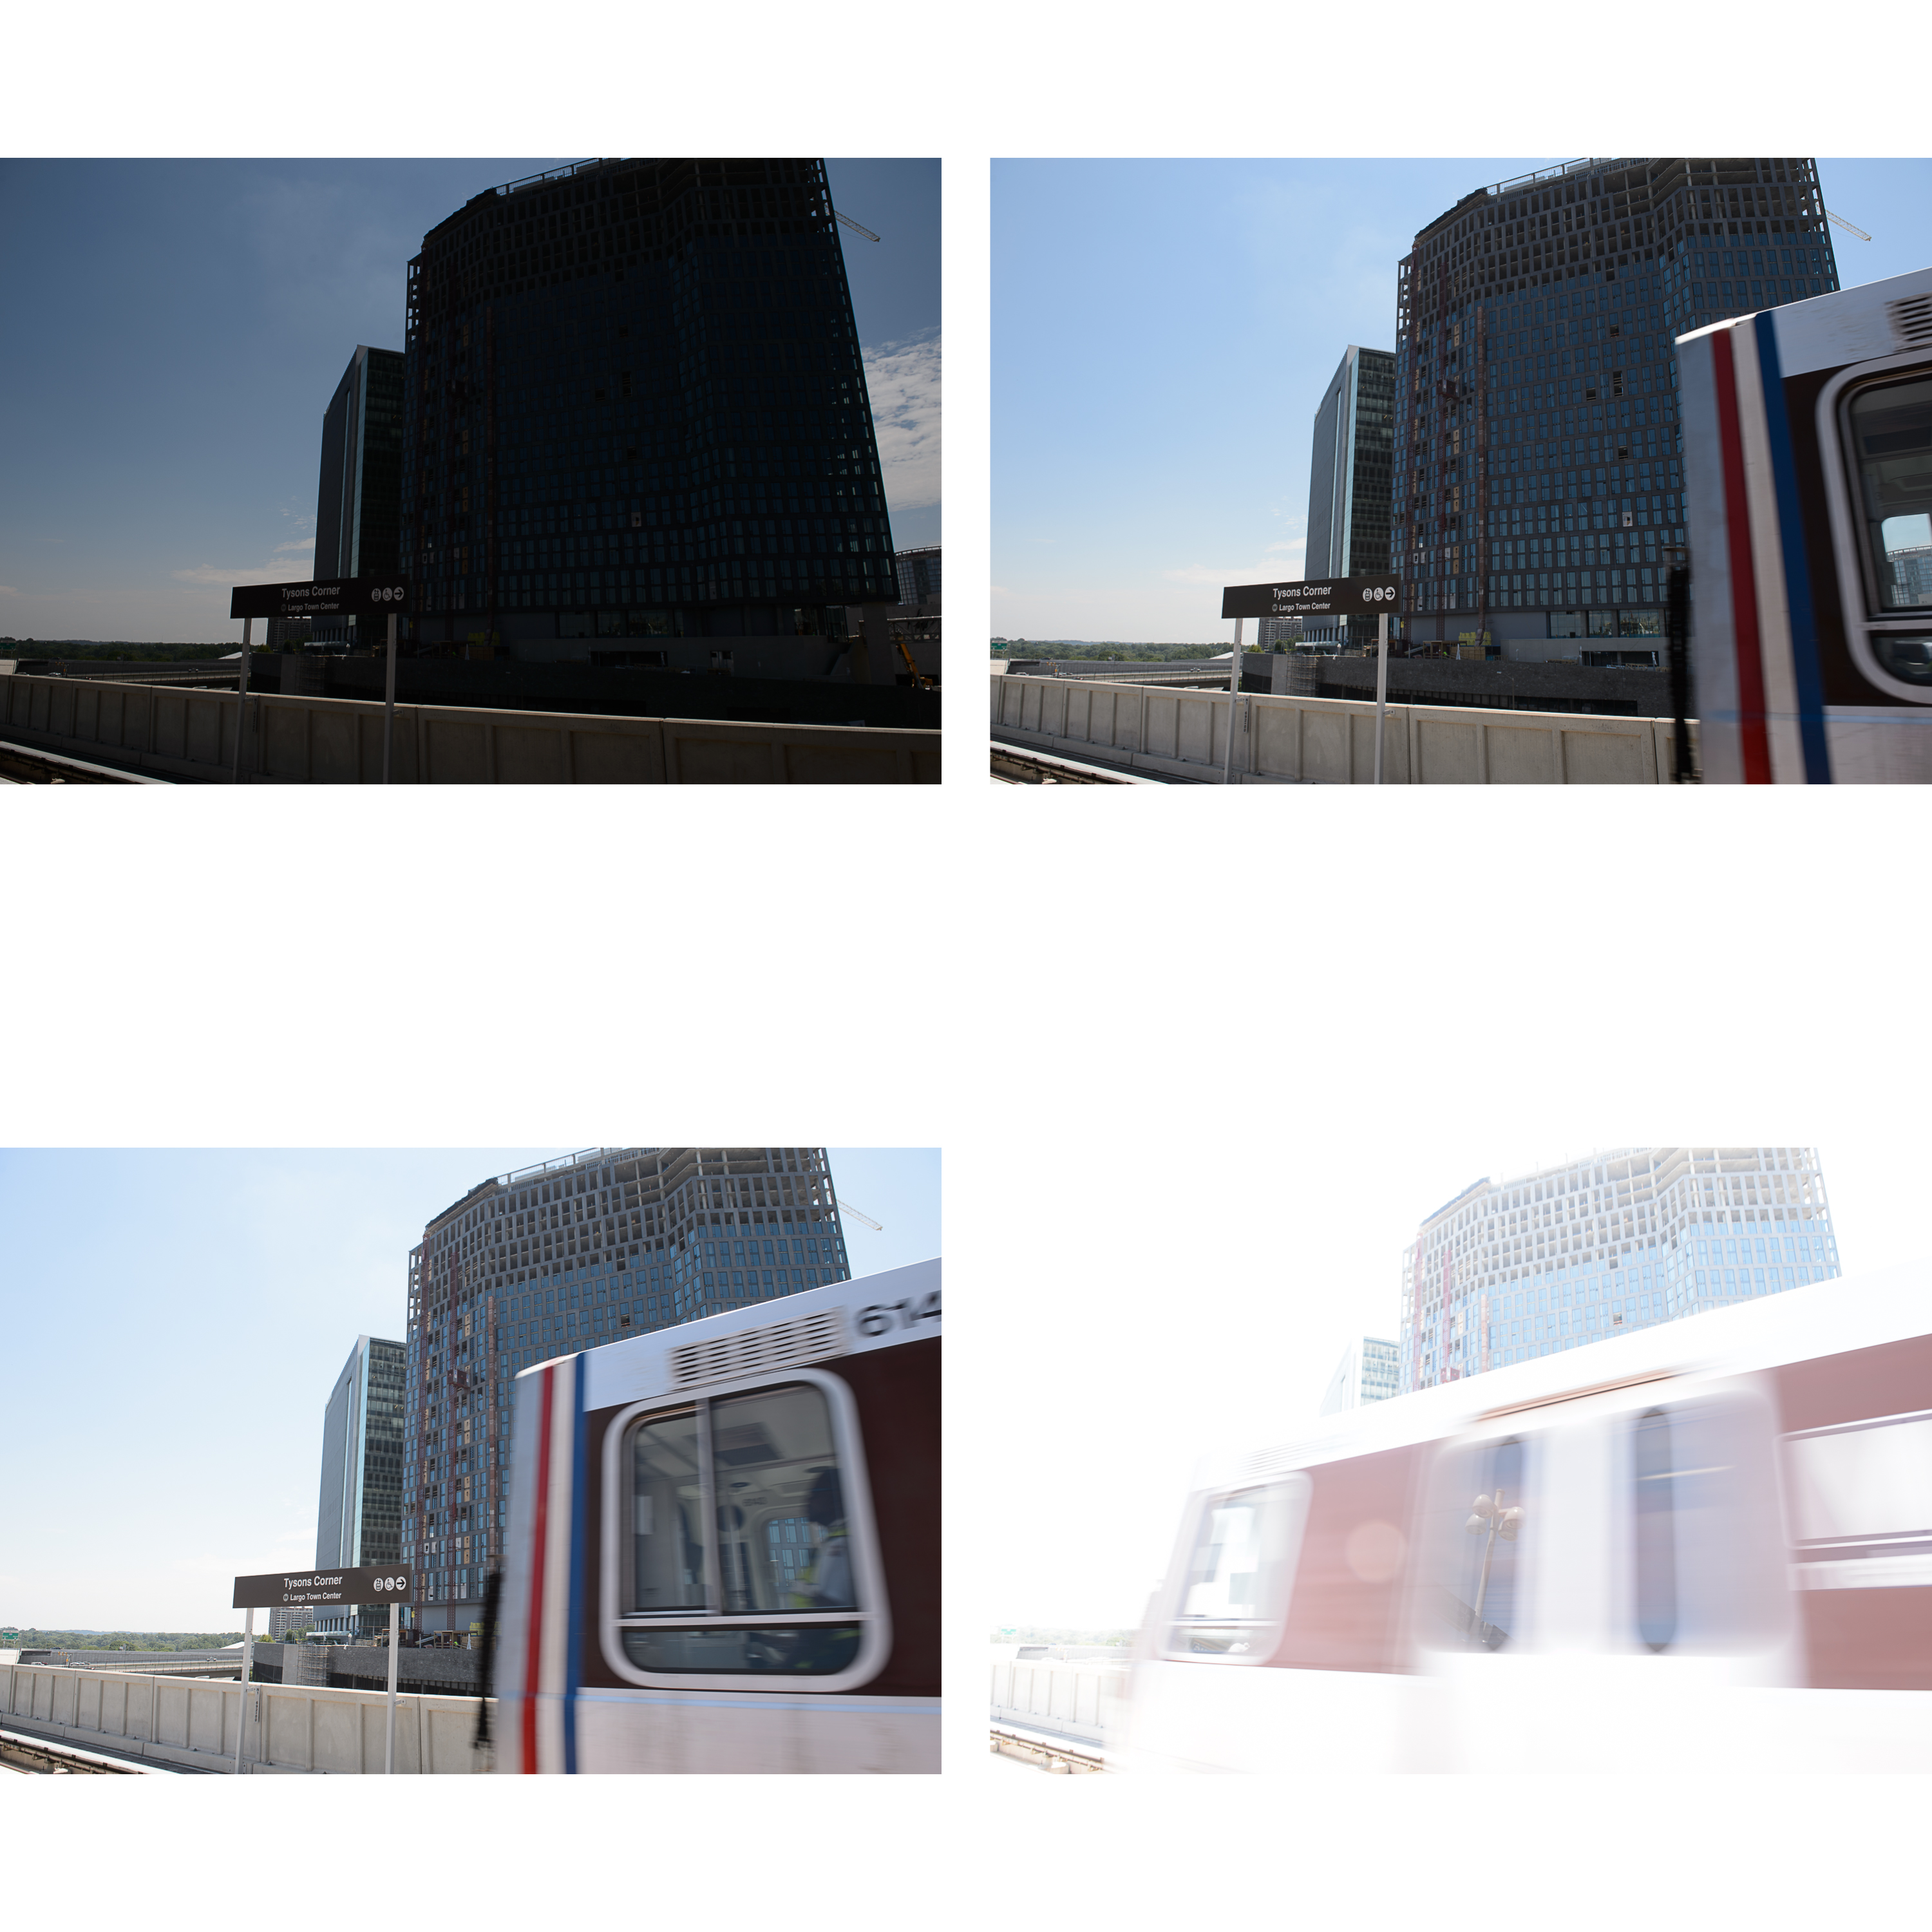
Using the very fast motor drive of the Nikon D4, there is very little difference in the composition of each frame. For the most part, you would not seen much differences except for the moving train cutting across the middle. This is what you need – the composition should be as similar as it can in each of the bracketed frames. With this in mind, the software can align each individual image for processing.
Post Processing
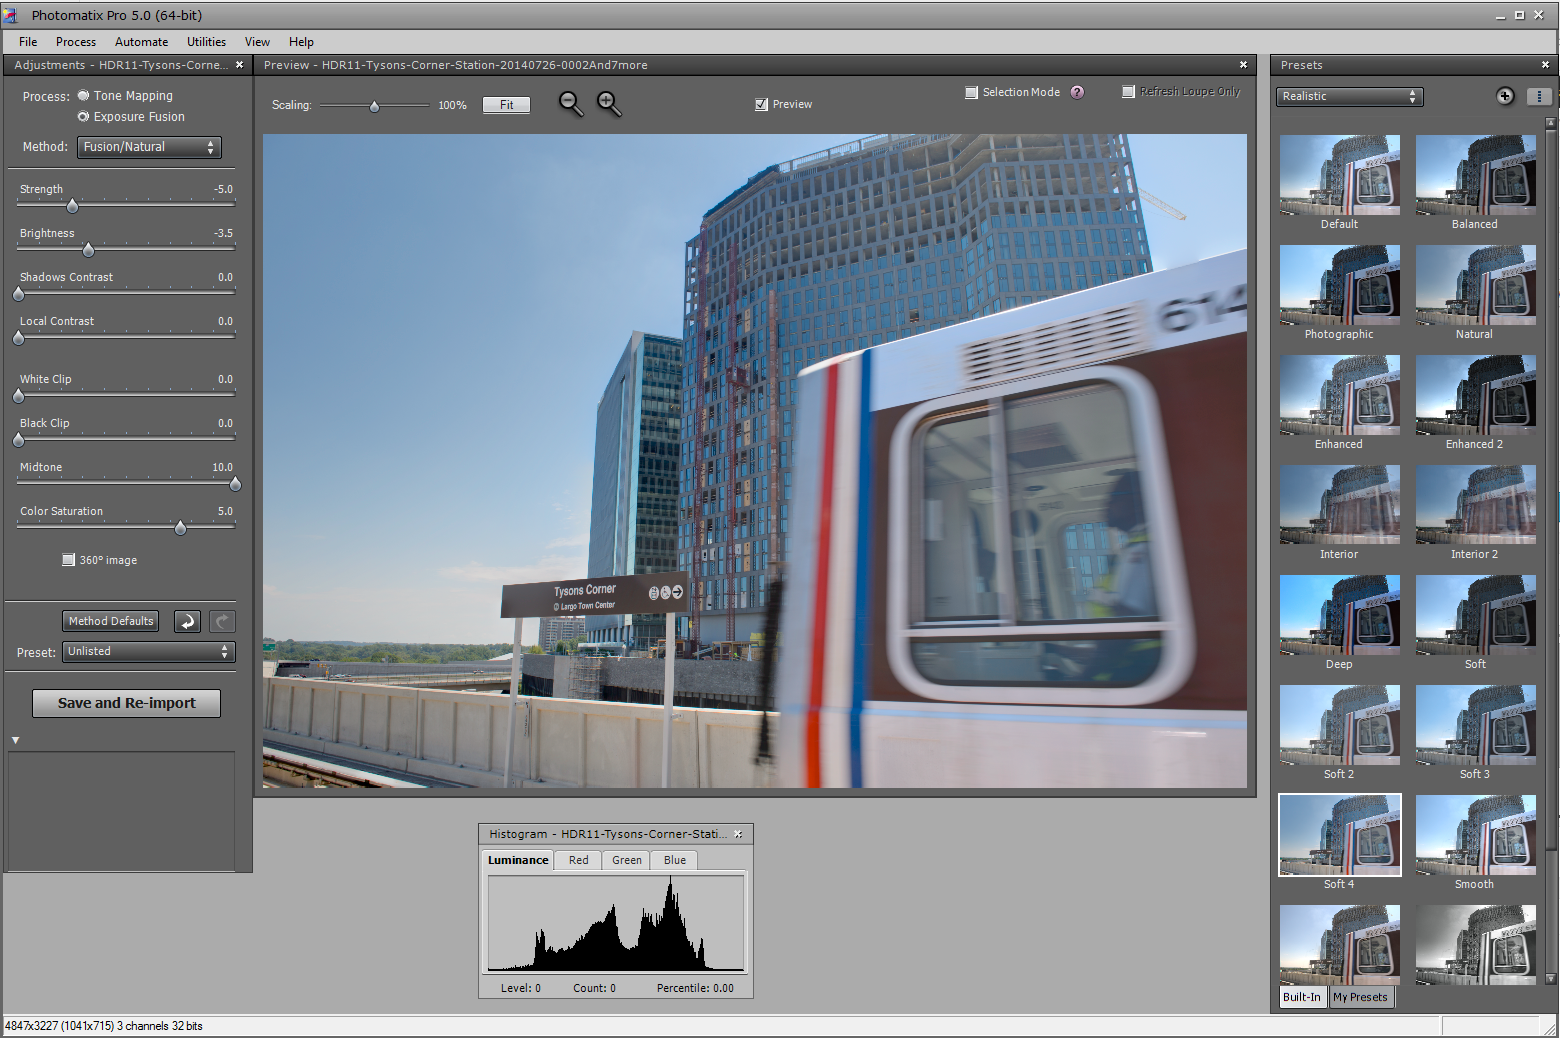
For this particular set, I brought the bracketed images into Photomatix Pro 5.0. After you export the images from Lightroom to Photomatix, you are presented with a Deghosting dialog box:
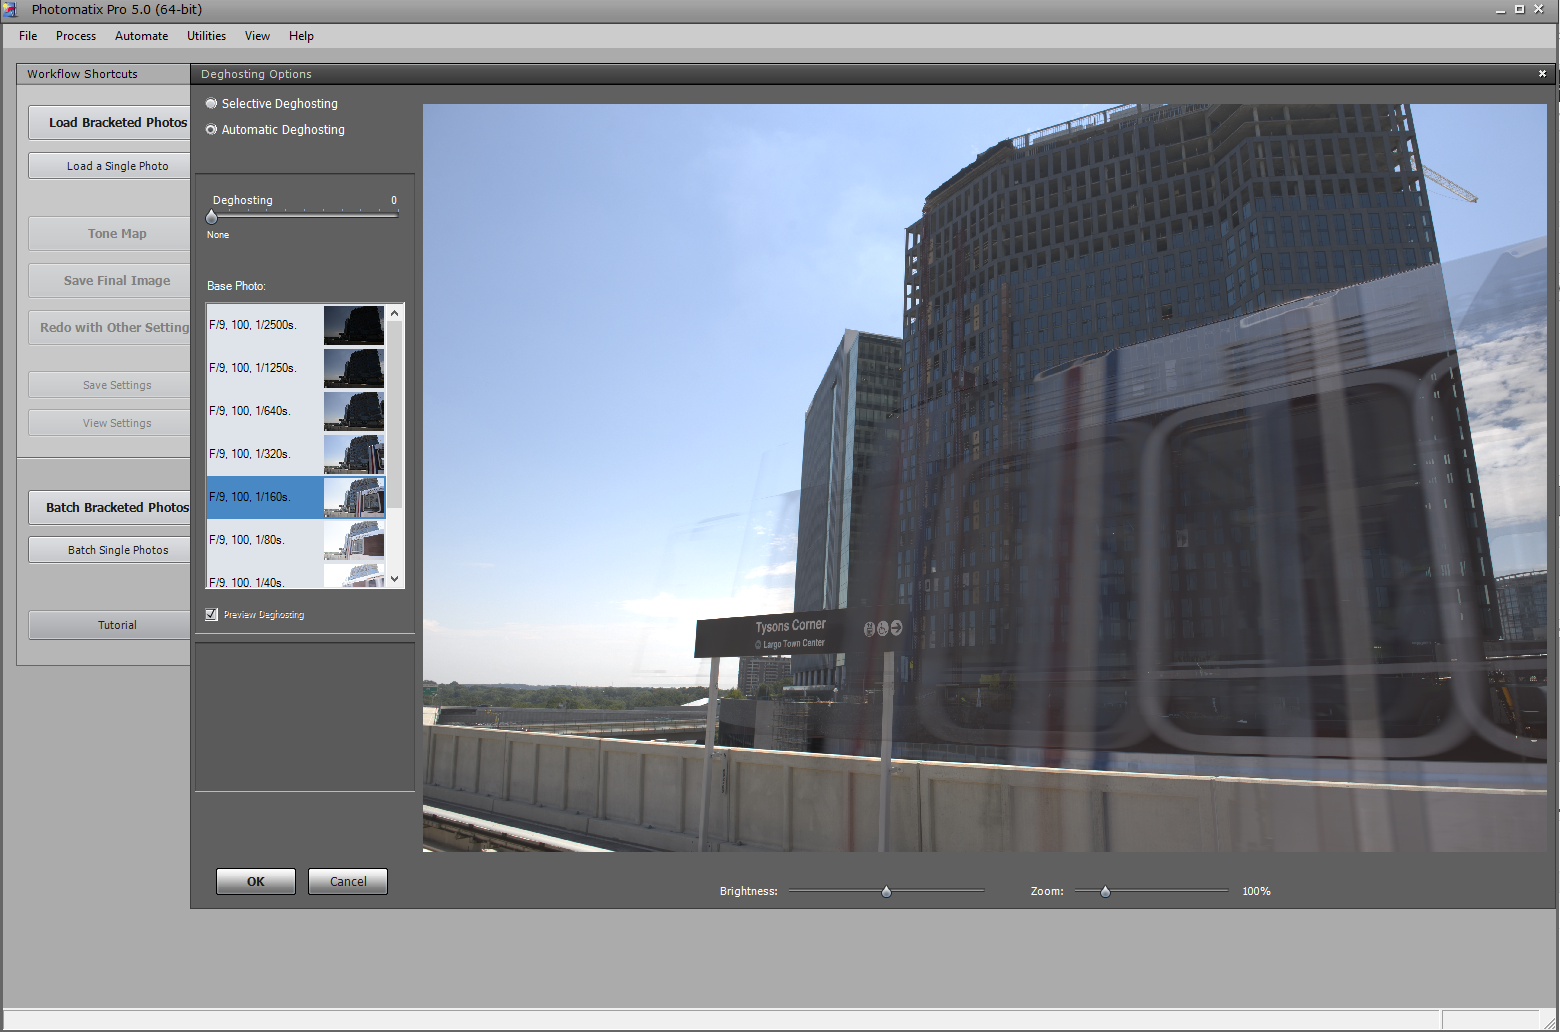
From the initial preview, you can see that the train is a mess. There are many different versions you are trying to stay, and the software is trying to put all of them into the combined image. To clean things up, you need to drag the “Deghosting” slides on the top left all the way to the right. This is the “Very Strong” setting. Then from the set of images below, select which of the bracketed photos you want to select as the master or source file that will take precedence over all the others. I chose the 1/160s one because the train was just starting to come into the frame. and you could still make out many of the numbers at the top of the train.
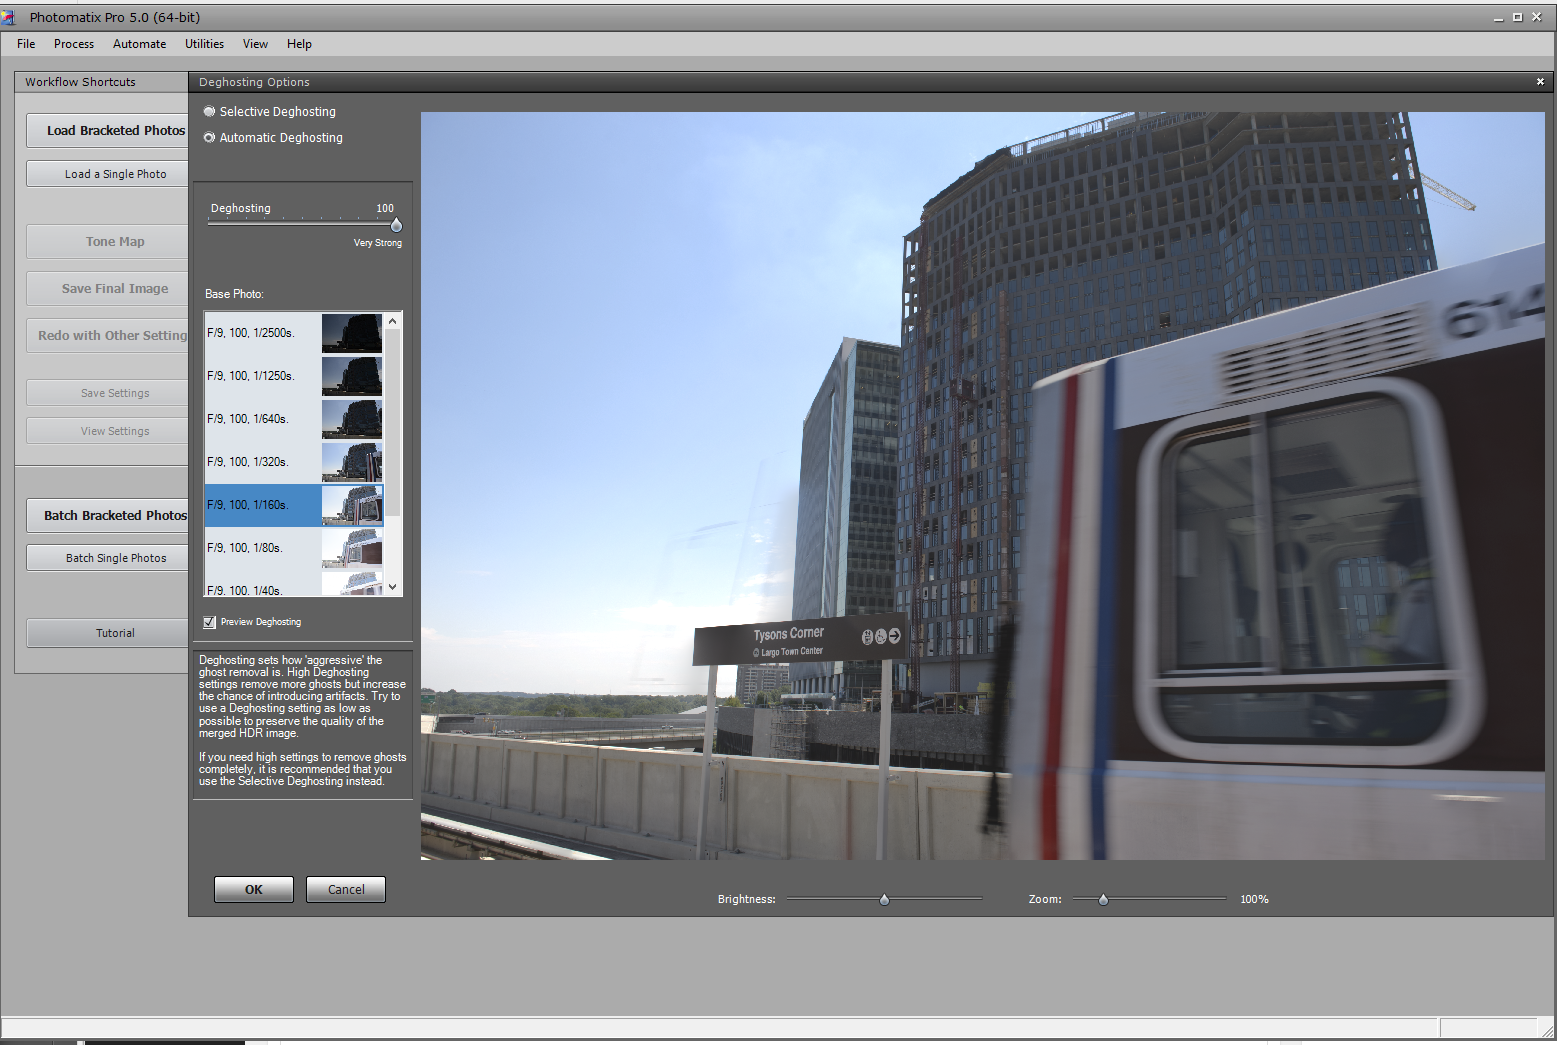
After selecting ‘OK’ you have a much cleaner file to tone map to your final HDR image in Photoshop. This is an extreme example, but it will work if you want to clean up moving people in an image, or anywhere that the preview HDR looks too muddy or blurry. Give it a try!
TimeLine Media – www.timelinedc.com
703-864-8208