Posts Tagged ‘Adobe Photoshop’

Content Aware Photoshop | Tech Tuesday

Outdoor Photos

It has been a busy week for putting in print orders – Thank you!! Some were talking to us about photos at the last ballroom dance event and had questions about dimensions of photos. This is an old discussion that photographers have been having for years. The cameras that most consumers use create images that have dimensions that are 2 x 3 natively. That means that to get the entire images onto a piece of paper without any borders or cropping, the size of the photos has to be 4” x 6”, 6” x 9” or 8” x 12”. Notice that the popular 5” x 7” or 8’ X 10” dimensions are not listed!
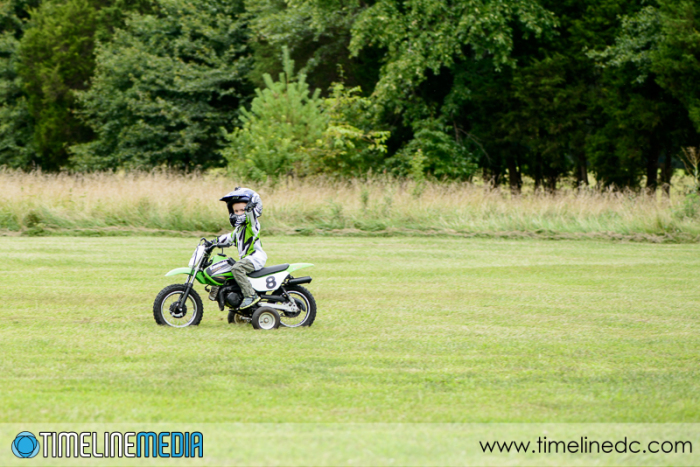
Initial-image-prior-to-editing-©TimeLine-Media

Photoshop Editing

In order to create those, some cropping is needed for these sizes. For the most part it means that something will get cut off in the frame. Please do not worry about this! As part of the editing process (that week where I am off social media and blogging after a big event) I am looking at each photo. With this in mind, I am cropping them down from their original state out of the camera to make sure the subjects are more prominent in the frame, and that they are placed better in the frame. This means that there are lots of cases where there is extra room where if you need an 8×10 print, I can redo the cropping to ensure nothing gets cut off, and all the important parts of the frame will still be in your photo before you receive it in the mail.

New Functionality

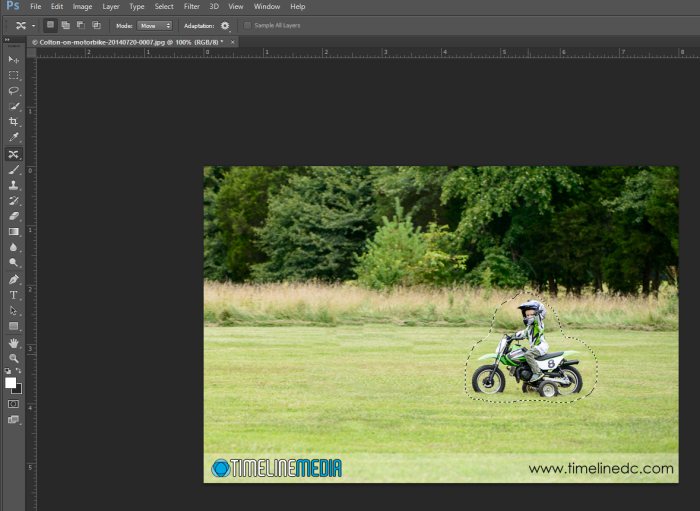
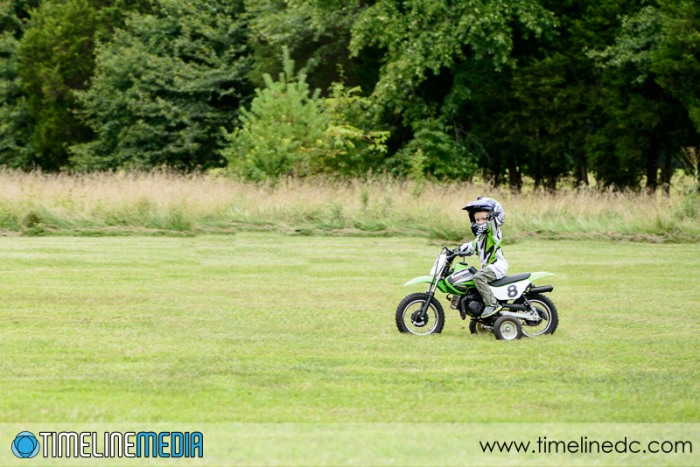
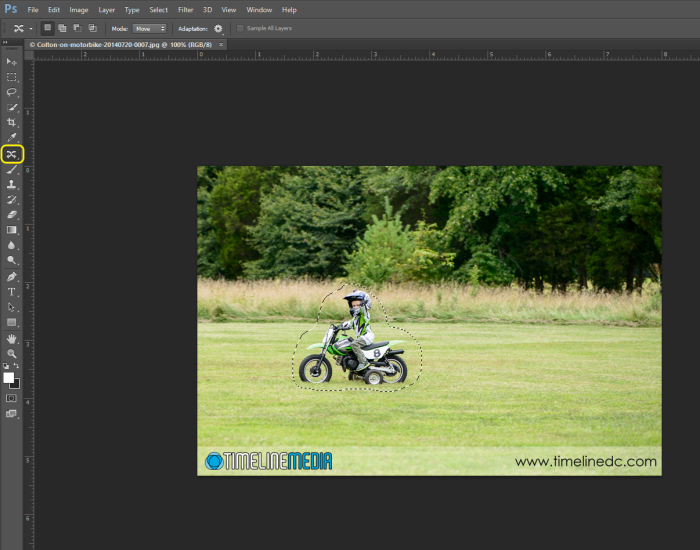
For extreme examples, I may have to do some Photoshop tricks to get things to work. At this point, this is where “Content Aware” functions do their magic. Using this example of my nephew riding a motorbike, you can see that the composition is not quite right. In fact, he is too far on the left of the frame riding out. A better composition would be for him to be more on the right with “room” to go through the frame. To move him back, I select an area around him with the Lasso tool: Select-subject-with-Lasso-tool


Then I click the “Content Aware Move” tool from the toolbar:

Select-content-aware-move-tool


Then I just click the selected area, and move it down the frame – Photoshop will fill in the space that I cut him out with surrounding content.

Move-subject-in-frame


In that way, I can move subjects around a frame, and put them in a place that is easier for cropping images. Not every case is as easy as this one, but if you have a specific request, please know that there are lots of options to get the final photo that you need in a specific frame dimension.

Final-edited-photo-©TimeLine-Media

TimeLine Media – www.timelinedc.com
703-864-8208

Heroic 3D Titles | Tech Tuesday

Dance Photo Posters

I had a record number of votes for the Arthur Murray professional show posters at the Facebook page! These featured an action photo from each of the dances performed with the dancers popped out in color. Additionally, I left the the monochrome background. On this occasion, I wanted to identify each of the studios that the dancers represented. Also, I wanted to make a new design for the titles. For the most part, I have a font with some kind of layer style applied in Photoshop. In many blog posts and videos online, I have seen a lot of features added to the 3D panel in Photoshop. Additionally that can make editable text into 3D models that can be easily added across multiple images.

Arthur-Murray-Ashburn-winning-poster-©TimeLine-Media


The 3D extrusion function was introduced in the CS6 version of Adobe Photoshop. Since it has been a few versions now, the technology has really evolved quickly, and is quite powerful for those that know what they are doing. I am just dipping my toe into this section, so I still in the hunting, testing, and experimenting phase. That being the case, I was really impressed with how easy and fast the 3D works in Photoshop CC 2014!

Starting-text-layer-©TimeLine-Media


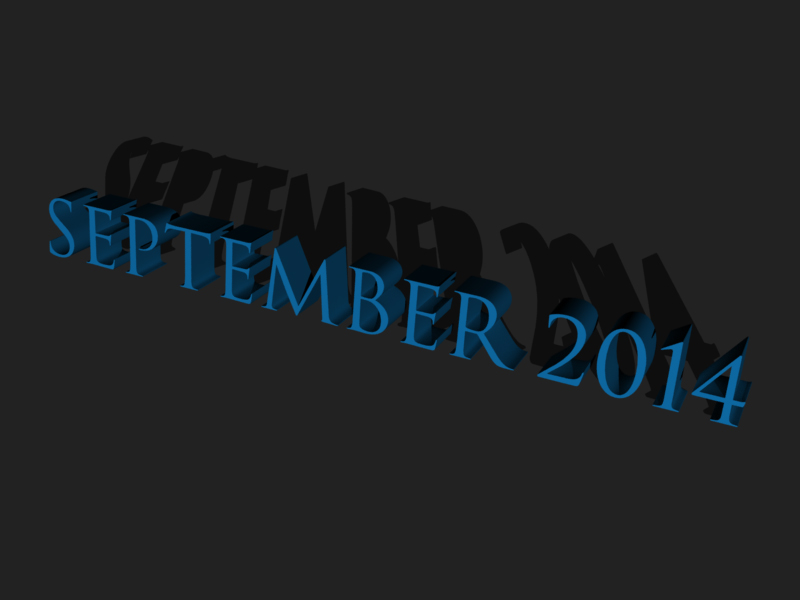
Start by making a simple text layer on a dark, contrasted background. Clicking on the 3D Menu, then “New 3D Extrusion from Selected Layer” will transform the text layer into a 3D object. This is now the ultimate Smart Object! Viewing the 3D panel, and the Properties panel, you will notice a large number of options to manipulate the design from here.

3D-Extrusion-of-Text-Layer-©TimeLine-Media


From here, you can change the rotation of the text, the depth of the 3D object, and the angle of the text to the view. And this is all by the clicking and holding the mouse and dragging it around the screen! It does not take much to produce some nice dimensional effects for titles. In future entries, I’ll post more about the details that I played around with to get the final versions. However, I’ll start with the basics to get others playing around with 3D just for the fun of it!

3D-Title-with-color-lighting-and-shadow-©TimeLine-Media

TimeLine Media www.timelinedc.com
703-864-8208

Software Perspective Correction

Final software corrected image

Post Processing

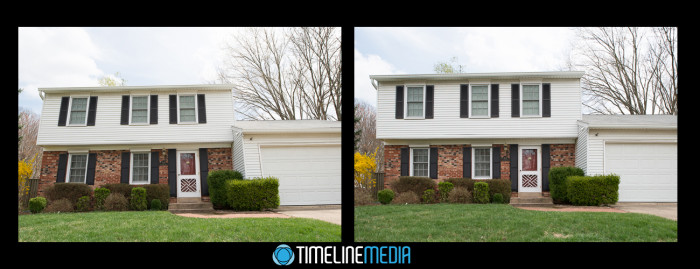
Thanks to feedback from my photographer friend, Jae, I decided to try editing the photo from yesterday’s post in software. In that case, I compared two images from a Nikon PC (perspective correction) or tilt-shift lens. Overall you can use this special lens to straighten angles of buildings that you photograph. Concurrently, the images will not have that “falling away” look. This is usually what you get when the camera is pointed up towards the top. With this in mind, here is a repost of the two images – the one on the left uncorrected, and the one on the right straightened.

Tilt Shift comparison - ©TimeLine Media
Tilt Shift comparison – ©TimeLine Media

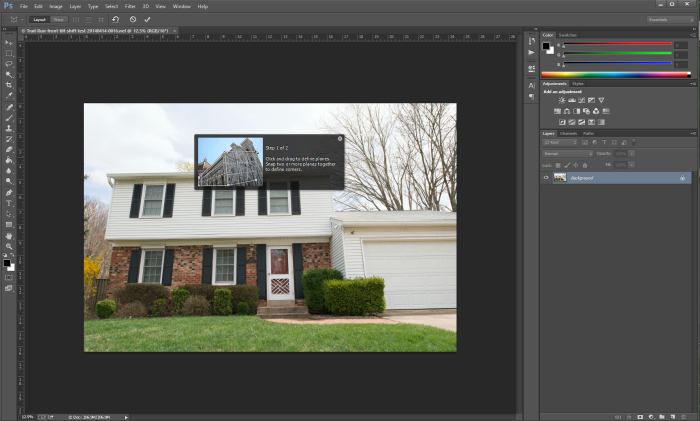
Today, I attempted to do the same correction on the left photos, but in Photoshop CC to see how close you can get in post. In Photoshop, I selected the Perspective Warp tool by selecting it under the Edit menu. This is the dialog box that pops up:

Adobe Photoshop

Adobe Photoshop Perspective Warp - 1
Adobe Photoshop Perspective Warp – 1

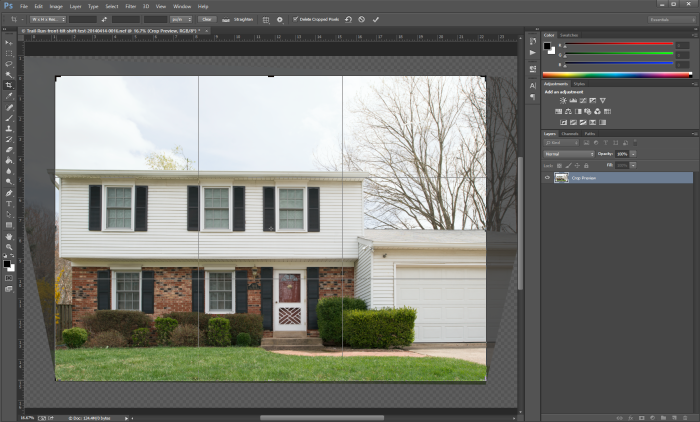
It tells you to draw a box around the areas that you would like to straighten. I go for the top half of the house as this is where I saw the biggest change in the photo.

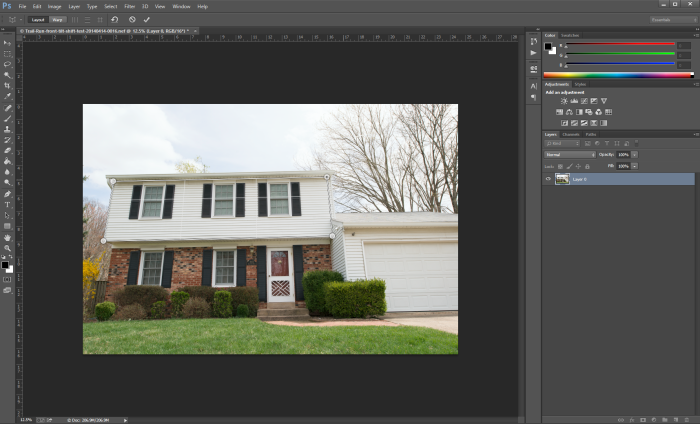
Adobe Photoshop Perspective Warp - 2
Adobe Photoshop Perspective Warp – 2

Next, I moved the corner dots to the edges of that section of the house that I wanted to line up:

Adobe Photoshop Perspective Warp - 3
Adobe Photoshop Perspective Warp – 3

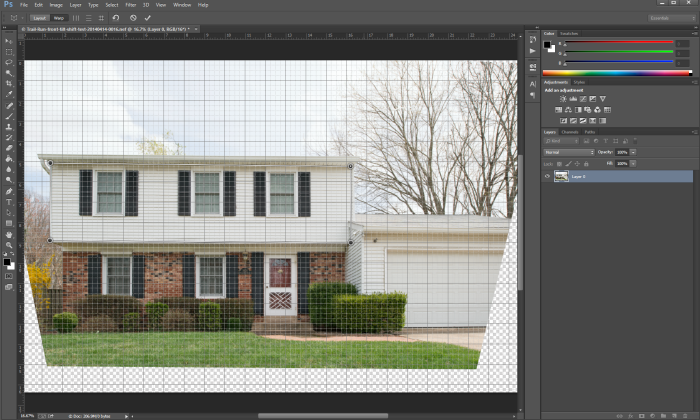
Turning on the Grid lines, it makes it easier to adjust the dots to be straight to each other, and the rest of the photo adjusts along with them:

Adobe Photoshop Perspective Warp - 4
Adobe Photoshop Perspective Warp – 4

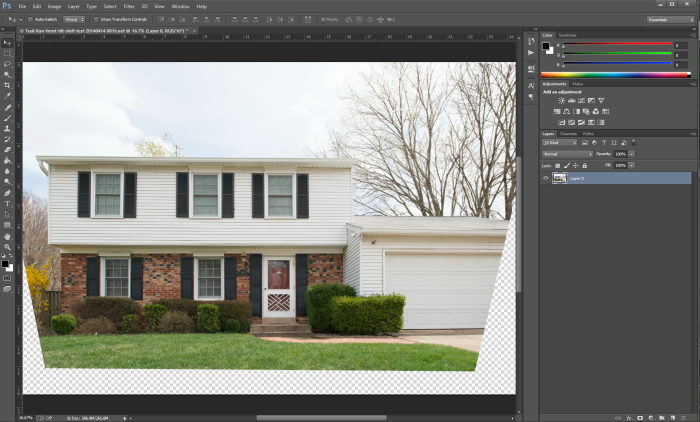
Clicking the check mark gives you this image:

Adobe Photoshop Perspective Warp - 5
Adobe Photoshop Perspective Warp – 5

This is very close to the corrected image! Unfortunately, you can see how much of the photo needs to be cropped out, which means that I will lose some of the structure in order to fill in the black background.

Adobe Photoshop Perspective Warp - 6
Adobe Photoshop Perspective Warp – 6

This is the real power of the tilt shift lens. In this case, the background is just made of lawn and driveway. You may need to have that area for indoor photos, or other larger projects. This also shows that this is a very specialized lens that will really show its magic in specific circumstances. It was fun trying this tool in Photoshop, and am happy that I could use this in a pinch! I would just need to set the camera back a little farther if I want to get more in the frame.

Final software corrected image

TimeLine Media – www.timelinedc.com
703-864-8208
1 2 3