Posts Tagged ‘post processing’

Content Aware Photoshop | Tech Tuesday

Outdoor Photos

It has been a busy week for putting in print orders – Thank you!! Some were talking to us about photos at the last ballroom dance event and had questions about dimensions of photos. This is an old discussion that photographers have been having for years. The cameras that most consumers use create images that have dimensions that are 2 x 3 natively. That means that to get the entire images onto a piece of paper without any borders or cropping, the size of the photos has to be 4” x 6”, 6” x 9” or 8” x 12”. Notice that the popular 5” x 7” or 8’ X 10” dimensions are not listed!
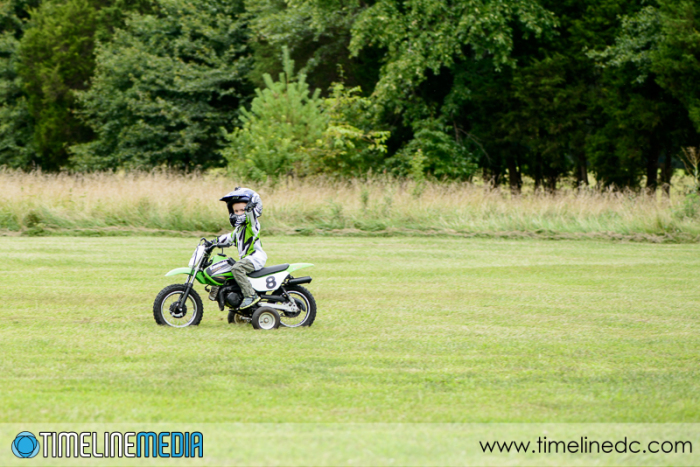
Initial-image-prior-to-editing-©TimeLine-Media

Photoshop Editing

In order to create those, some cropping is needed for these sizes. For the most part it means that something will get cut off in the frame. Please do not worry about this! As part of the editing process (that week where I am off social media and blogging after a big event) I am looking at each photo. With this in mind, I am cropping them down from their original state out of the camera to make sure the subjects are more prominent in the frame, and that they are placed better in the frame. This means that there are lots of cases where there is extra room where if you need an 8×10 print, I can redo the cropping to ensure nothing gets cut off, and all the important parts of the frame will still be in your photo before you receive it in the mail.

New Functionality

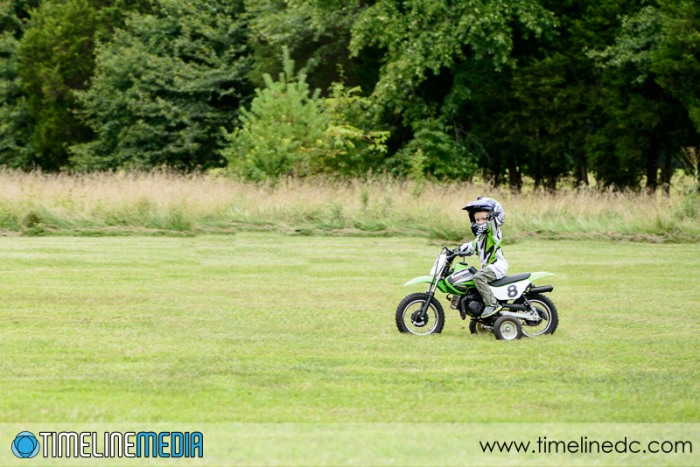
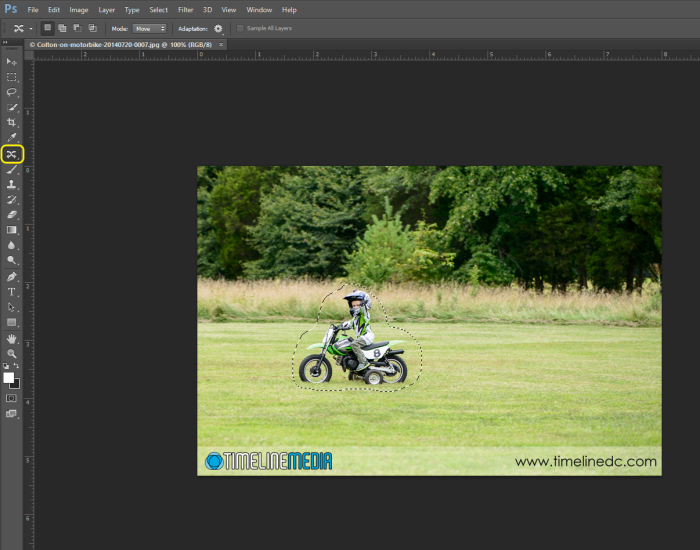
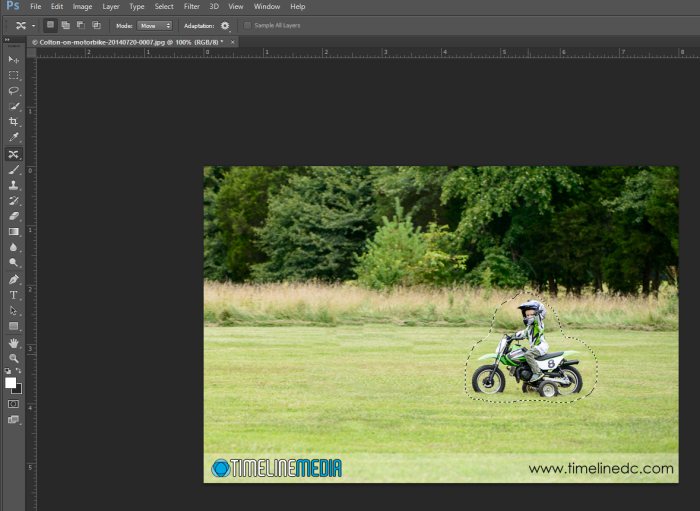
For extreme examples, I may have to do some Photoshop tricks to get things to work. At this point, this is where “Content Aware” functions do their magic. Using this example of my nephew riding a motorbike, you can see that the composition is not quite right. In fact, he is too far on the left of the frame riding out. A better composition would be for him to be more on the right with “room” to go through the frame. To move him back, I select an area around him with the Lasso tool: Select-subject-with-Lasso-tool


Then I click the “Content Aware Move” tool from the toolbar:

Select-content-aware-move-tool


Then I just click the selected area, and move it down the frame – Photoshop will fill in the space that I cut him out with surrounding content.

Move-subject-in-frame


In that way, I can move subjects around a frame, and put them in a place that is easier for cropping images. Not every case is as easy as this one, but if you have a specific request, please know that there are lots of options to get the final photo that you need in a specific frame dimension.

Final-edited-photo-©TimeLine-Media

TimeLine Media – www.timelinedc.com
703-864-8208

HDR – Deghosting | Tech Thursday

Tysons, Virginia

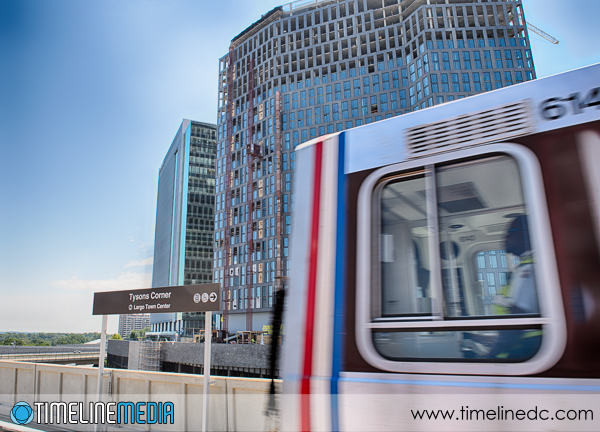
I received some questions about this photo from a few post ago:

HDR-SilverLine-in-Tysons-Corner-©TimeLine-Media

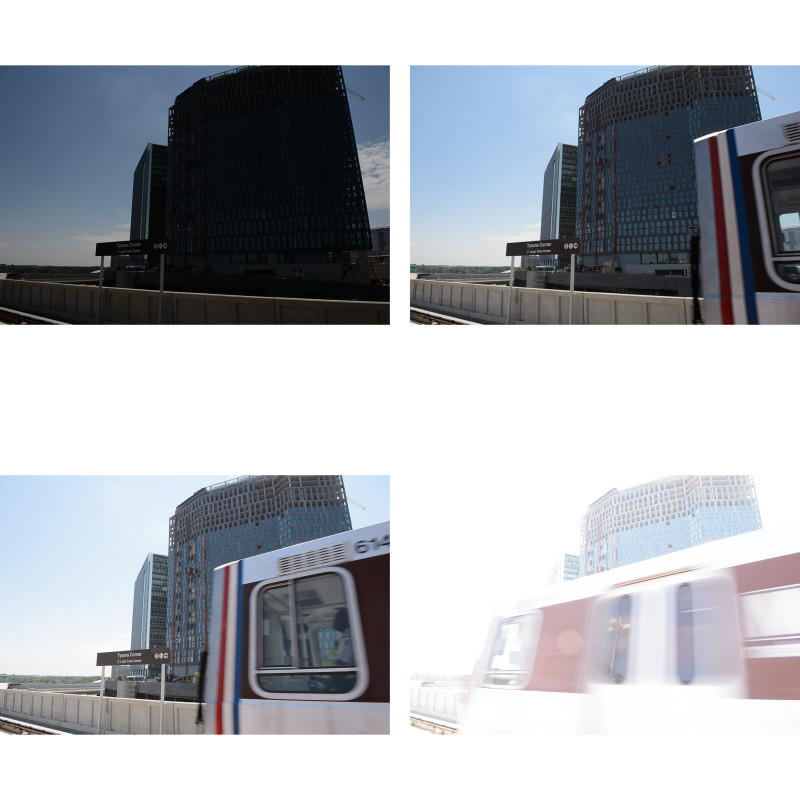
This was a high-dynamic range (HDR) photo from the Metro platform with an incoming train going through the frame. I really did not know if this would work at the time I took the images. For HDR, you need to make a series of exposures that differ in shutter speed. This will create a range of images that vary from underexposed to overexposed. Using the bracketing functions built into the camera, you can set this up in camera.

Using the very fast motor drive of the Nikon D4, there is very little difference in the composition of each frame. For the most part, you would not seen much differences except for the moving train cutting across the middle. This is what you need – the composition should be as similar as it can in each of the bracketed frames. With this in mind, the software can align each individual image for processing.

Post Processing

HDR-Source-images-©TimeLine-Media


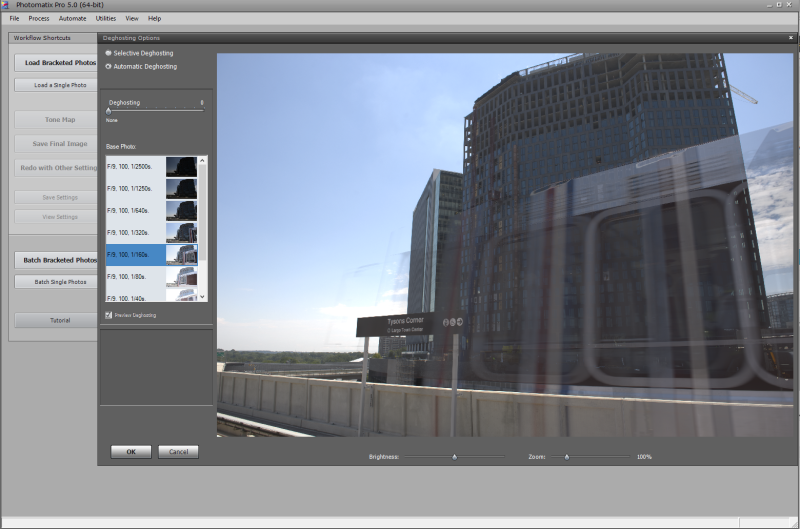
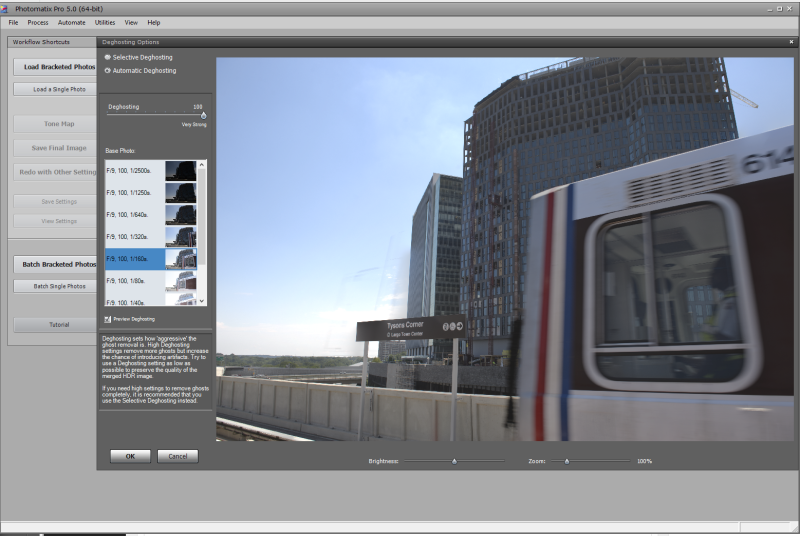
For this particular set, I brought the bracketed images into Photomatix Pro 5.0. After you export the images from Lightroom to Photomatix, you are presented with a Deghosting dialog box:

Photomatix-before-Deghosting-selected


From the initial preview, you can see that the train is a mess. There are many different versions you are trying to stay, and the software is trying to put all of them into the combined image. To clean things up, you need to drag the “Deghosting” slides on the top left all the way to the right. This is the “Very Strong” setting. Then from the set of images below, select which of the bracketed photos you want to select as the master or source file that will take precedence over all the others. I chose the 1/160s one because the train was just starting to come into the frame. and you could still make out many of the numbers at the top of the train.

Photomatix-Very-Strong-Deghosting-selected


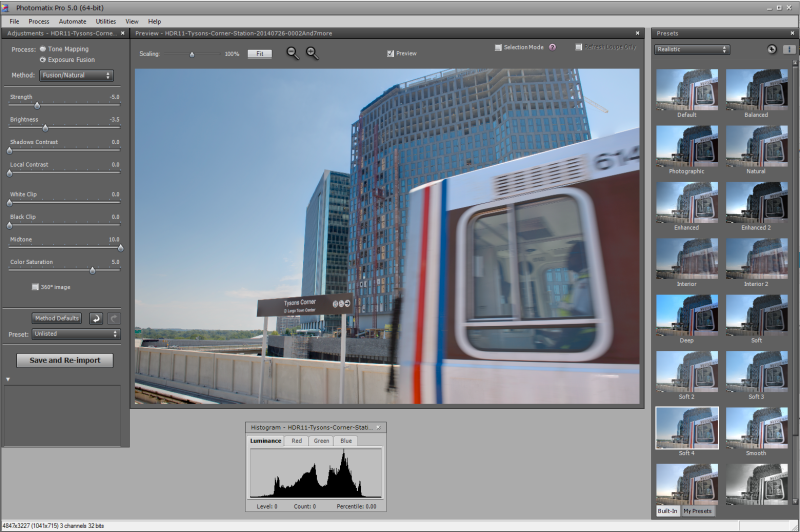
After selecting ‘OK’ you have a much cleaner file to tone map to your final HDR image in Photoshop. This is an extreme example, but it will work if you want to clean up moving people in an image, or anywhere that the preview HDR looks too muddy or blurry. Give it a try!

Photomatix-Pro-5.0
Photomatix-Pro-5.0

TimeLine Media – www.timelinedc.com
703-864-8208
Panoramic photos – Tech Thursday

Milwaukee, Wisconsin

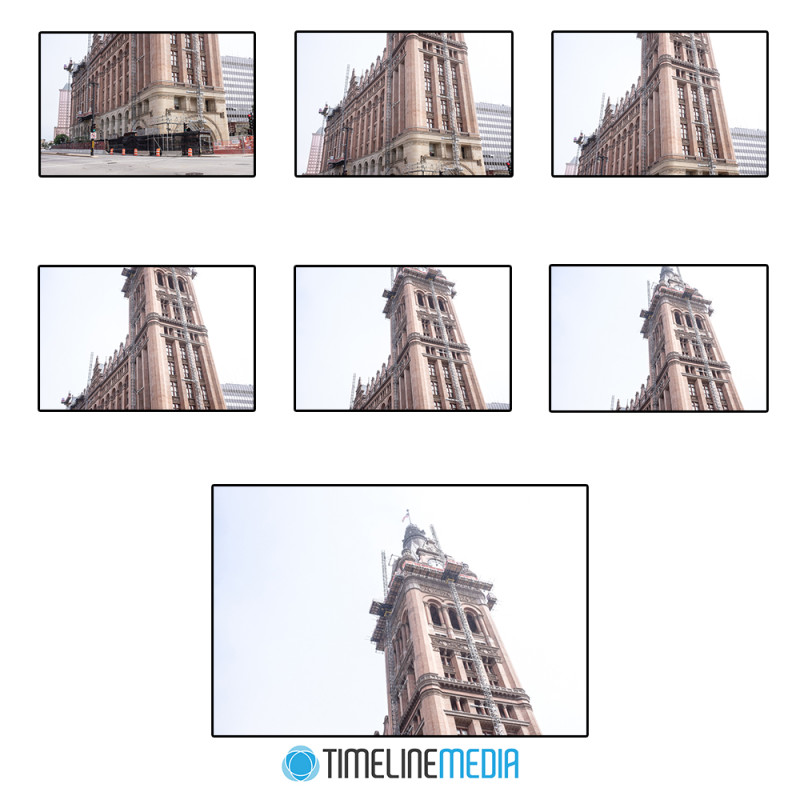
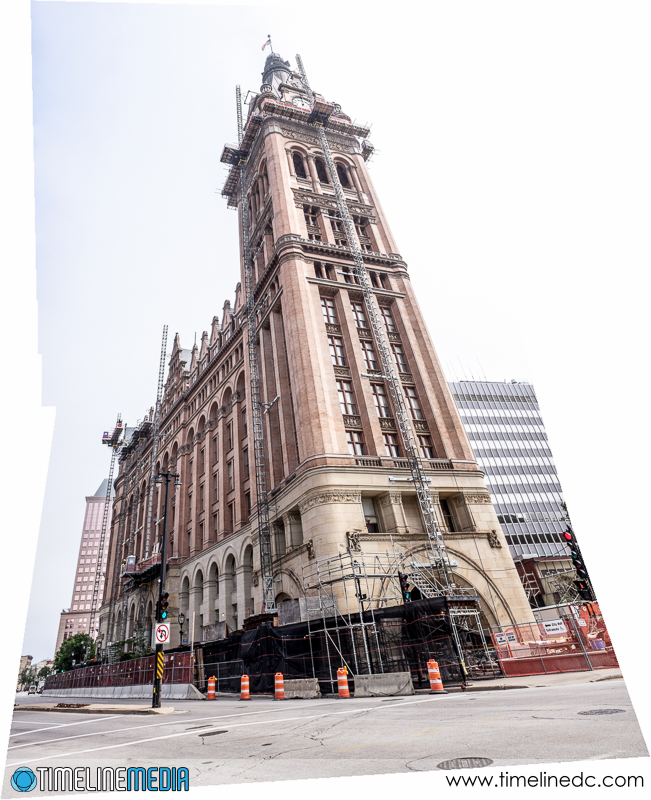
Trying to get in a large scene in one photo can be difficult if you do not have the right tools with you. While traveling, you may see panoramic scenes that you come across that are a challenge to get in one frame. This is especially true if you have a fixed lens camera. Moreover, a limited amount of time to get your photos adds to the problem. All the photos on this post were made with the Fuji X100s which as a fixed 35mm equivalent lens. It is not particularly wide, and I had no chance to get the entire tower of Milwaukee’s City Hall with this camera. Especially with the tour group moving on to the next point of interest, I had to go quickly. If you come across something similar, remember Photoshop for later. It is very good at creating panoramas from multiple images taken in series. For this attempt, I took this series of photos:

Source images for panorama - ©TimeLine Media
Source images for panorama – ©TimeLine Media

Post Processing

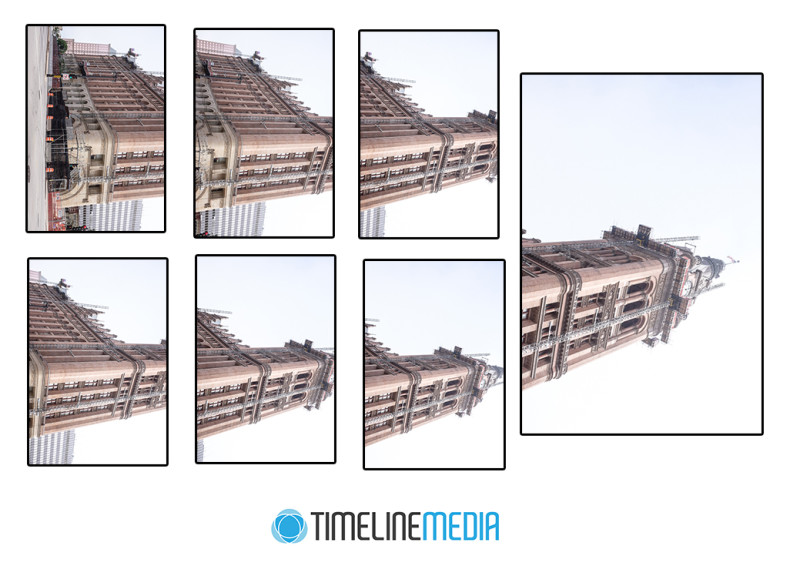
Starting at the bottom of the building, I took seven photos from the street to the top. I made sure that there was overlapping areas in each photo. Having this overlap will help the software find common points that will make for a more seamless panorama. One tip that I would give when you attempt this with landscape formatted photos going in a vertical direction for large tower structures such as this would be to turn change the orientation of the photos to portrait orientation prior to merging. Here is what the source images looked like after turning them 90 degrees clockwise:

Source images for panorama turned clockwise - ©TimeLine Media
Source images for panorama turned clockwise – ©TimeLine Media

After this, let Photoshop do the rest of the work! Open all the source images, then select File > Automate > Photomerge. Next, select the “Add Open Files” in the dialog box, and click OK. Photoshop will now work on the images, and will pop out a merge file:

Merged photos from Photoshop photo merge - ©TimeLine Media
Merged photos from Photoshop photo merge – ©TimeLine Media

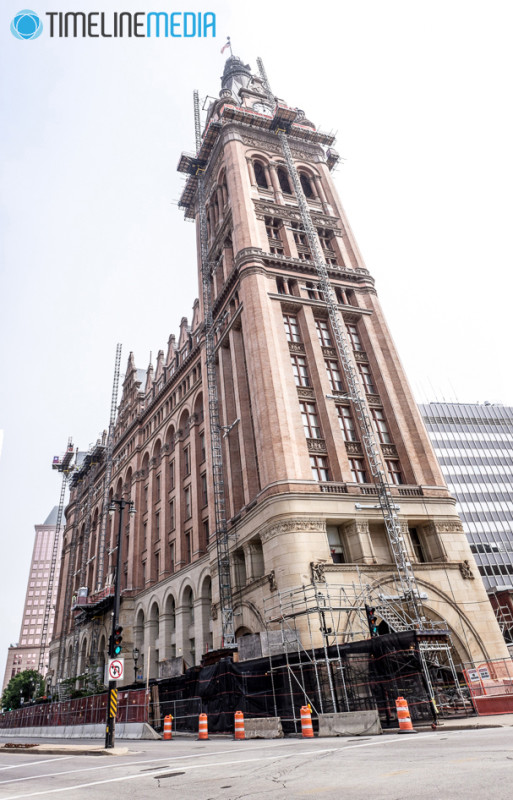
Because of the perspective differences with each photo in the panorama, this is the result. There are some areas where there is no data resulting in the blank spaces on either side of the photo. I just use the crop tool to remove these areas to get the final, large panoramic image!

Milwaukee City Hall - ©TimeLine Media
Milwaukee City Hall – ©TimeLine Media

TimeLine Media – www.timelinedc.com
703-864-8208
1 2 3 7